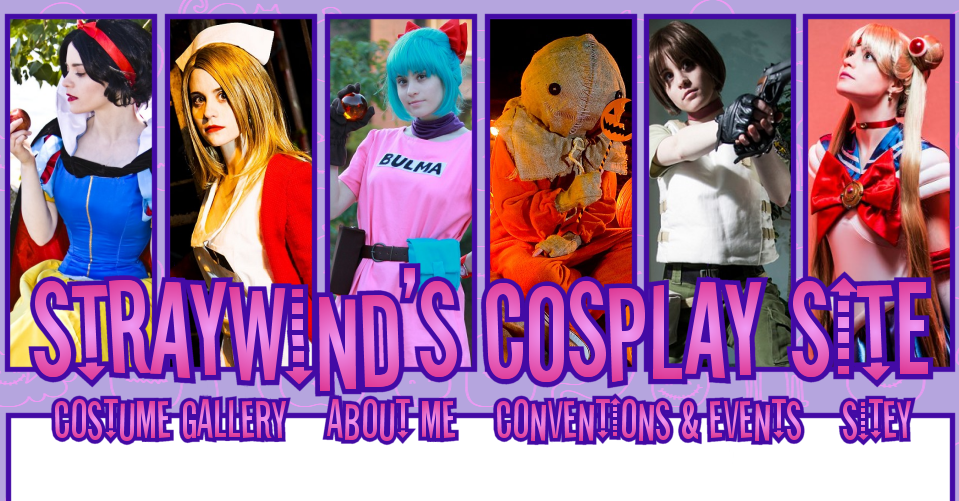
R. Dorothy Wayneright - The Big O

Cost: $183
Time to Make: 60 hours
Timeline of Construction: December 2021 - April 2022
Pictures


Information
Cosplaying from The Big O was something that I had thought about from time to time pretty much since I first started Cosplaying. It was a series that was really near and dear to me when I first discovered Cosplay and Anime conventions. The first convention that I ever attended was the Toronto National Anime Expo 2001, which was an earlier incarnation of Fan Expo. I made an endeavor at my first con to check out a little of everything available to me at the event. I explored the dealer's room, went to some guest panels, attended some of the contest events and my friend Kristin and I decided to check out some of the daily screenings. It turned out they were showing two episodes each day of the con of the Anime The Big O and we thought we would see what it was like. Once we saw the first two episodes, we were hooked and eagerly showed up to see the other four episodes they were screening for the remainder of the weekend.
After the event, I was able to track down video CDs for the series at Pacific Mall and the animation looked amazing, but the subtitles were pure gibberish. Oh, those were the days, where the best sources of Anime were VHS rips of fan subs or video CDs with questionable subtitles. Despite the inability to make sense of the subs, I adored the series. I grew up watching Batman: The Animated Series in the 90s and I loved that show so finding an Anime that was so heavily inspired by the Batman cartoon and also brought in some Anime flavour, really drew me in.
In terms of Cosplay, there wasn't really a character that I felt compelled to Cosplay at first. Sticking to Cosplaying the female presenting characters, I really had very few options besides Angel or Dorothy. I didn't really feel like Angel was quite as iconic and memorable outfit wise, to want to Cosplay her. I kind of settled on wanting to Cosplay Dorothy. She's a bit of a tough one since she's an android and her whole personality is being stoic and mechanical to suit her android body. That's not exactly how I like to pose and act in real life. The real sticking point for it was that she appears to be paper white in the series. That's what makes her stand out as being inorganic. I've seen people portray her through Cosplay and almost everyone wears heavy white makeup to some degree. That's always bothered me because I just know if I did the makeup there is no way it would be very even and I think it would just look bad on me. I would be so nervous that it would rub off on my costume or on anything I touched. Due to this fear, I shelved the costume idea, but it always came back to me over the years as again, I might not adore Dorothy, but The Big O means so much to me that I always wanted to show my love for it through Cosplay.
Fast forward to 2021 when I was trying to figure out costume ideas for my usual sewing schedule as I always like to plan for a costume starting in the fall, that I begin sewing over the Christmas holidays, and I finish by around March or April the following year. Usually I keep to this schedule so I have a fresh costume for either Toronto ComiCon or Anime North. Things were a bit off for 2022 since the world was still in chaos over Covid and Anime North switched to a date in July, but I still wanted to keep to my usual sewing schedule. This was also my first time working on a new costume since starting a new job, which had greater responsibilities and was more tiring than my previous position. Thankfully, my new work was 90% WFH so I could set some time to work on sewing over the evenings and weekends, but it was an adjustment to find a good balance of downtime and productive sewing time. It just made making costume progress slower than with some of my past projects.
I had already looked back at an old movie for my costume that I made earlier in 2021 (Alice from Disney's Alice in Wonderland) so I thought why not look back at an old Anime that I liked for something to make next. That's what got me thinking about The Big O again as it's still one of my all-time favourite series. I thought about it for a bit, especially when looking at other Cosplayers as well as the Dorothy Figma that I own, and I thought why not just Cosplay her without the white makeup? Some other Cosplayers have done it and you still get a feel for the character and in my case, I'm already extremely pale. I'm close to paper white to begin with so why not use that to my advantage. Hence, my decision, in about October 2021, to start planning out the costume.
Her costume was pretty simple, but there was a lot to consider when making her outfit. The series has a very gothic vibe, again to match Batman: The Animated Series, and the main characters all wear black and white. Interestingly, Dorothy's maid outfit is sometimes portrayed as having a red tone to it. I think it feels like the outfit was meant to be a velvet or something else that's a black fabric, but with a red sheen. I decided to just go a straight black route for her costume instead to be more cohesive with the tone of the show. Another sticking point was the colour of her hair. The look changed quite often depending on the screenshot or other media. Sometimes it's more of a red, sometimes it's very dark brown and other times it looks look it could be a natural redhead colour. Pinning down a colour to look for was very tricky. Trying to decide what to do for Dorothy's very prominent brooch was also very challenging. It can look like a more oval or rounded brooch and sometimes it's very dark green. Sometimes it's blue and generally in the show it looks nearly black. It took a lot of searching through sites like eBay, Etsy and Aliexpress to find something to order to make her brooch.
Once I had settled on the sticking points for the costumes, I went searching for fabric and patterns to use. I do believe her costume is two pieces as it's a uniform blouse and a skirt and I hunted for a pattern that would work for that. I thought maybe Burda pattern 6342 would be a good fit for the skirt. Her skirt has some fullness to it thanks to what seems like inverted pleating. She has two pleats in the front and two in the back. At the same time as I found the Burda skirt pattern, McCall's dress pattern M7948 stuck out to me. That's a full dress pattern, but I really liked the flow of it and the skirt pleating was more fitting than the Burda one. I decided to order both patterns along with 3 meters of cotton twill in black. I figured that would be a nice structured fabric to still give some flow for the skirt, but also look like a uniform. I ordered everything during a Black Friday sale from the site Fabricville.
When I got all my supplies in late November, I quickly realized I was going to have some problems with the twill fabric. It had a static quality to it and as such, hair, dust and other debris would just stick to the material. It didn't become too obvious how bad it would be until I started laying out the material to cut, but it would become quite frustrating as I had a white dog and her hair was everywhere and eventually covered every inch of the dress as I went to sew it, pin it or iron it. It really bugged me. In the long run, it turned out to not be an issue as my dog passed away in early 2024. Cleaning the dress and removing her dog hair after she passed so I could wear it to Anime North 2025 was actually quite sad.
Before I could really sew it, I had to design the costume. I wanted to see how the McCall's dress pattern would work, as I figured the costume would be less finicky if it was one-piece instead of being a dress and a skirt. Keeping a blouse nicely tucked in can be so annoying. The downside of the McCall's pattern was that it was meant to be a pullover, so it was loose fitting and had no considerations for a zipper. I had to make a mock of the dress, which I started in December of 2021. I continued to work on that until partway through January. To make the dress more fitted and formal, I added princess seams to the front of the blouse by making a new version of the front. I took in the sides and I also drafted a new back pattern that was two pieces so I could add a zipper. The dress pattern also had flowy short sleeves so I had to take a standard sleeve pattern that I've used with other costumes and adapt it to the dress. Figuring out the pleat depth for the skirt was also a bit of a challenge, but it was all trial and error to make sure the skirt would fit with the blouse based on the pleats when I wanted to sew them together.
By early February I was ready to start sewing the costume. The first hurdle was actually cutting out the fabric. The black fabric I bought was extremely crooked. I always try to grain and thread perfect my fabric before I start working with it to make sure the material hangs right when you sew it. This fabric was so warped that it would not lay flat and had big creases when I tried to match up the selvages. It was so off. I tried to pull the material as is suggested to straighten it, but even after a lot of pulling, it did nothing. In the end I had to lay the material flat and match the selvages and then cut off the excess material that hung over the sides. It was a big waste of fabric, but I had no idea how this material got so skewed in the factory. I suppose I should have seen that as an omen of things to come.
Once I finally conquered the fabric issues and got sewing in mid-February, I began sewing together the pieces of the blouse with considerations for the adjustments I made through making my mock. Using my dress form, I quickly realized that for the back pieces of the blouse, I had taken too much fabric out of my pattern piece so it would be difficult to close the zipper. I had to remake the back part of the blouse, but thankfully I had leftover fabric to do so. I had to make constant re-adjustments to the size of the skirt pleats so the skirt would match up nicely to the blouse when I went to sew them together, but once it was together, things went pretty smoothly. The only rub was that adding darts to the front of the blouse made the side seams not match up nicely, but it was necessary to ensure the pleats had some depth and the fit of the blouse worked for my shape and size. Attaching the zipper to the back was a fast process. The sleeves were a little trickier. The sleeve holes in the blouse were kind of small, so it took a bit of tinkering to get the sleeves I patterned to fit nicely to sew the sleeve seams. They were pretty tough to sew with the machine as well because the material liked the bunch up so tackling puckers was annoying. Eventually I persevered.
I did run into an issue after officially finishing this costume. I went to back to iron the skirt pleats to get a slightly more even depth to them, but I decided to sandwich a piece of cardboard inside the dress to create a barrier between the back and front of the dress when ironing it. I didn't realize that the cardboard had previously been used as a glue gun rest so I ended up melting glue residue into mostly one part of a back pleat. What a silly mistake! Using my finger, nail polish remover and an iron to act as a press against scrap fabric, I was able to remove about 90% of the glue residue, but what a nightmare. Always check your tools. (~_~) Thankfully, the glue spots are mostly hidden in a back pleat and are barely visible now as slightly white coloured spots.
Once the main part of the dress was together, I decided that I wanted to add horsehair braid to the hem. Horsehair braid is a type of crinoline netting that adds volume to skirts and dresses when sewn into the hem. I previously used it in my Sakura battle costume, which really gave the short skirt some oomph. Dorothy isn't wearing a ball gown or anything, but her dress does have some volume thanks to the pleating and is often pictured with some fullness to it, so I wanted to better emulate that. Unfortunately, I did not have black horsehair braid on hand, but I had purchased several yards of braid for my Alice costume that I did not use (since I wear a hoop skirt with it instead) and the braid was dark blue. I really didn't want to waste the blue horsehair braid so I played around with options a bit and I decided to "paint" the crinoline using permanent marker. Since my fabric is black and I even wear black tights, the chance of any sort of marker paint coming off was minimal or at least would not be apparent. I did test colouring the crinoline and with the permanent marker it does set pretty well and it takes some pressure for it to rub off. Just in case the hem of the skirt flipped up, I really wanted to get the crinoline to match the dress as closely as possible and with the marker it works. I saved a few dollars by using the horsehair braid that I had on hand too.
The belt was the next major element that I needed to make. Belt patterns are pretty simple so I just drafted my own pattern. It's just a big rectangle that I interface and fold down to give it some structure. The hardest part was deciding the closure for the back. In the end, I decided to use velcro as my waist size has been changing a bit lately so I wanted to make sure I had a bit of leeway with how tight the dress needed to be to still fit. That has become a big concern with trying to re-wear costumes I made more than a couple of years ago. This should give me a bit of liberty to wear the costume even if my weight fluctuates a bit. I also had to buy black velcro because apparently I only ever use white velcro. I finished off the look of the belt by attaching two large buttons, which are part of her belt detail. I got the buttons on a trip to Fabricland where I had originally tried to buy fabric. I ended up ordering fabric online from Fabricville instead because it was a lot cheaper (and that's a bit frustrating since they're technically the same company). I finished the black elements of the costume by the end of March, so for April I needed to tackle the white parts, which were the scarf and cuffs.
Finishing up this costume took so much longer than it should have because I spent so much time contemplating how I wanted to do the cuffs. The animators were very inconsistent with the style of the cuffs. Sometimes they're drawn with a scalloped edge, or it's a pointy edge, it can be just a smooth curve, or even just straight. I originally wanted to do a scalloped edge because I feel like that's the version shown most often, but I just could not create a template or a make a mock that I liked. The shapes always looked a bit wonky or I didn't like the overall curve. After struggling with it for a few days, I finally decided to switch to doing a basic curved cuff. I did want to incorporate lace like how I incorporated it in my Alice apron, but I felt like that made it too bulky so I changed my mind and just made the basic curved cuff. The white fabric I used for the cuffs (and later for the cravat) were leftover material from my Homura magical girl costume. It was a nice opaque white material. It took me about 3 tries of sewing to get the cuffs to a size that I liked. It took some reworking as it either came up too high on my arm or it was too large to match with the sleeve underneath when I went to hand sew it in place. I also had to be extra careful with my hand stitching when attaching it because I wanted to minimize the look of the stitches from the outside. That required me to re-sew parts of it a couple of times, but by the end of April I was finally happy with it.
The other major part to tackle was the cravat/scarf and brooch. The cravat was a bit of a struggle as I had to figure out a creative way to put it together as it's not an accessory I've sew before. I believe a cravat is meant to be a tie, but I didn't want a full tie to go around the collar of the undershirt. My undershirt was actually a dickey shirt that I bought from Aliexpress. It only extends to around the bust and has straps at the sides to hold it in place around the torso. I figured a dickey shirt was helpful for this costume as you get the look of a button down shirt and collar without the bulk of a full shirt. It gives a nice illusion. I do wish the material of the shirt matched my white fabric better as it's much shinier and a duller white, but it still looked nice and crisp.
In order to make the cravat/scarf accessory, I looked at some tutorials online for that sort of tie. I decided to do a bit of improvising, though. I believe this sort of accessory should be made of flowy fabric, but I really wanted it to be opaque so I used a fabric that was a bit thick. I made a little rectangle piece that I attached to the front and underside of the straight collar that extends about halfway around the collar. The main part of the cravat loops under the rectangle piece and is sewn in so that holds it in place. The little rectangle piece is attached to the collar using snaps. Normally I could probably tuck the unfinished edge of the scarf underneath that rectangular piece to hide it, but I needed the raw edge to hang down a couple of inches underneath as I sewed the second layer of the scarf to it. It's a bit Frankenstein underneath, but the overall look from the outside worked.
The actual main parts of the cravat are simple rectangles of fabric that I finished the edges of by sewing a rolled hem. The tricky part was deciding how I wanted to give the cravat it's semi-pleated look. I did a test version where I tried out different pleat styles before I started sewing the real version. I thought of maybe sewing knife pleats or boxed pleats and actually finished a version with knife pleats before I realized I was over complicating it. The most logical style was just using a gathering stitch. I had previously knife pleated it before adding the gathering stitch so the final look of the main part of the scarf is kind of a combo of gathering and pleating and I think gives it a both structured and flowy look. I followed the same overall concept with the second layer underneath. I made sure the lower piece was a bit bigger, but I wish I had made it even larger so I had more material to gather to make the gathers fuller. I actually made the rectangle a little short. I wanted it to hang a few inches below the upper piece but it only extended about 2 inches below. I ended up sewing a bit of extra white material to the upper part of the under cravat piece so it would hang lower. I really didn't want to waste more fabric as it's really nice white material when I could just add back some discards from when I first started sewing the scarf pieces. Again, the underside of the scarf has a bit of a Frankenstein look, but only the front really mattered as I won't be entering craftsmanship competitions. Since the underside of the scarf does look a bit messy, I decided to add snaps to the scarf to hide some of the rough sewing from view. It keeps the scarf from moving around too much as I move and so it maintains its overall shape.
On top of the scarf sits a brooch. As stated earlier, trying to figure out what to do for the brooch was complicated. The appearance and colour of the brooch changes depending on the frame of the animation. I always saw it as a deep green and I really wanted something with a bit of a dome look to it to give the brooch some depth. It took several weeks of searching before I finally found round glass cabochon for sale from an Aliexpress seller. I really wanted the brooch to be a focal point so it was difficult to find something for sale that I felt was large enough to really tie together the costume and give that pop of colour. I still wish it could be a bit bigger, but what I found works out well. The cabochon was sold in random batches of 10 and they had quite a few colours for sale so I ordered 2 batches and left a note requesting to get both of the green shades they had available. Thankfully, they did send me both of the green ones they had. One was a dark green and the other a bright green. I was kind of hoping for more of an emerald shade, but the dark green worked well enough. It was just a glass piece so I cut up a clear plastic Pringles lid and hot glued the plastic to the back of the glass. I then hot glued a brooch backing figuring that the plastic would provide some support. It worked well enough and looked pretty good. I did make brooches out of both shades of green, so I could change the colour if I later felt a brighter green would look nicer. I gave myself some options.
Lastly, I finished up the look by getting some standard opaque black tights and some black shoes from Ardene. The look of the shoes is pretty plain and her feet are tiny so I took some liberties when picking out simple loafer shoes for the costume. One of the hardest things to pick out was the wig. Like determining the brooch, the colour of Dorothy's hair changes quite a bit in the series. At first I was looking for a dark red wig. I thought that would look nice to match her hair and also look good on me. I looked all over from eBay to Arda to Epic Cosplay, but I couldn't find the exact sort of shade I had in mind. I ended up ordering a cheap bob wig from Aliexpress and was pretty disappointed with the results. The wig was under $20 and it looked it. The colour was too bright of a red and looked bad on my skin tone. It was super thin so it had no volume. I got that wig back in December 2021 and by April, when the costume was almost done, so I could really see the final vision; I knew I needed a better wig. It was back to the drawing board. I really wanted something from Arda to work and I was close to ordering either the discontinued Priscilla wig (which I previously used for Orphea) or a Heidi, but I really didn't know what colour would look nice. In the end, I decided to go old school with my wig approach. I started looking up wig brands from back around 2010 when you could get wigs from places like Cosplay.com. Those brands might not have the same colour spectrum or the newest fiber tech for wig quality, but the colours have a nice natural look and they have more basic styles. The styles I was seeing from places like Epic Cosplay and Arda are aimed at really styling the wig to get the final product, but I really just wanted a basic short wig that was pretty much ready to go right out of the bag. Dorothy's hair has an old timey bob style look and I found a wig called Dutch from the brand Abella and bought it from the shop Wig Secret. It's not quite as full as Dorothy's hair, but the overall style has the same feel. I got it in a firey copper red. I was really hoping to find a colour that could be both brown and red as her hair colour looks so different in different lighting, and I didn't want to go super bright red so as to look off on my skin tone. The wig turned out to be quite pretty. It's really nice right out of the box and I do like the colour. I wish it committed a bit more strongly to the red tone, but it really does go from being a brown to a very reddish brown depending on the lighting and looks quite cute. I think it's a good compromise for the character. Finally, I finished the wig with an old black headband that I've had for a few years.
That pretty much covers everything for the costume. As the character is an android, I kept my makeup fairly natural although, as I said, I did skip wearing heavy white makeup to match her look in the series. I had a lot of fun putting this costume together. Parts of it took some serious effort and I often had to re-work things and draft up mocks, but it all contributed to a very nice final piece. I'm really happy that I could revisit a favourite series from my teen years and pay homage to it through Cosplay. That's why I got into Cosplay. It's a fun escape, allows me to be creative and finishing and wearing something unique and fresh really gives you a sense of wonder, pride and hits you with a feeling of nostalgia. I can only hope in the years to come that I can find more series and movies to revisit through Cosplay, so I can use my new skills to continue to bring to life things from my past that make for fond memories.
Events/Conventions this costume was worn to
YetiCon 2023 (Sunday), Anime North 2025 (Sunday) & private photoshoot on Sunday May 17th, 2026
Photo Credits
None
Back


