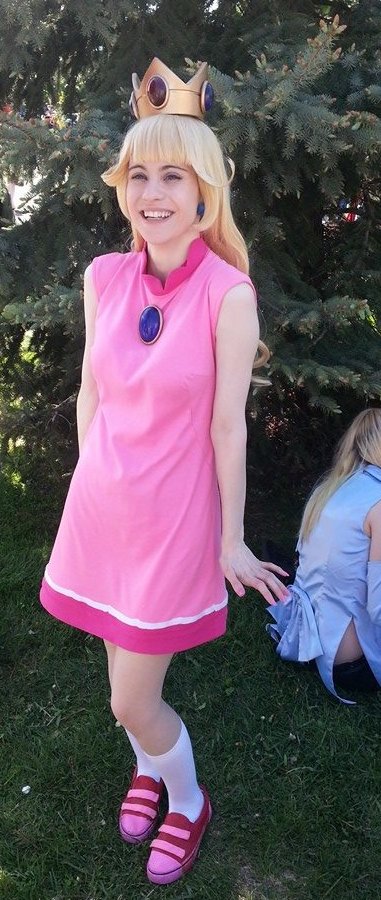
Tennis Princess Peach - Mario Tennis Open
Cost: $100
Time to Make: 30 hours
Timeline of Construction: April - May 2014
Pictures


Information
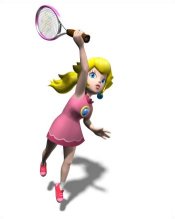
Back when I was hard at work finishing my ball gown for Princess Peach in May 2013, I had been sorting through reference
images when I learned that Peach has quite a few alternate outfits that she's worn in various side Mario games. I came
across screenshots from Mario Golf and Mario Tennis and I just loved how cute Peach's sports dress looked. The outfit
retains some of Peach's classic elements (like her brooch and the scalloped collar) but it's quite simple so it's not as
cumbersome as her gown. I spent quite a bit of money on my wig, crown and brooch so I figured making a second Peach dress
that's easier to wear would be a good idea so I could get more use out of my original costume accessories.
I debated about making the costume over the summer after finishing making my ball gown, but my ball gown turned out to be
super taxing. I took a hiatus from sewing, but decided to make the costume for a con in 2014. Originally I had considered
making it for Atomic Lollipop in July, but when my plans for Cosplaying Dilandau from Escaflowne for AN 2014 fell through,
I decided to make Tennis Peach for AN instead.
I hunted for a pattern and found one by McCall’s that I thought would work well for the costume. I bought the pattern in
late January and I was hoping to start working on the costume in February, but my plans stalled when I was unable to find
fabric after searching with Pan in the fabric district. Thankfully my friend Amanda helped me track down some really nice
knit fabric when she went shopping with me in mid-March.
I spent most of the rest of March working on modifying the pattern that I had purchased as I needed to change the neckline
and figure out the best way to handle the bottom trim and seam for the darker fabric at the bottom of Peach’s dress. I
made a mock of the dress and thought I had figured out the modifications that I wanted to make. In mid-April I started
working on the dress using the fabric I had purchased. Working with the fabric was actually pretty tricky as the pink I
had purchased for the bulk of the dress had a sun damage line along the fold and there was a rather large hole that had
been cut in the middle of the piece that I had to avoid. (The fabric was discounted due to the damage and the area around
the part with the hole was given to me for free).
Once I had cut out the fabric based on the pattern, I still had roughly Ľ of the fabric left over. That’s important to note
for later. I spent a week sewing together the pattern. The pattern called for the dress to have several panels sewn
together to create the bodice. I had modified the pattern after doing the mock up to shorten the dress. I had gotten to
the point where the whole dress was sewn together and I had finished the sleeve holes before I realized the dress just
didn’t look right. Shortening the dress had actually ruined the flare and made the bottom of the dress look like it was
pleated. After spending several days on it, I made the decision in late April to scrap the dress and start again.
Patterning from scratch is definitely not a strong point of mine. I mentioned to my friend Pan about the issues I had been
having with the dress and how frustrated I was feeling that I had wasted a month making mocks and then making a dress that
didn’t work out, and Pan told me that she had made a Power Rangers themed Go Go dress a couple of years earlier that
pretty much was the exact pattern that I needed for Peach. I looked up photos of her dress online and sure enough it was
really the overall look that I had wanted to achieve with Tennis Peach. She offered to lend me her pattern and dress after
she finished exams and I was thrilled to take her up on her offer.
Pan’s pattern worked out very well and only needed very minor alterations. By the time I got the pattern from Pan, I only
had a month to go until AN. It should have been plenty of time to get the costume done and relax with it, but at the same
time I was working on Tennis Peach, I was sorting out, cleaning up and packing for the Nominoichi. It was my first year
selling and I underestimated how much work it would be to create and manage a sales thread on the Anime North forum. That
kept me very busy over the last 3 weeks before AN and really cut into my sewing time. I also ran into issues regarding
sewing the knit fabric that I bought for the dress. The two sewing machines that I had to work with had a lot of trouble
sewing the fabric close to any edges or finishing darts. They would just refuse to continue sewing. If I made any sort of
error with my seams and I needed to rip the seams to redo them, cutting the stitches would leave small to large holes in
the fabric so it was a disaster! I was able to cover most of the holes by sewing slightly larger seams, but there are a
couple of places on the dress where some of the holes are still visible. I also ran into a problem with compensating for the weight of the brooch. The knit fabric is rather flimsy so the weight of the brooch drags down the upper part of the dress. I tried to compensate for this when sewing my shoulder seams, but there was only so much I could do when faced with issues when I tried to redo seams after testing out how the dress sat. In the end I tried to brace the brooch under the dress with a couple of layers of felt as a support.
I ran into quite a bit of trouble cutting the dress pieces out from my remaining fabric because I only had just enough
fabric to work with, but it took a lot of positioning to avoid the damage line and the hole in the remaining fabric. I
wasn’t able to be as careful as I wanted to be with ensuring that the fabric was grain perfect so I had to redo my side
seams on the dress a couple of times as the seams bunched a bit. Given the issues with ripping seams, it was incredibly
frustrating. I honestly should have been able to make the bulk of this dress in just a couple of days, but issues with the
sewing machines not handling the fabric and fixing seam bunching made this project take a couple of weeks. I had to will
myself to cut out the pattern pieces because I really wasn’t sure if I had enough fabric or if I would have to go back
downtown and hope that the fabric was still available for sale.
The actual process of sewing the dress was fairly straightforward. The dress is pretty simple besides adding a series of darts
and seams in the very front and back of the dress to give it a bit of shape. I really like the fact the pattern gives the
dress a bit of flare at the bottom. I drafted my own scalloped collar pattern based on the finished dress that Pan had
lent me. I was planning to re-use the scalloped collar from my original Princess Peach dress, but I lost the pattern. I
actually managed to get my new collar pattern right on the first try and that rarely happens to me. XD The collar has 2 layers of heavy
interfacing to help support it. I think the collar ended up being slightly too stiff, but it's probably better to
be stiff than saggy!
I debated for a while about how I planned to do the bottom of the dress. I bought expensive piping and my original plan
was to create scallops at the bottom of the light pink part of the dress, then outline that with piping and sew down the
darker ending to the dress underneath. I had worked that into my first attempt on the dress and that's when I had realized
the first version of the dress wasn't going to work. I was having trouble figuring out the proper ratio for the scallops
so after spending a couple of days in thought, I scrapped the complicated idea and I decided to just make the 2 parts of
the dress meet in a simple seam. The complicated part would be covering the seam. I decided to draft my own white trim.
It's meant to be a very curved scallop looking trim that extends all the way around to cover where the two parts of the
dress meet. It was about 5 days before AN when I started working on that part of the dress so it was kind of down to the
wire. I made several pattern attempts, but in the end I decided to make the scallops moderately small with a very minor
curve. It was the only way to keep the seam totally covered without it being gigantic. The trim was made from white felt that had heat 'n bond on it to hold it in place. Felt
was the perfect medium because it wouldn't fray and would be slightly forgiving. I cut out about 5 panels of the trim and
slowly ironed them down around the dress. The heat 'n bond that I had used was rather old so the bonding wasn't perfect, but my calculations were correct so it fit perfectly. A
few spots had to be tacked down to hold the position, but the seam was covered quite well. I must say that the trim is
something I'm somewhat disappointed in. I didn't make it that curvy so it looks almost like a straight line instead of
curved. If it wasn't bonded with the dress, I would have probably remade it.
Attaching the bottom of the dress to the upper part was pretty simple. I decided to finish the dress using horsehair
braid that is like crinoline ribbon that you can sew to things to give them a bit of shape and make them stand out.
Amanda had suggested it to me. The tutorials call for it to be sewn down on the right side of the fabric with a very small
seam allowance and turned inwards to finish the seam. I accidentally goofed up and cut off too much material so after
sewing down some of the horsehair braid, I found that the bottom part seemed way too disproportionate. I removed the seam
and instead sewed it to a very small hem at the bottom of the dress. It's not the best way to do it, but since the trim
had been attached, I couldn't cut off the bottom of the dress to redo it. ~_~ It worked well enough, but the horsehair
braid does like to pull up on the hem on some parts and causes the hem to turn a bit.
The only other complicated thing about the outfit was the shoes. The shoes were a bit of a sticking point for me.
Originally I was just going to buy pink running shoes and not worry about the design, but eventually I decided that I
shouldn't skip on a detail when the costume is already pretty simple so I decided that I should paint shoes. I wanted
something that would be easy to work with and I remembered how well my Bulma shoes turned out so I decided to look for
some plain canvas shoes. Peach's shoes look like weird bowling shoes and are pink and red so I figured painting white
shoes might be my best option. I tracked down shoes that looked exactly like my Bulma ones on Aliexpress. They showed up
with a month to spare. They pretty much were the same shoes under a different brand name. I used acrylic paints to paint
the fabric part of the shoes. I created fake strap details using some of my pink fabric and sewed them to the shoes.
Painting the bottom half of the shoes was a problem. The bottom was rubber. I tried acrylic paint first and that cracked.
Then I tried nail polish and that also cracked. Then I got the bright idea to message my friend Adrien, who enlightened me
to the qualities of painting rubber and he told me I would have to dye it. He suggested using permanent markers. I rushed
out and bought a pink marker the day before Victoria Day. Trying to get the nail polish off the shoes was quite obnoxious.
The amount of scrapping and nail polish remover I used up will probably impact on my life expectancy. XD Anyway, the
markers worked out pretty well aside for the fact I probably need 2 or 3 markers to really give the shoes a good coating.
After wearing them at AN, the marker did rub off a bit in some places and dirty spots are very obvious on the marker
parts. I sadly stepped in gum when I got to AN on the Friday and it was super gross trying to get it off my shoes. :( I'm
definitely going to have to stock up on pink and red markers to touch up the shoes in the future.
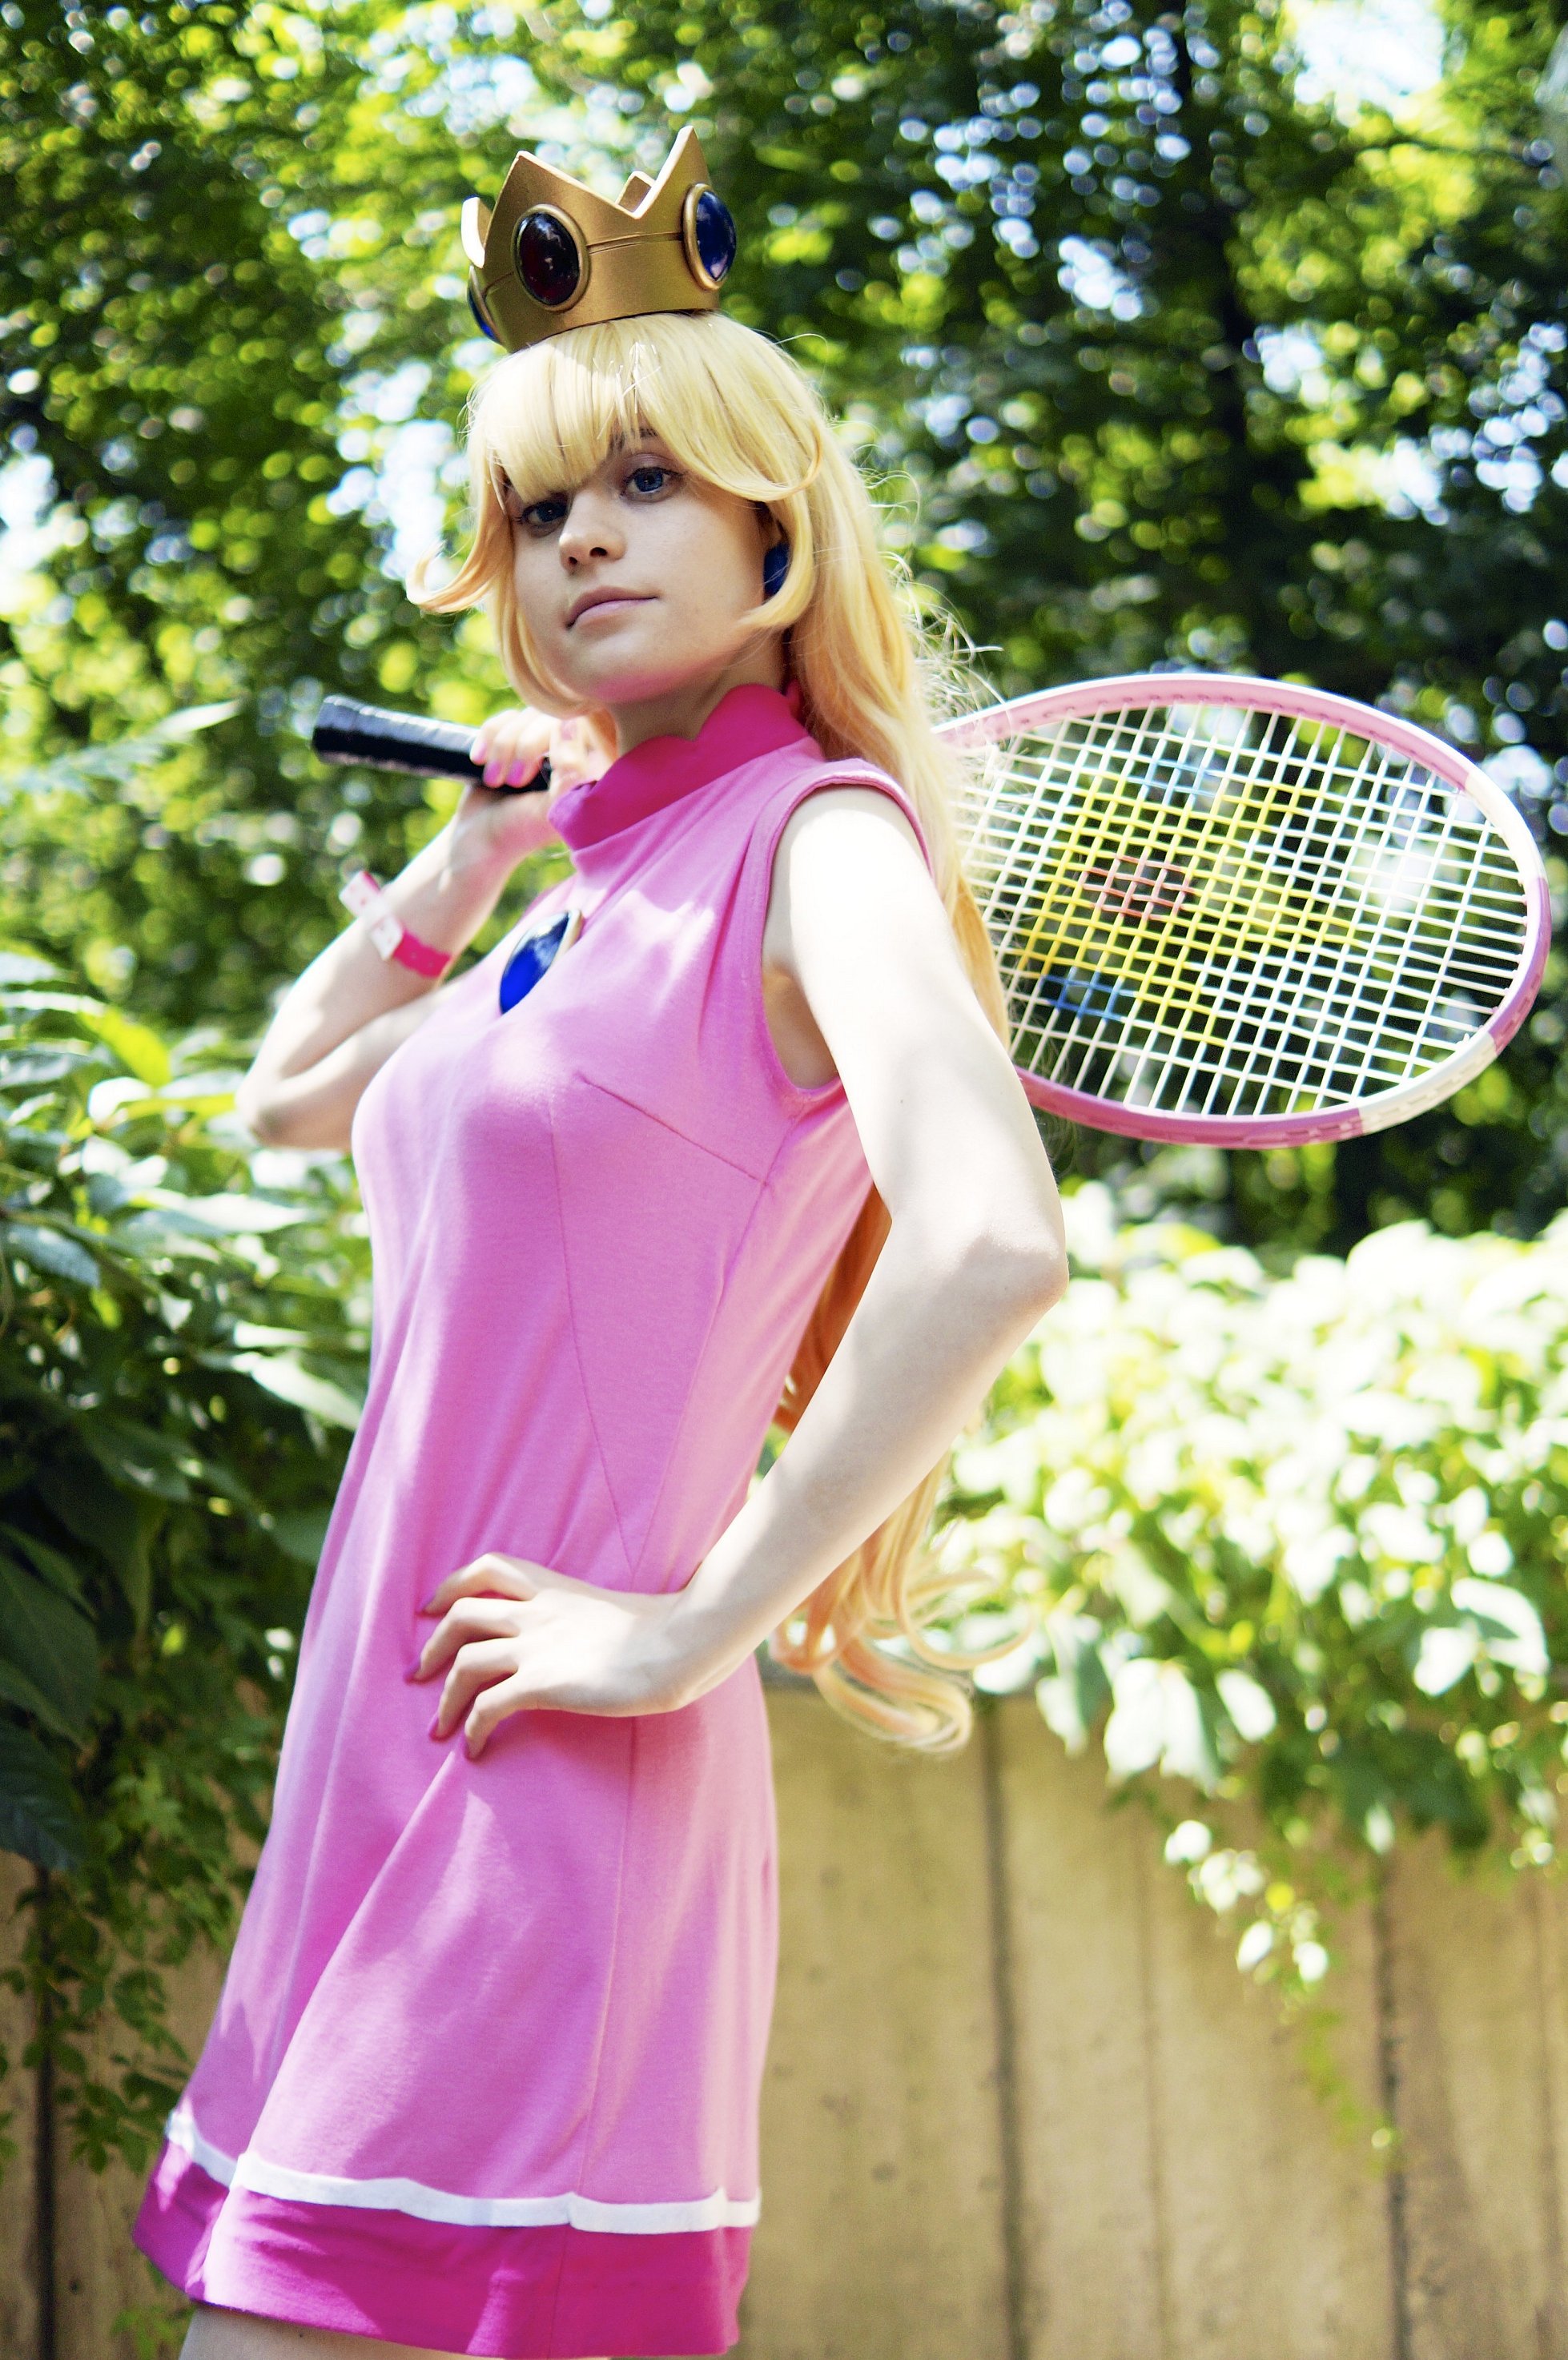
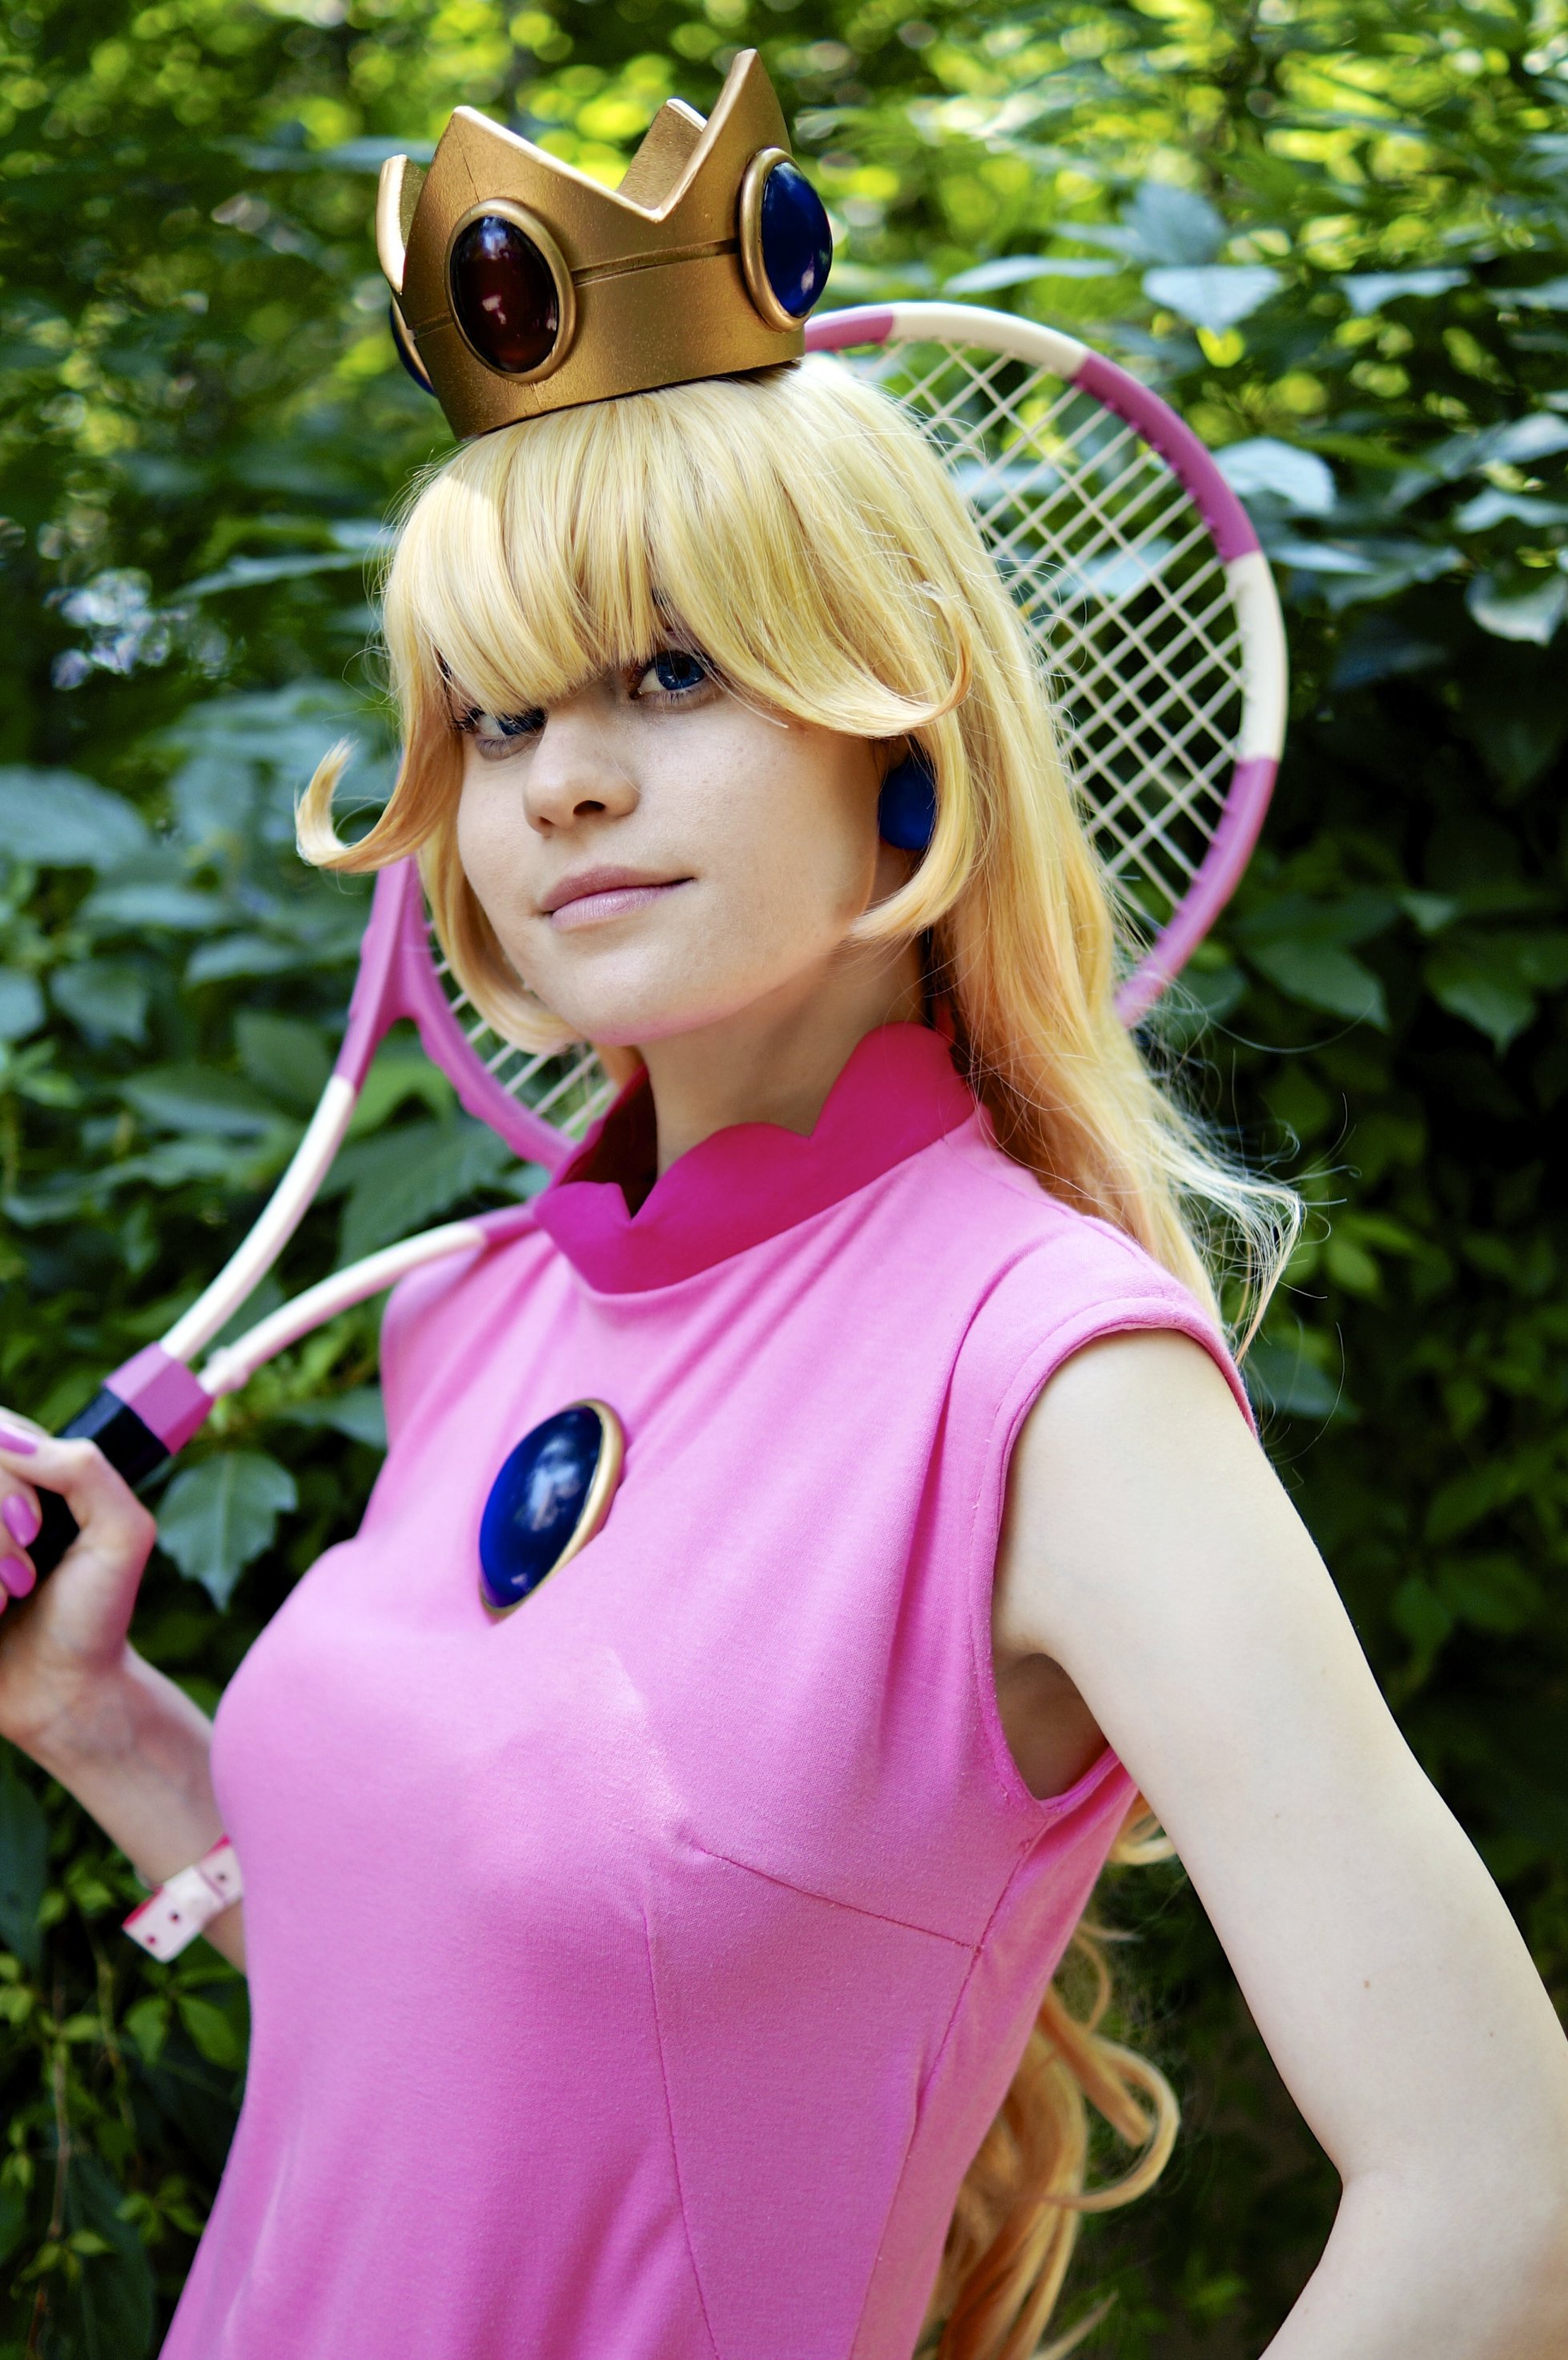
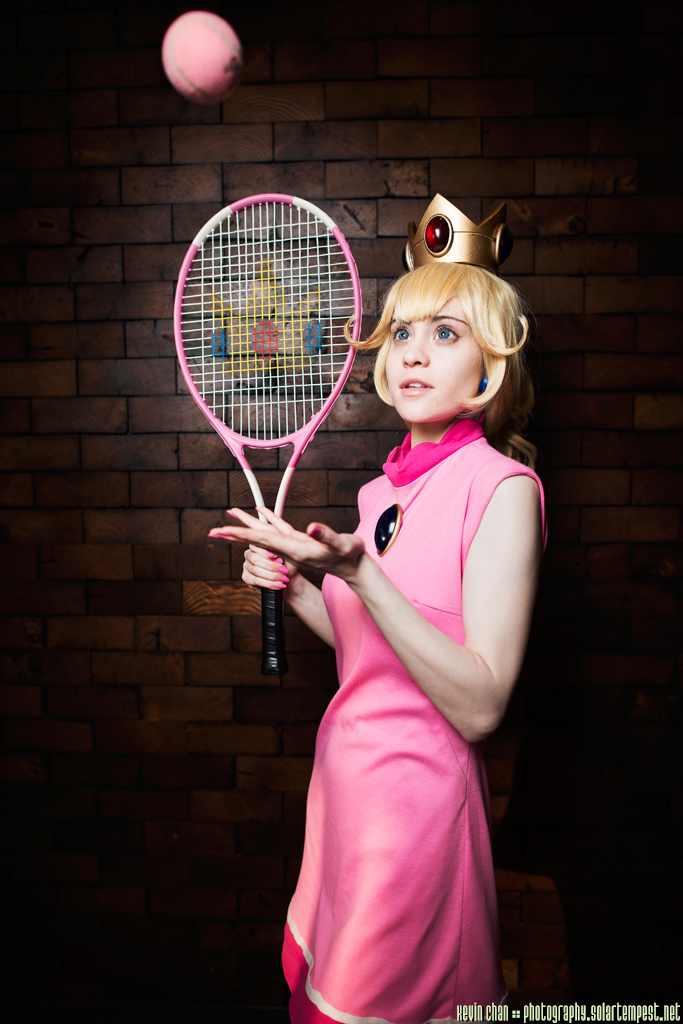
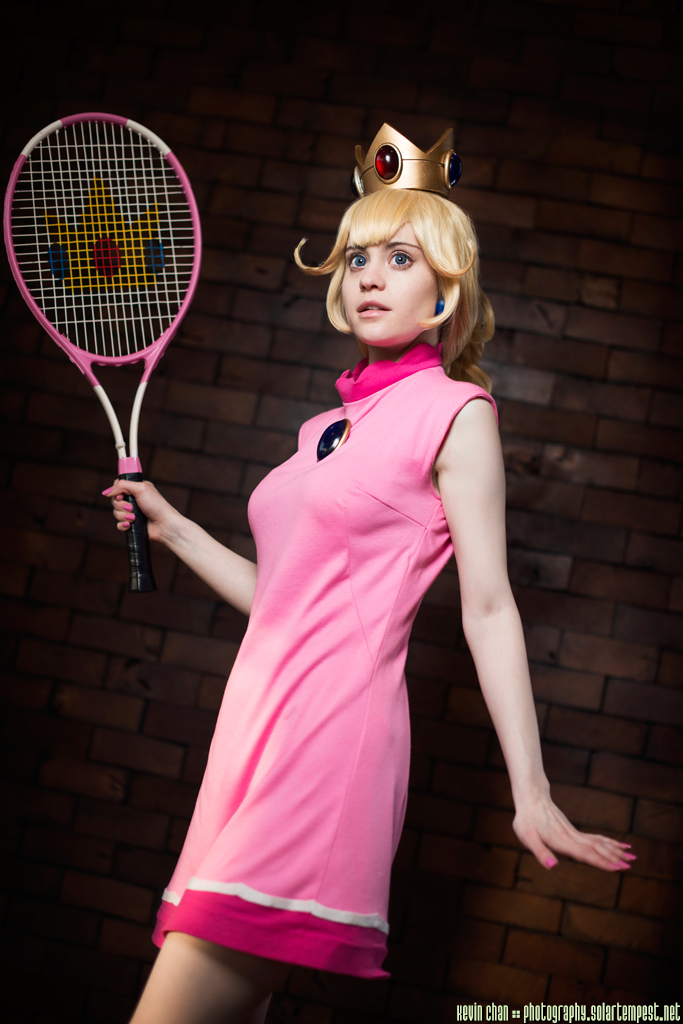
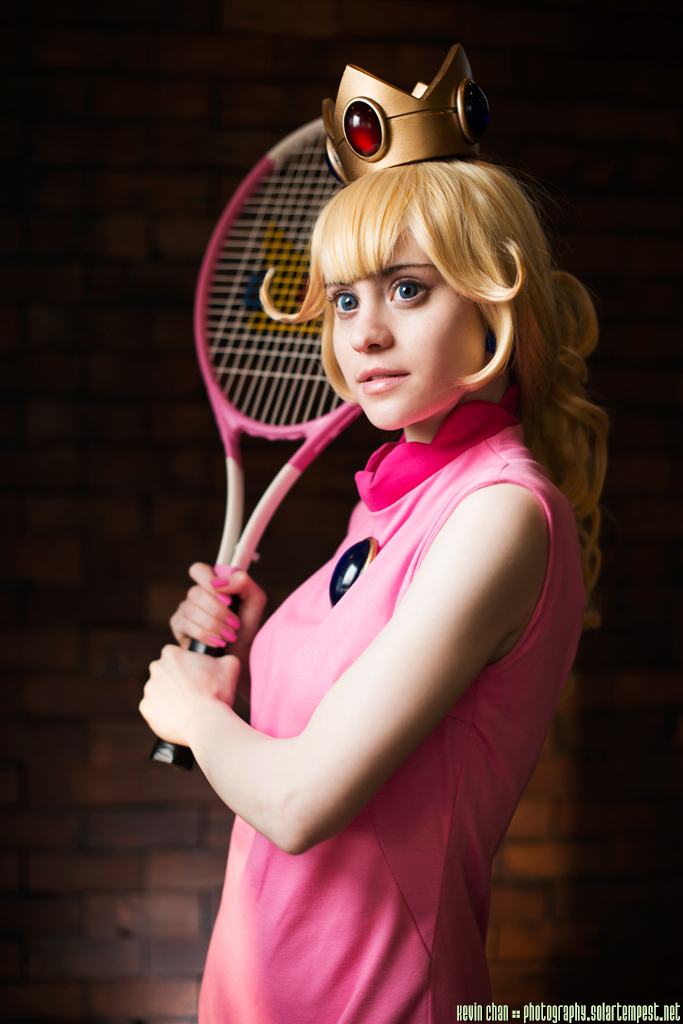
The really impressive part of this costume is the tennis racket that Adrien helped me paint. I purchased a cheap racket
from Walmart (it was $10). Adrien helped me give it a base coat of white spray paint. He then blocked off parts and
painted it pink to match her design. We both worked on painting the centre crown detail after he made a stencil for it.
The crown detail was done with red, yellow and blue acrylic paint. The racket is definitely the coolest part of the costume and
thanks to Adrien, it looks really awesome! It also makes for a great prop with my Peach ball gown. Stillvisions happened
to have a pink tennis ball that had somehow ended up in his yard so I ended up taking it to use with my tennis racket at AN. It made
for some fun photos. (^^)
It was pretty fun to Cosplay Princess Peach again and I love how comfy this costume is. I often make really complicated
stuff like my Halloween Rei costume or my ball gown for Peach so this was a breath of fresh air. Granted, with all the
complications, the construction process could have been a lot smoother. Still, it makes for a good summer costume. Pan
helped me clip up the wig since Peach wears her hair in a ponytail for this costume, but a combination of the wig and
crown being so heavy made the wig fall back on my head when I tried to wear it up. I sewed in some wig clips to the front
of the wig, which will hopefully help ease the pulling, but I'm not sure if I'll bother clipping it up again if I can't
make it look nice. The Arda wig that I'm using is quite heavy to begin with.
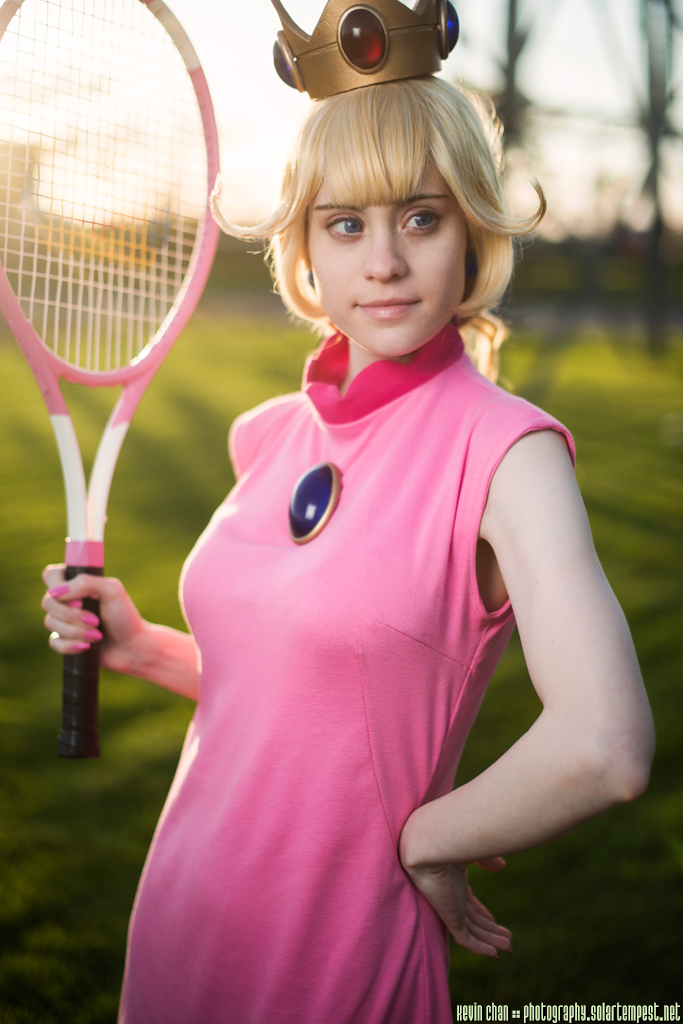
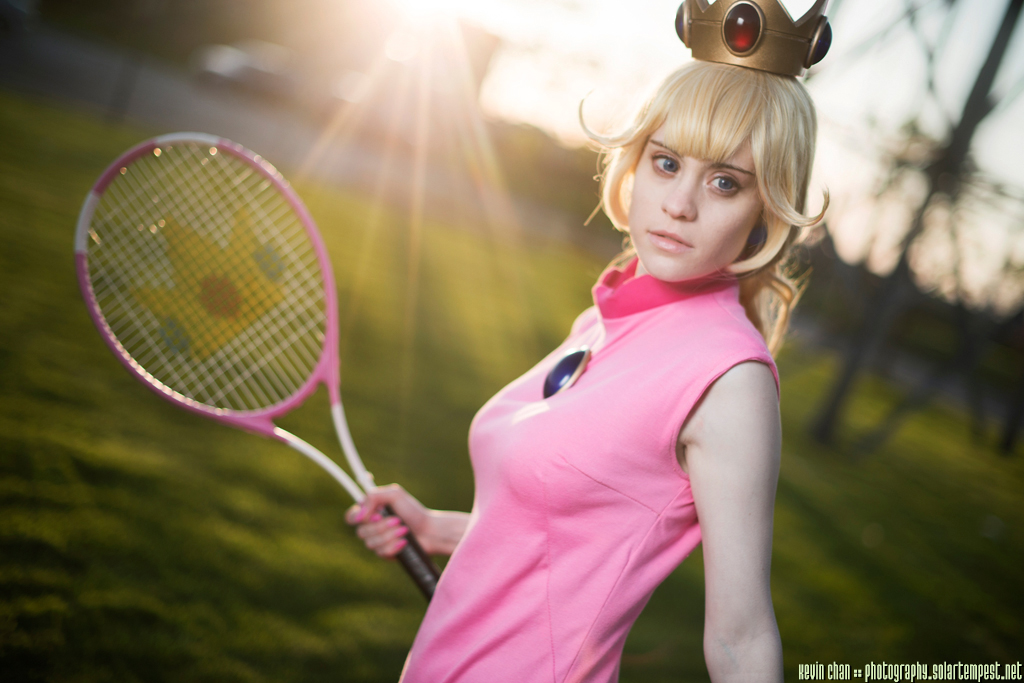
I wore this costume during the Nominoichi on Friday night of AN and then again on Saturday evening. I found it to be very
good to wear for the hectic Nominoichi event. I think I'll definitely wear this costume to more summer events in the next
couple of years. I did a shoot with SolarTempest at AN and I'm hoping to shoot at a tennis court at some point. I just
hope that I find more costumes to make like Tennis Peach as it's really the kind of costume that I enjoy making despite the setbacks that I faced.
Events/Conventions this costume was worn to
Anime North 2014 (Friday & Saturday Evening) & Atomic Lollipop 2014 (Saturday)
Photo Credits
EleventhPhotograph, Mai Sheri, Lightning--Baron & SolarTempest
Back