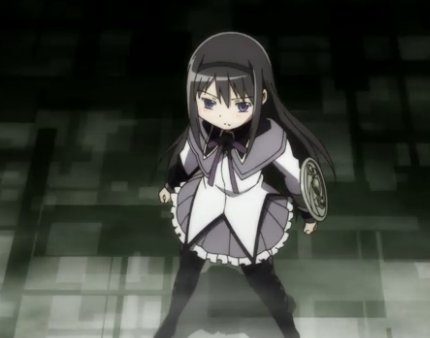
Homura Akemi - Madoka Magica

Cost: $378
Time to Make: 70 hours+
Timeline of Construction: January - May 2019
Time Shield Made By: Adrien (ehdrien)
Pictures


Information
Making Madoka Kaname's school uniform back in 2017 was a dream costume for me. I had noticed the uniform design from Madoka years before and had fallen in love with the colours, style and trims of the outfit even before I had watched the Anime. That really was what drew me to the series. I always sort of figured I would re-wear my uniform again as one of the other characters since all the main magical girls go to or visit the school during the course of the Anime. Although Madoka stood out to me as my favourite character in the Anime, Homura followed up as a close second. I liked the dynamic between the two girls especially with how things progressed at the climax of the show and in the continuing series. I decided I would eventually re-wear my uniform as Homura and that kind of got the character on my Cosplay radar in general.
At the start of 2019 I was struggling to figure out a costume to make for the coming Cosplay season. I usually find inspiration in December or early January so I can start work on a costume during the Christmas holidays or at the beginning of the new year to work on during the cold winter months. At the start of 2019, though, I was really searching to find Cosplay options. Over the last handful of years I've really made my way through my list of dream costumes. I made Madoka's school uniform, a few years ago I worked on Shinku from Rozen Maiden, I even re-made my Kagome costume from Inuyasha to show how far I've come in terms of sewing. I didn't really want to work on anything too intense so I just had to keep thinking.
Inspiration finally struck when I was looking through my figure collection and really took notice of Homura. I had just decided to buy a Homura 1/8th scale statue from Good Smile Company in the fall to match with a Madoka Kaname figure I had bought earlier in the year and it stood out in my collection. I remembered how much I enjoyed the Anime, that I had yet to Cosplay Homura with my school uniform and I started to really take notice of her design. I have to say that Homura's magical girl outfit is definitely my favourite magical girl design from that series. I like it more than Madoka's. The mix of purples and white were a pleasing colour combo and the details were quite elegant and pretty. I thought maybe that the blouse wouldn't be too hard to make since it has a similar style to the hem like the school uniform and I knew that I could modify the same pattern to make it work. Once I discovered that you could buy pre-made tights to use for her boots, I decided that the costume would be a fun addition to my Cosplay repertoire.
Once I decided to make this costume, I spent quite a bit of January making test versions of the blouse. I used my Sakura Haruno blouse/Madoka school uniform pattern as a base. I wanted to take away the main princess seams that give the bodice its shape so the look was a little more uniform. I made the pattern with the seams in and then adjusted it to be as tight fitting as possible. I also changed the hem line for each piece to match the weird pointed angles of her hem line. I also worked out the proportions for the front zipper. Once I felt like the fit would be ok, I traced each pattern piece from the mock so instead of having 4 parts to the front and back of the blouse I now only had 2 per side. I also fiddled around with options for the purple collar and how I thought the black undershirt might work out, but without fabric there wasn't much else to do. By mid-February I was somewhat satisfied with my patterning and was waiting to finalize everything once I got a chance to buy fabric for the costume. That's when the problem of a time crunch sort of started. I was planning on working on it in March. I didn't expect to get a chance to go fabric shopping during the middle of winter because I wanted to go to the fabric district to fabric hunt, but having to wait really set me back. I also wanted to go with my friend Pan so waiting for our schedules to align for a weekend took a while. We didn't actually get a chance to fabric hunt until the very end of March so I missed my window to sew during winter, but I was determined to see how far I could get with the costume in the coming weeks.
I will say that I was really pleased with the purple fabric that Pan helped me track down for the skirt and collar. I know Homura's collar and skirt are a bit of an unknown when making the costume as the colouring tends to shift between grey and purple. I tend to see purple for those parts in promo images and in figure form. The purple is what drew me to the character and it makes sense for them to be purple since purple is her soul gem colour and each magical girl has a reflection of their colour in their outfit design. I really wanted a purple fabric and I think the purple we found was very close to my vision and I love the soft colour for the character. I'm not as sold on the contrast purple I got for the bows, but the fabrics do look nice together. One of the reasons I decided to make Homura was because I had a lot of leftover white and black fabric so I thought it was going to be a cheap costume for supplies. Eventually I discovered that I needed more white and I even had to buy more black fabric so my attempts to clear out my fabric bin didn't really work out. XD
I did also have an idea of making a second costume for Anime North. Not really a second actually, more of a replacement as I was thinking Homura might be a bit too time consuming to work on as I also had other things going on. I bought fabric at the same time for an alternate magical girl outfit for Sakura Kinomoto. This was a design that was in the Manga only and was a cover image. I only picked to work on that costume in March, but I didn't get the chance to work on that Sakura costume simply because I wanted to wait for some accessory supplies to show up. I thought I would work on Homura in the meantime, but the accessories for Sakura didn't even show up before Anime North so I'm glad I didn't have my heart set on making Sakura and decided to stick with working on Homura instead.
The first thing that I worked on when I got fabric was the white blouse which I started making in early April. Since I had worked with the pattern before and I had made a mock, it was pretty simple to put the basics of it together. I got the main parts of it sewed before I switched gears and decided to work on Homura's skirt. I wanted to make the skirt so I knew what length the bottom of the blouse needed to reach. I used my Good Smile Company figure as a reference for the skirt design. The figure had a windswept appearance so I thought the skirt should be a knife pleat. It turns, out looking at other sources later, that a box pleat might have been a better choice. Oh well. It took me a couple of tries to finish the skirt. First I made the pleats too thick and then when I had it set and I sewed down the top of the pleats, I realized that my proportions were wrong and the skirt was too big. Somehow I had measured the fabric wrong so the skirt width was like 3 inches shorter than I had anticipated. I have no idea how I miscounted. I went over the dimensions a few times before cutting out the fabric. My mix-up just meant that it took some creative measuring with each pleat to work in the incorrect sizing. Some of the pleats are a bit wonky, but they looked ok.
Putting the skirt together went well enough once I figured out the measurements. I've made several pleated skirts now so it was an old hat. I tried to hide the zipper in a pleat and I made the skirt a bit shorter than my standard length for short skirts. I had ordered some pre-ruffled white fabric from an Aliexpress seller. Call me lazy, but I can't use my ruffler foot anymore since it doesn't fit on my new machine and I didn't feel like making ruffled fabric so I spent a few bucks and bought some trim. It turned out to be pretty nice stuff although a little wide. I was concerned about it making the skirt a little heavy and poofy that I actually purchased a bolt of lace to use as an alternative. I tried out the lace which looked cute, but the lace I bought was way too small so it didn't have the right effect. I wanted to work the ruffles in with some distance between the edge of the skirt and the ruffle seam so it could have some flow like it was a separate under skirt. So after spending a couple of hours changing out the ruffles for the lace, I had to take the lace off and pin in the ruffles again. At least I could use the machine to attach the ruffles! I was originally trying to hand sew it down, but it was taking forever. This costume really turned into a time sink! I tried to work the ruffle seam in with the hem of the skirt so there wouldn't be too many glaring seams on the bottom of the skirt. The seam looked a little chunky, but I think the skirt turned out pretty well and I'm happy that it turned out fairly evenly.
Once I had finished the skirt, I tried to work on mocks for the black collar of the undershirt and the purple collar for the blouse. It was mostly tinkering to get a sense of how everything needed to sit on the blouse. I then got back to work on the blouse and made and attached the sleeves. I always start with an oversized sleeve pattern and work the sleeve into the sleeve holes until I can match up the bottom and decide how much needs to be trimmed. I used a sleeve pattern that I had worked out for a Hitomi (Escaflowne Movie) costume that I never made. I extended the end of it and cut it up a few inches in the middle as Homura's sleeve has an opening in the back. I used black bias tape to cover the raw edges and I sewed it down using the machine. That went very smoothly. To finish each sleeve, I made diamonds out of black felt and I hand sewed them down where the black bias tape ends at the points where the sleeves had been cut up. I used it to hide where the edge of the tape met. The diamonds are a bit big, but they turned out alright. The diamond is meant to be more of an opening to the sleeve below, but I figured making it a solid felt piece would keep the costume from driving me too crazy. XD
Now that I had attached the black bias tape to the sleeves, I took on the big task of adding the bias tape to the bottom of the blouse. I also had to finalize the length of my front zipper for the blouse. I was a bit hesitant to settle on the dimensions because I wasn't sure what would work best for the angle of the purple collar. I didn't want the zipper to make the top of the blouse too low or too high. I only had one decent separating zipper so I just kind of had to roll with it. I couldn't find many options downtown for that style of zipper. I was hoping to have a few length options, but the Leather Surplus Store didn't seem to have many of that style of zipper in stock. Adding the black bias tape went alright. I was worried that I wouldn't have enough to go over every point, but thankfully I did. I had some troubles with how to turn the black bias tape at the side seams. It made the seams pop open a little bit and I later took in the side seams, which helped a lot with making the seams and tape sit flat.
What really gave me the most trouble with this costume were the collars. The collar for the black undershirt and the purple collar for the blouse were super tricky to pattern. I didn't own a dress form. I've always made my costume using mocks that I try on, but I had so much trouble getting the proportions right for both collars. Originally I wanted to make a new collar for a black dickey shirt that I had purchased. My thought was to minimize the layering so the white blouse could be better fitted. I had even made black sleeves for the white blouse and attached them right where the diamond is on each sleeve. When I decided to test out a mock of the black undershirt, I found that the fabric of the blouse was actually quite see-through. I had thought I had bought the same fabric I had purchased from a fabric shop before as it had great flow and was quite opaque, but this fabric was more see-through than I had realized. The white seam of the front zipper was quite glaring and I could see the edges where the dickey shirt ended. It was quite distracting. It was at this point that I thought it would be best to set the costume aside. It was just a little over 2 weeks until Anime North 2019 at this point and I was quite frustrated by aspects that were not working well (the black collar) and now I found out the white blouse was see-through. So I shelved the costume for a couple of nights.
I had made plans to visit Pan on Friday, May 10th after work. Originally I had asked her if she could help me adjust my purple collar pattern that evening. It seemed to be a tad bulky in the back and I wasn't sure what position it needed to sit in so I figured another pair of eyes could help me out. Of course, now I brought her the whole costume and explained my frustration with how it was fitting, with the purple collar and with the see-through nature of it. Pan actually helped me out a lot. She offered the suggestion of using black bias tape to cover over the zipper seam. I had determined that my original plan to use a dickey shirt wouldn't work so I now thought maybe I should get a full black shirt to wear underneath. I was going to try to find a shirt to modify with a new collar and cuffs, but Pan offered me some black twill and I thought maybe I could quickly make up a shirt. Pan also took the time to alter my purple collar. It needed some adjustments to help with the angling and I so appreciated her help! I really couldn't see the back to figure out where I had gone wrong and her pattern made a world of difference for me. Pan really was a lifesaver with this costume.
After leaving Pan's I felt pretty energized. I decided to quickly make the purple collar using Pan's pattern and I loved how it turned out. I had purchased 1/8th width black ribbon and some fabric glue and I started the slow process of gluing the ribbon down. It was very meticulous. Since the ribbon was so thin I had to use a toothpick to slowly push down each centimeter to make sure the glue stuck. It was kind of frustrating because some areas were pretty stubborn or in some places the glue smudged and when it dried it left a clear mark. Given the tiny nature of it, I think I did a pretty decent job and the purple collar is one of my favourite aspects of the costume. I was so worried it wouldn't sit properly as I had to hand sew it down to a small hem I made at the top of the blouse. Thankfully the shaping worked out and I was able to hide my stitches on the underside of the collar.
I put together the black undershirt in just a few days. I used my Sakura Haruno blouse pattern which was New Look pattern 6338. I pretty much made the pattern as was although I put the zipper up the front instead of in the back. The pattern didn't actually leave room for sleeves as it was meant to be sleeveless, but I used the same technique as what I did with the sleeves on the white blouse. Even though both the black shirt and the white blouse are basically the same pattern, the arm hole and, therefore, the sleeves themselves on the black shirt turned out to be kind of tight. I was a bit surprised when I put the shirt together and went to try it on. I had to go back and let out some of the seam allowance in the sleeves although I couldn't really do much about it fitting a little tight at the armpit. I pretty much put the shirt together in about 3 days. I got a little stuck because I forgot to get a zipper for the black shirt. I thought I might have one already, but I didn't so I had to rush an order from Walmart so I could install it and start working on the collar. At least adding the cuffs to the black shirt wasn't too difficult. I had already made cuffs back when I thought I was just going to have sleeve edges so I simply had to take in the cuffs a bit and then sew them down to the black shirt sleeves.
The black collar was super daunting, but I had an idea for how it might work. I had previously made a stand up collar for the white dickey shirt for my Madoka school uniform and I knew putting the zipper up to the top would make a great collar stand support for the oversized collar. I didn't really have time to talk to Pan again about helping me adjust a pattern so I had to wing it. I started taping bits of newspaper together and tracing around the collar line and creating seam lines at the shoulder. I kept cutting and adding more paper and just kind of hoped it would work out. I even had my father take a moment to draw in the centre point in the back so I could hopefully get it even. There wasn't much time to fuss with it so I hoped it would work out. Thankfully it did and I was able to construct the two sides of the collar and turn them. I was pretty happy with the shape although it was a tad oversized. I ran into more trouble with trying to add white bias tape. The tape I bought was moderately see-through. I had some leftover tape from Kagome that I had used on a previous mock. I ended up having to take apart the tape from the mock to use on my good collar. That wasn't ideal, but I didn't have time to get anything better. It kind of sucked as I was a bit short so I had to sew together a couple of pieces and the join is just over a shoulder seam. It was my best solution during the con crunch. (>.<);;
I had to hold my breath a bit when attaching the black collar. It was kind of heavy so I had to hand sew it in place. It worked out alright. Doesn't have as much lift as I wanted in the front and one side was a smidgen too big and had to be sort of tucked in. I think it makes the collar a tad lopsided, but seriously, that collar was the bane of my existence! I made so many mocks for it and mocks for the dickey shirt version before I had to abandon it. It was a black hole for fabric!
Once I was finally ok with the black undershirt it was time to assemble some bows. The purple fabric I got for the bows was a bit of a mistake. It was really heavy duty. Normally you want a bit of flexibility and flow but this fabric was quite rigid. I had never made a bow with such an elongated look. I decided to make loops of fabric for both the front and back bow to give it some depth. The bow tail for the front bow was just a tube of fabric, but it was the worst thing to turn. The fabric was just so thick that my 1.5 inch wide tube that was something like 28 inches long took hours to slowly turn right side out. Once I had the tail, main part of the bow and a small tube to act as the tie, assembling it was pretty simple. I just had to tighten the closure piece and put in some strategic stitches to hold it together. Originally I was using a brooch backing to pin it to my blouse, but it was a little awkward so I later switched it to snaps.
The last major task was to make the back bow. The design of the back bow was slightly different from the front as it's a bigger bow and the back tail has a black design on the bottom. I wasn't quite sure how I wanted to make the design. I experimented with some black pleather I had left from my Dilandau costume. I made a couple of test patterns, but I just couldn't get clean cuts. I decided to use felt instead since felt is pretty forgiving. I wanted to make both bow tails as long tubes that I turned right side out, but I knew it would be super hard to turn it because of the stiffness of the fabric. I only sewed one side on the back bow tail and turned the edges of the other side so I could top stitch it closed with my sewing machine. The stitches are visible, but it would have taken forever to turn the tube otherwise. I'm pretty happy with how the black design turned out, though. The tails on the back bow are a little wide, but I think the overall look is quite cute. I again used snaps to attach it to my blouse.
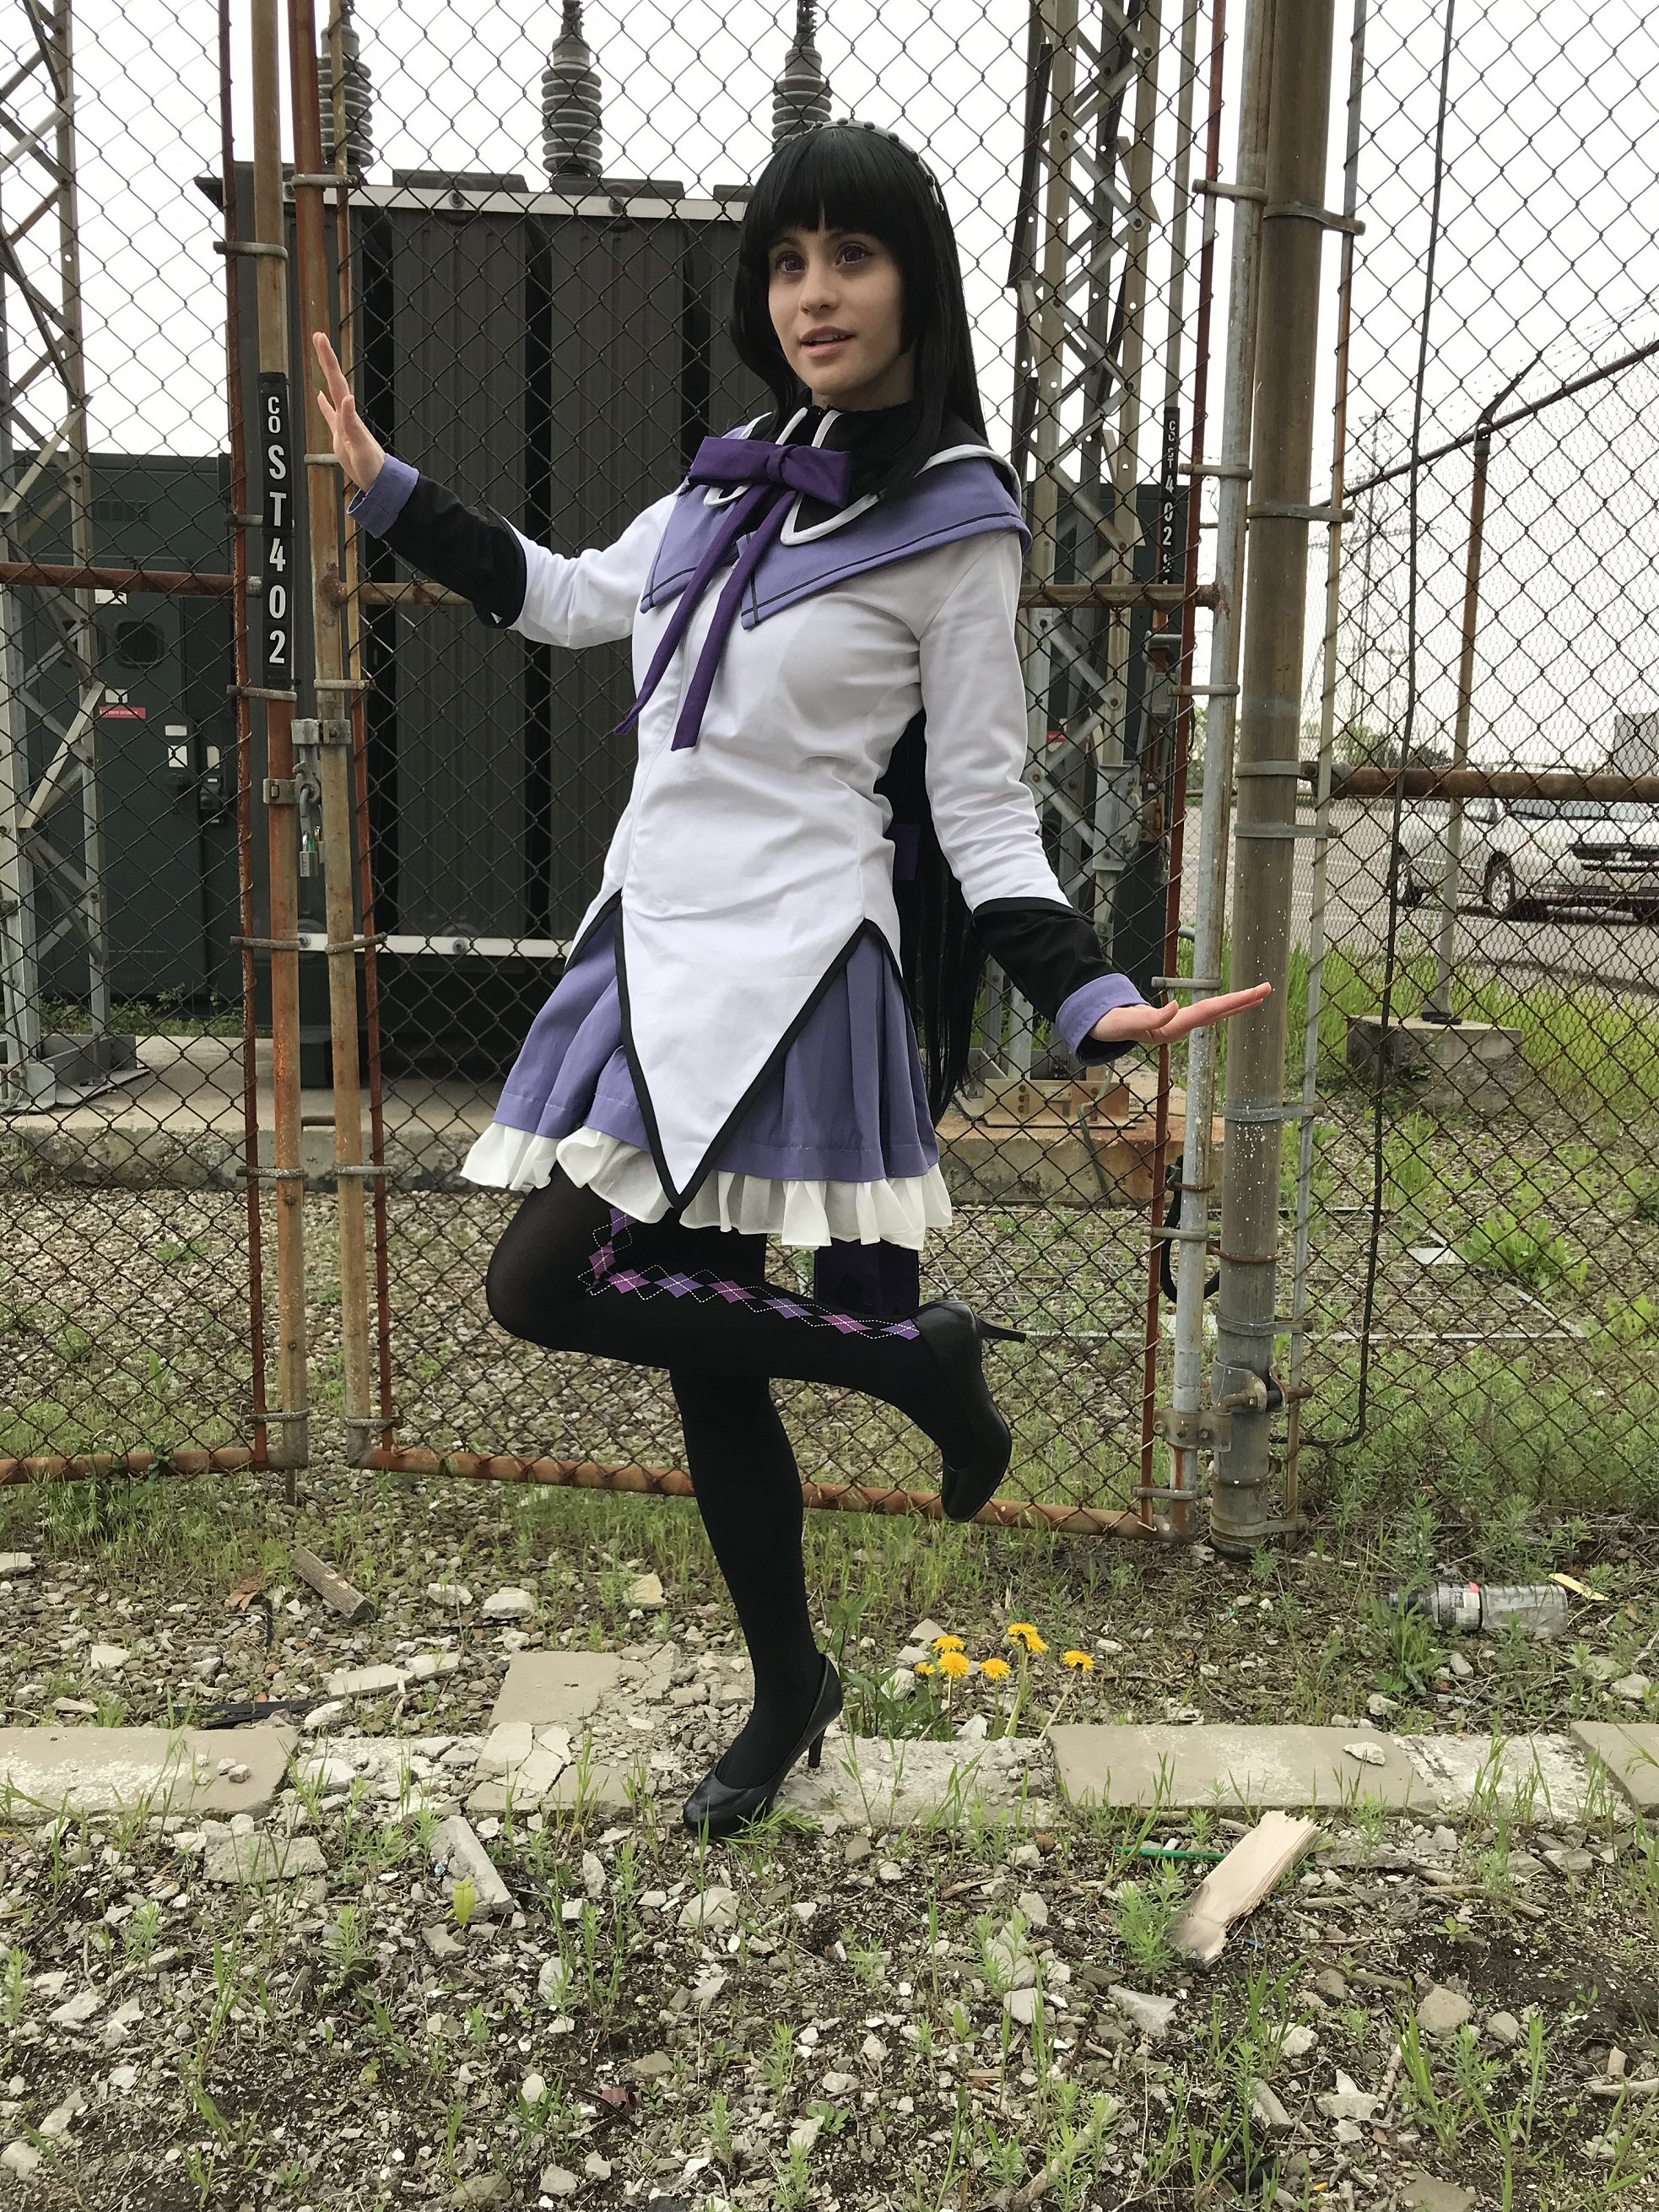
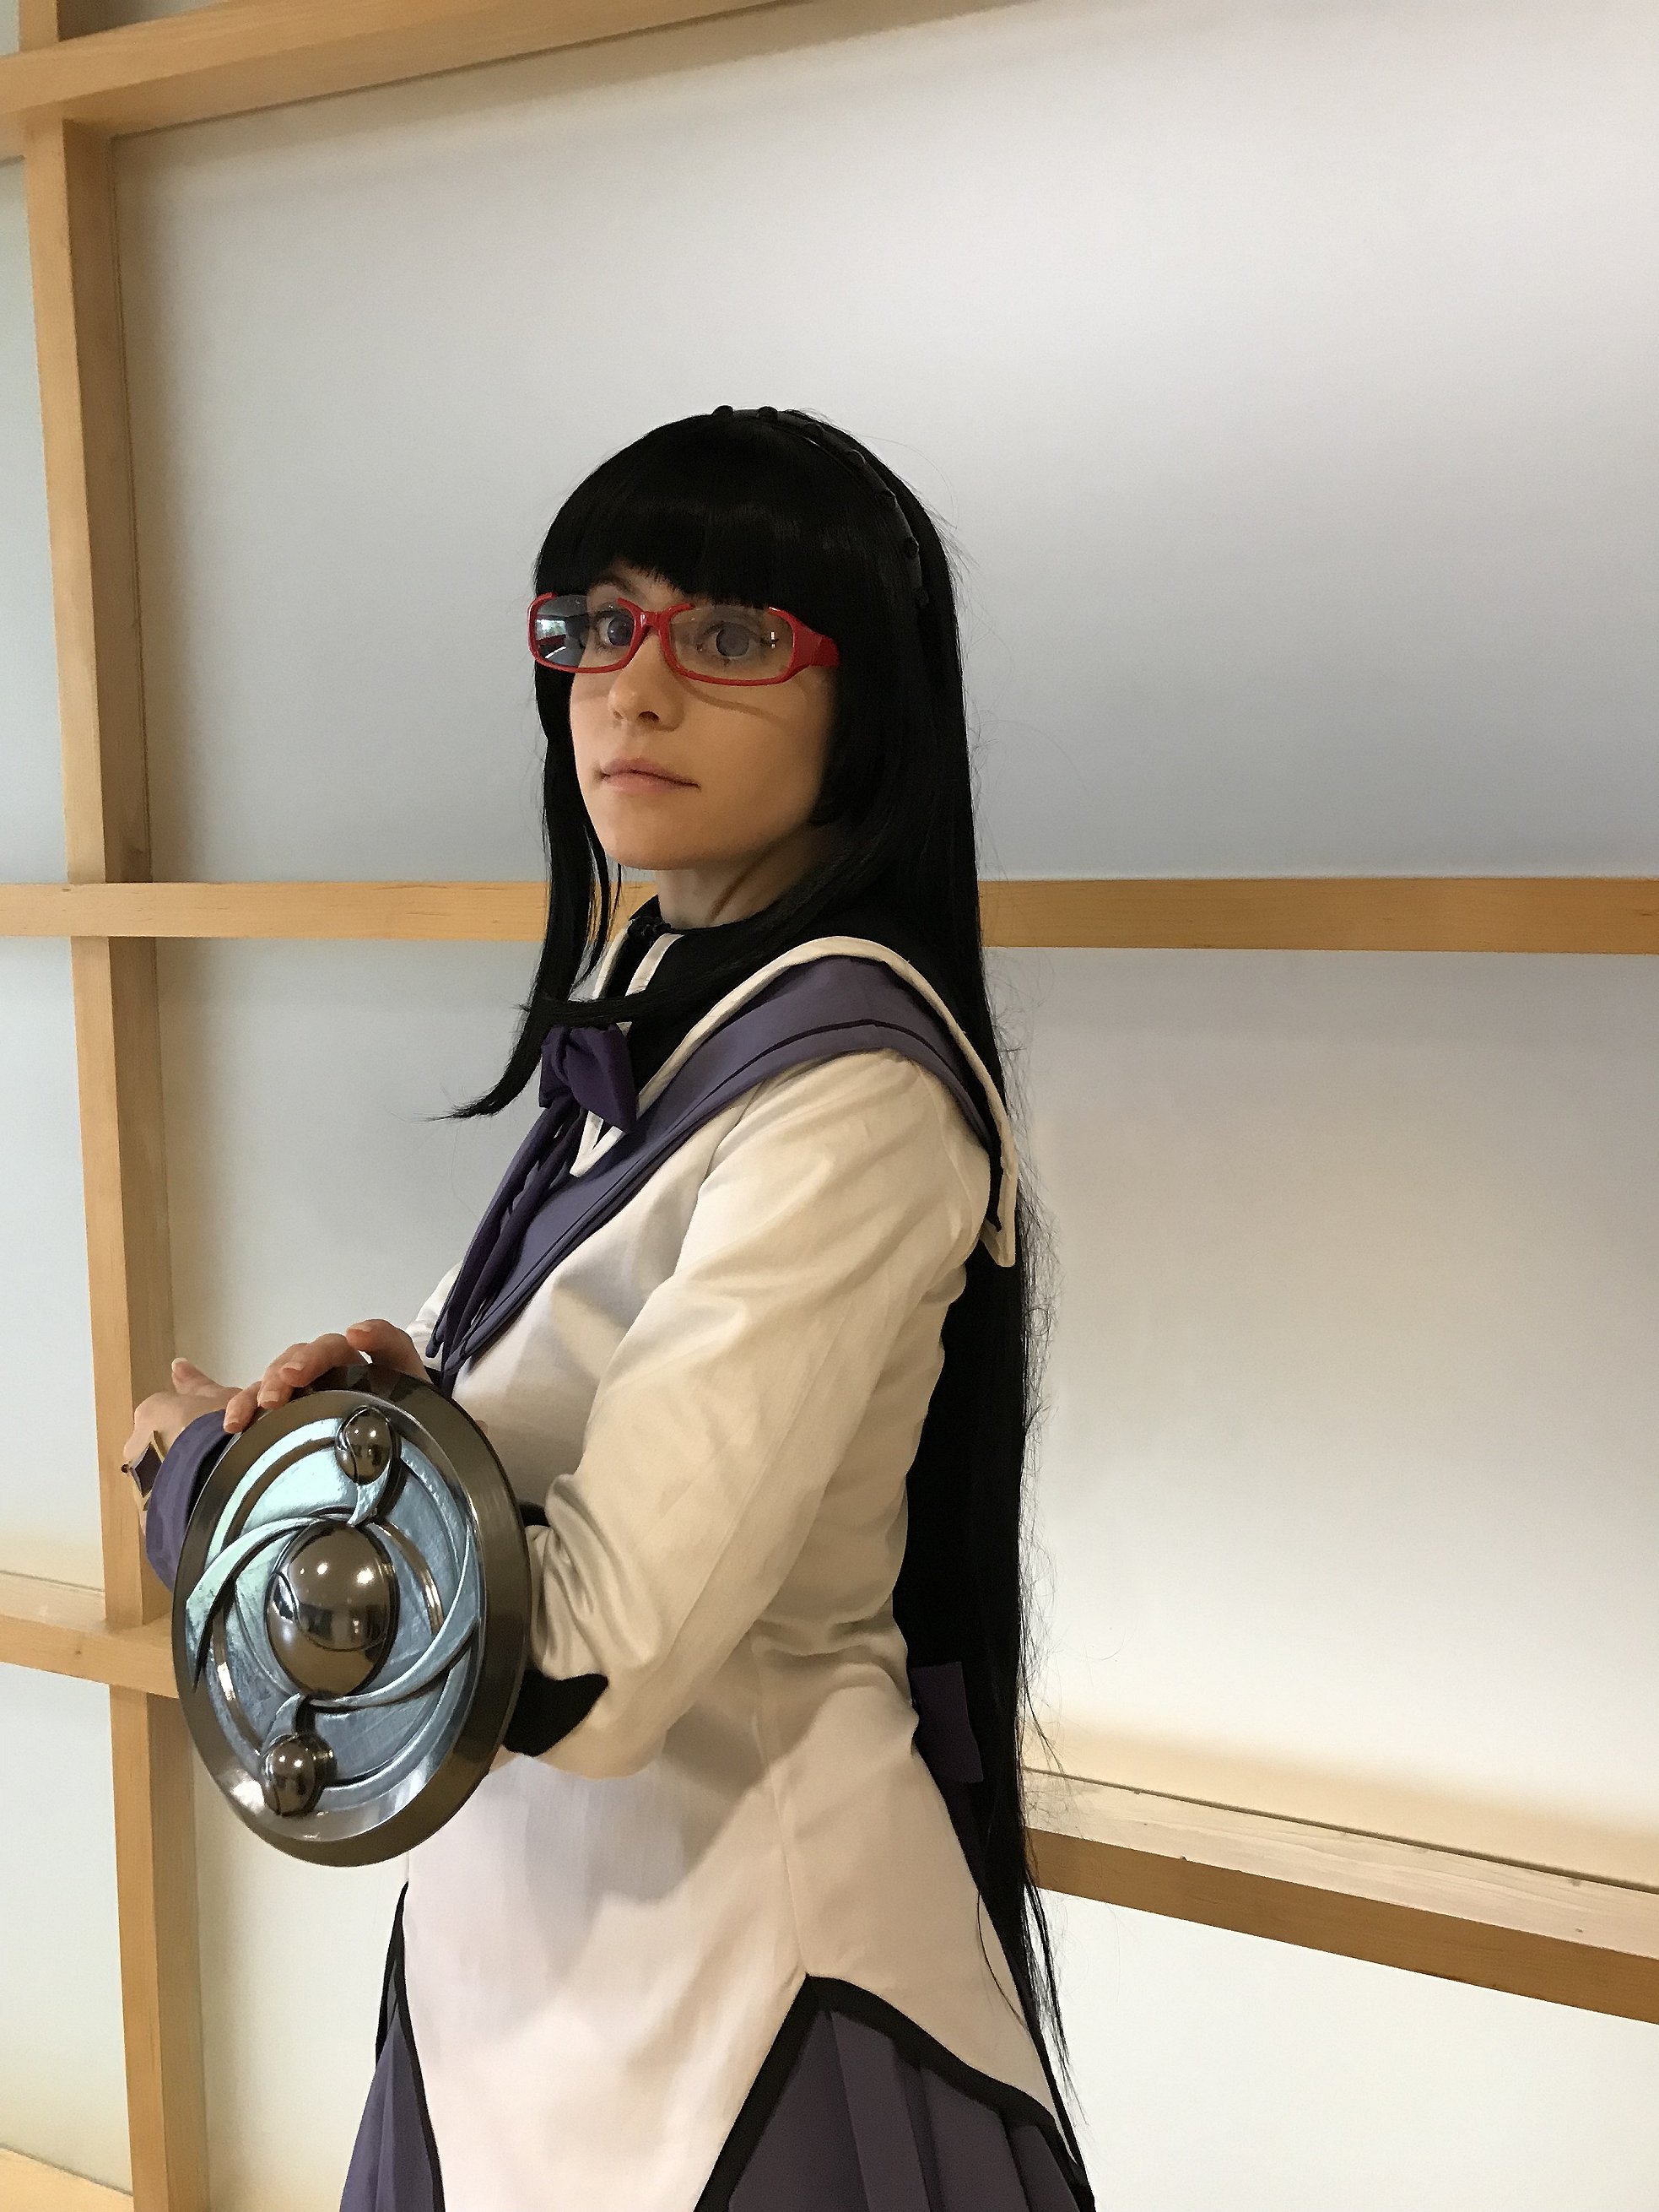
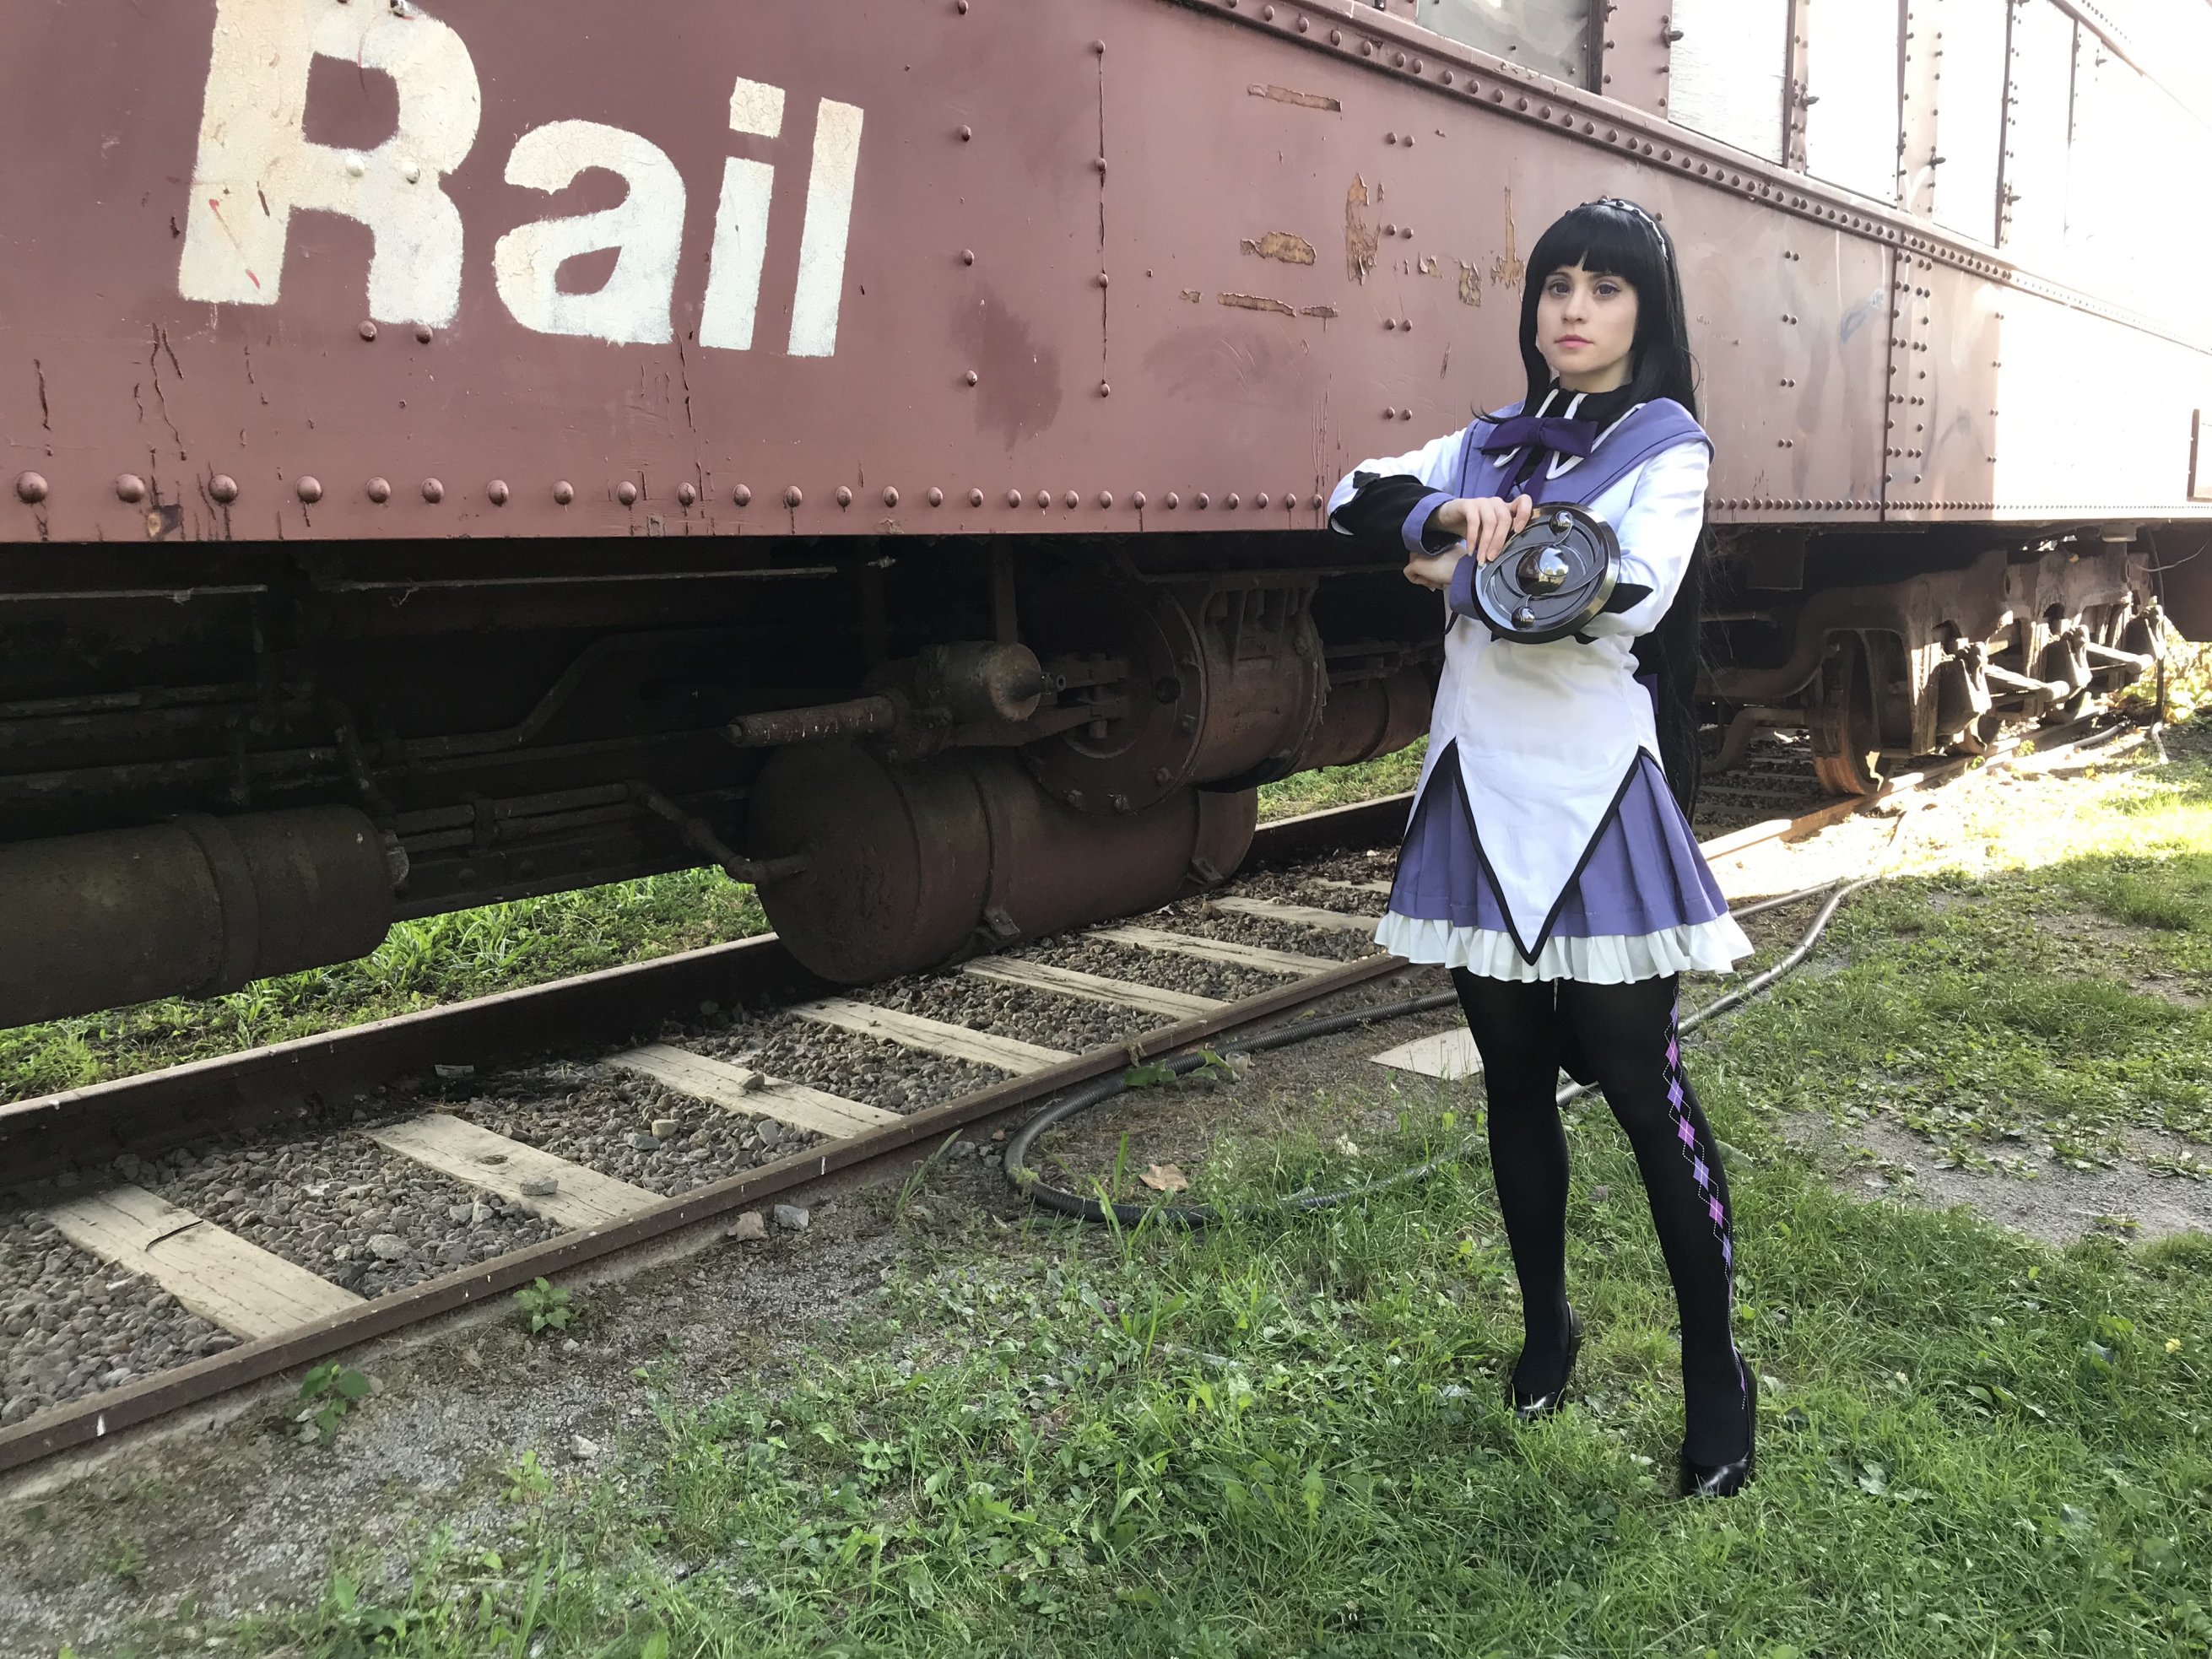
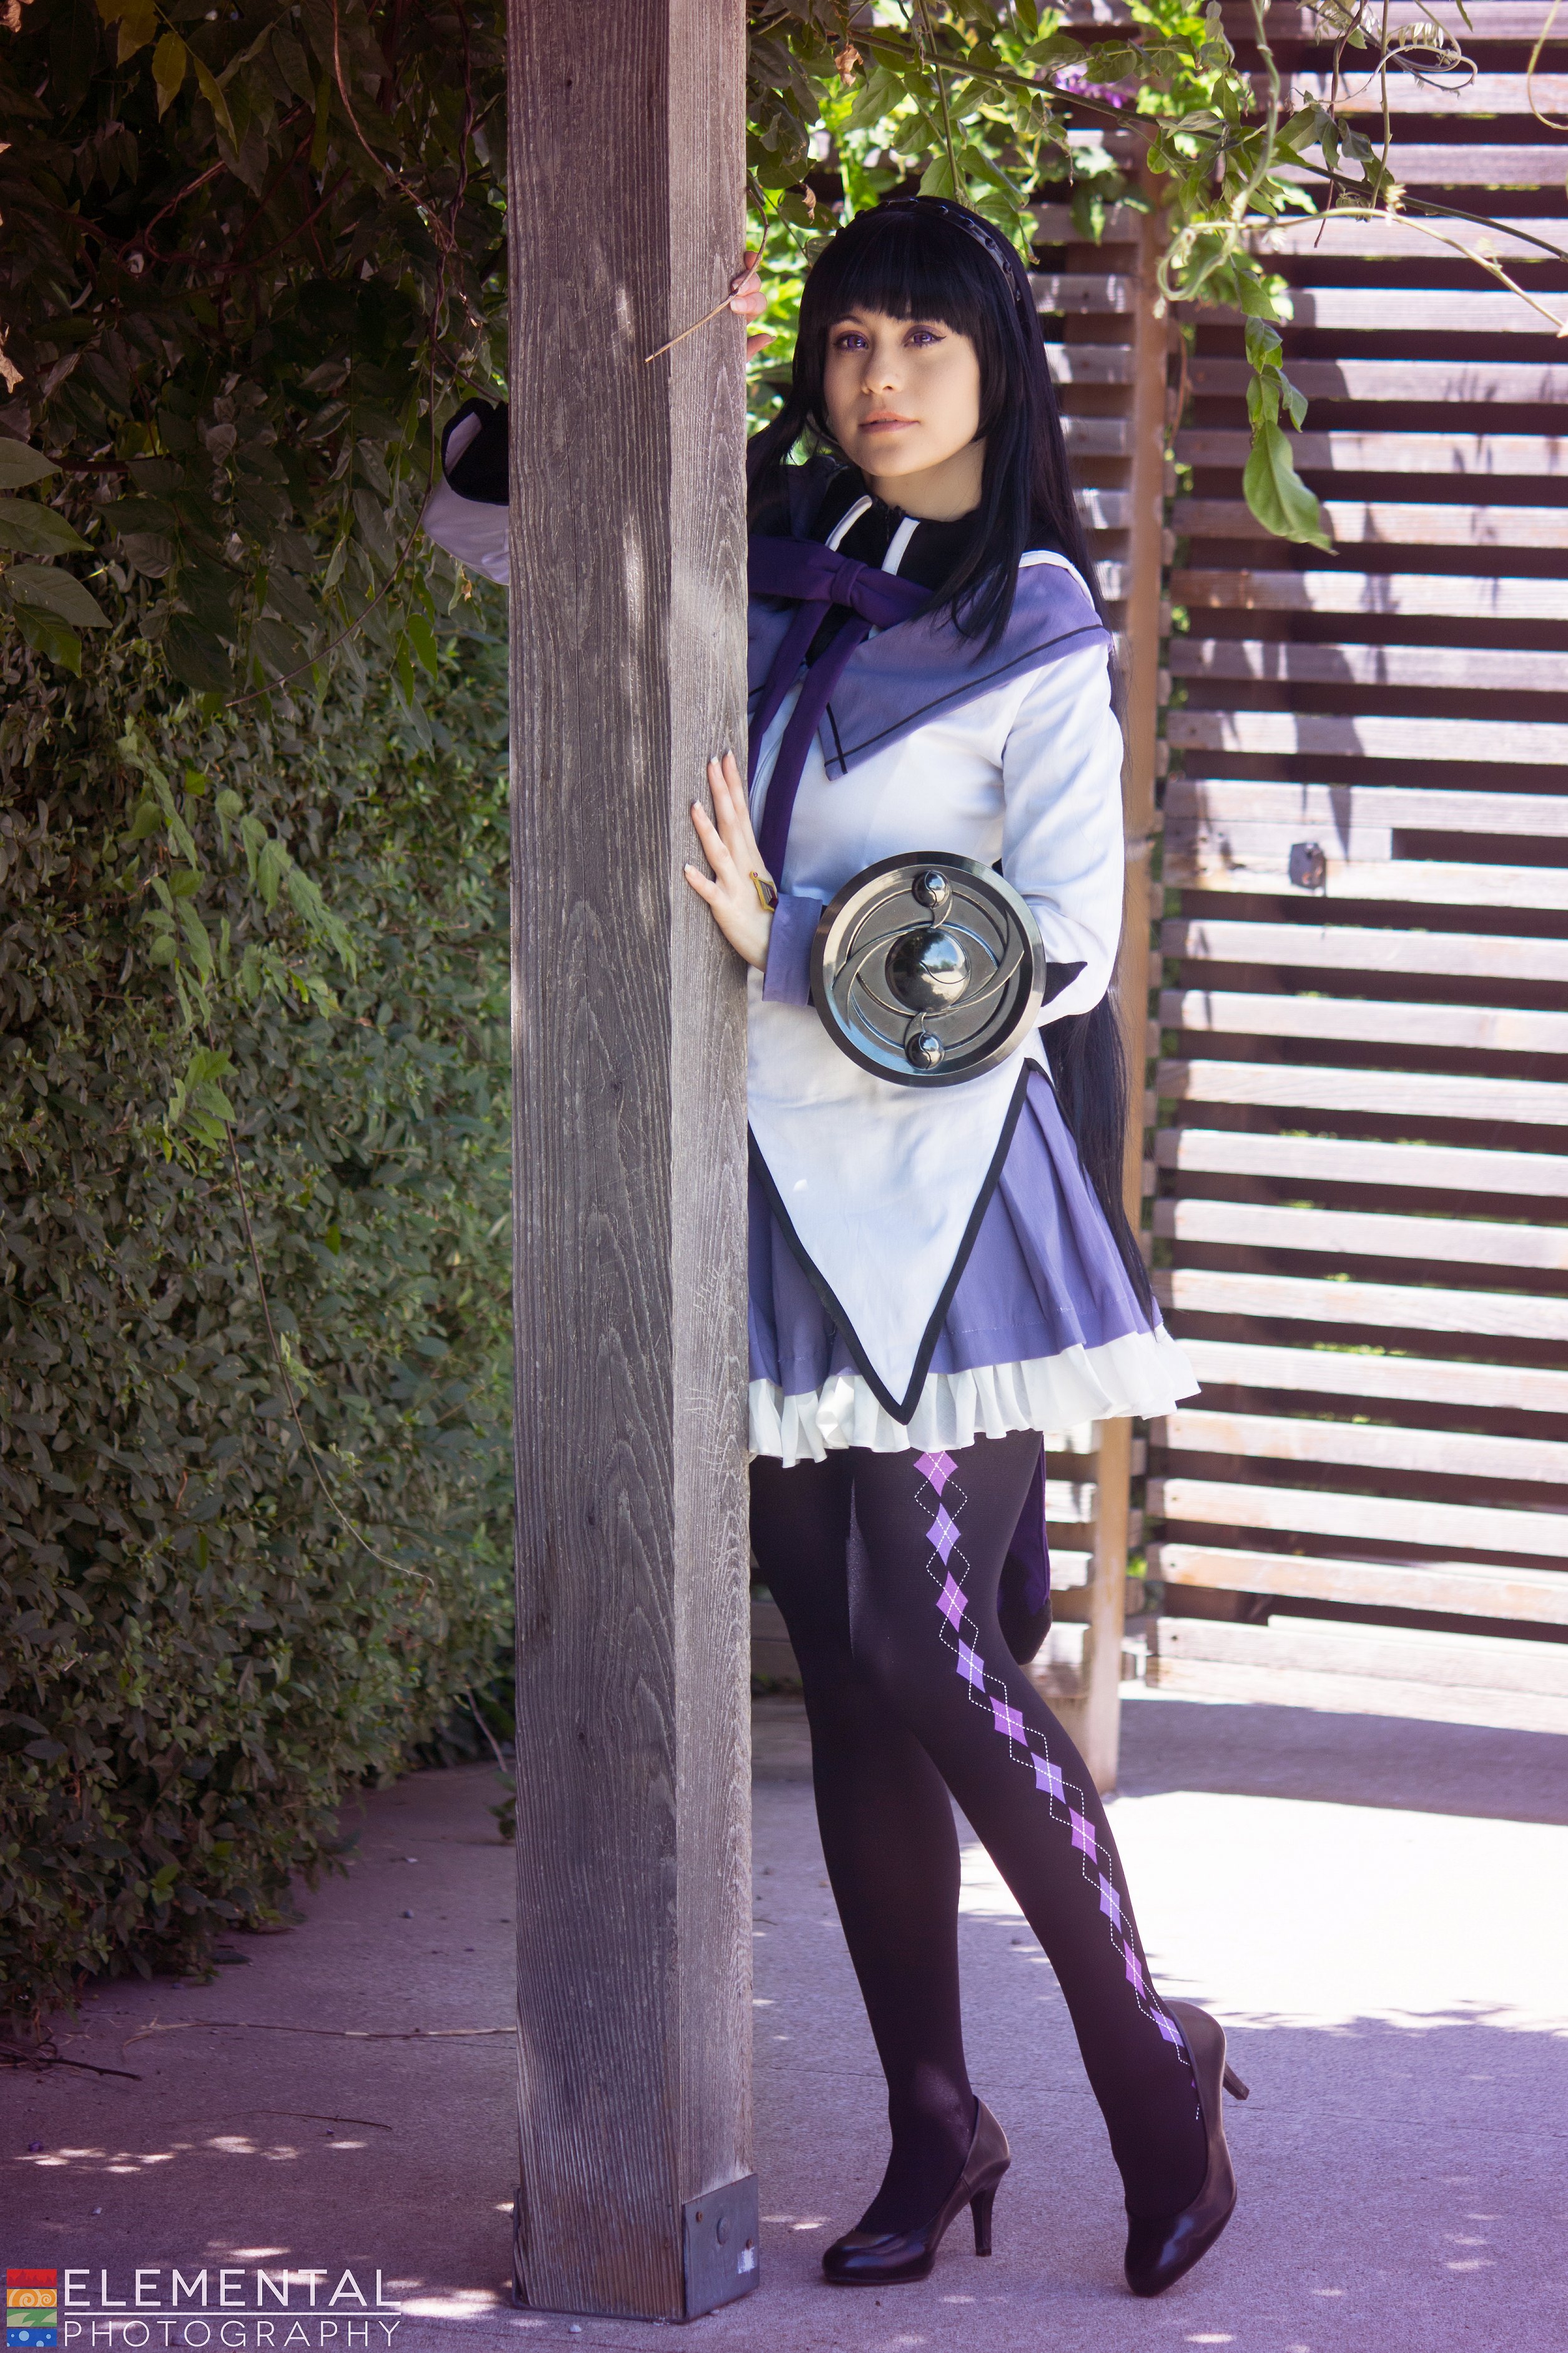
There were a couple of other accessory points. I bought the hairband from a Chinese seller along with a pair of Homura's red glasses and some tights. I know Homura's boots are a kind of strange mix of high heel and tights. A lot of Cosplayers have either made leggings or have painted tights. I actually bought fabric paint and some tights to paint and I was going to cover an old pair of high heels to make boot covers, but I was concerned about ripping the tights and all the hard work coming to nothing. I'm pretty hard on tights so instead I ordered pre-made tights from China. I'm not quite sure why the diamond pattern on the tights is so weird. They alternate between grey and purple and are crisscrossed with grey lines. Was it done to avoid copyright? To be fancy? Anyway, I decided to paint the grey diamonds purple to at least make it a bit more uniform. It took a few hours to slowly paint each one and let them dry, but I like the results. I paired the tights with a pair of comfort plus black high heels and I like the look they give the costume.
Back in the winter I purchased a pre-made soul gem prop for my hand from a seller on Aliexpress. I was pretty happy to not have to make that myself since it involves some gems. It came with a piece of double sided tape, but I took that off so I could use spirit gum and it would sit flush against my hand. Unfortunately, I didn't quite make the fit tight enough at Anime North. I had it on my hand for a couple of hours before stopping for lunch. Somehow the glue of the main gem let go while I was having lunch at Swiss Chalet and it fell off. I did manage to get it back and I had super glue on me so I could fix it right away. The problem came a few minutes later when I went to the bathroom. I was trying to adjust my long wig so I could use the bathroom when the hand prop fell off right into the toilet. I was mortified! I hadn't used the toilet yet so I was debating if it was a bad idea to reach in to get it when the toilet auto flushed and it disappeared. XD So that evening I ordered a couple of spare ones. Such a bummer that I lost my soul gem and it was before I even had a chance to get any photos of myself in costume.
Speaking of the wig, though, that was a big issue that I had. I debated for a while what wig to order and back in the winter when Arda Canada was having a sale, I ordered a Venus Silky in Onyx. I had been planning to get together with Pan so she could help me trim the bangs and the side pieces, but we just never got a chance. Once I wasn't so sure the costume was happening for AN, I didn't want to bug her to fix the wig so when I finally finished the costume a couple of days before Anime North, I was in a bit of a pickle with the wig. Pan was a huge help and actually brought a few of her old Sailor Mars wigs to AN. On Friday night of the con, after I had packed up from the Nomi and got a chance to go to the hotel, she trimmed the side pieces into one of her old wigs. She had already trimmed the bangs so it only took a few minutes to fix it up and it looked pretty cute! I really appreciate her last minute save and for her to donate a wig to my Homura costume. Not sure what I'll do with my original Arda wig. If I'll keep it for a spare, in case I need it for something else down the line or if I'll just eventually re-sell it.
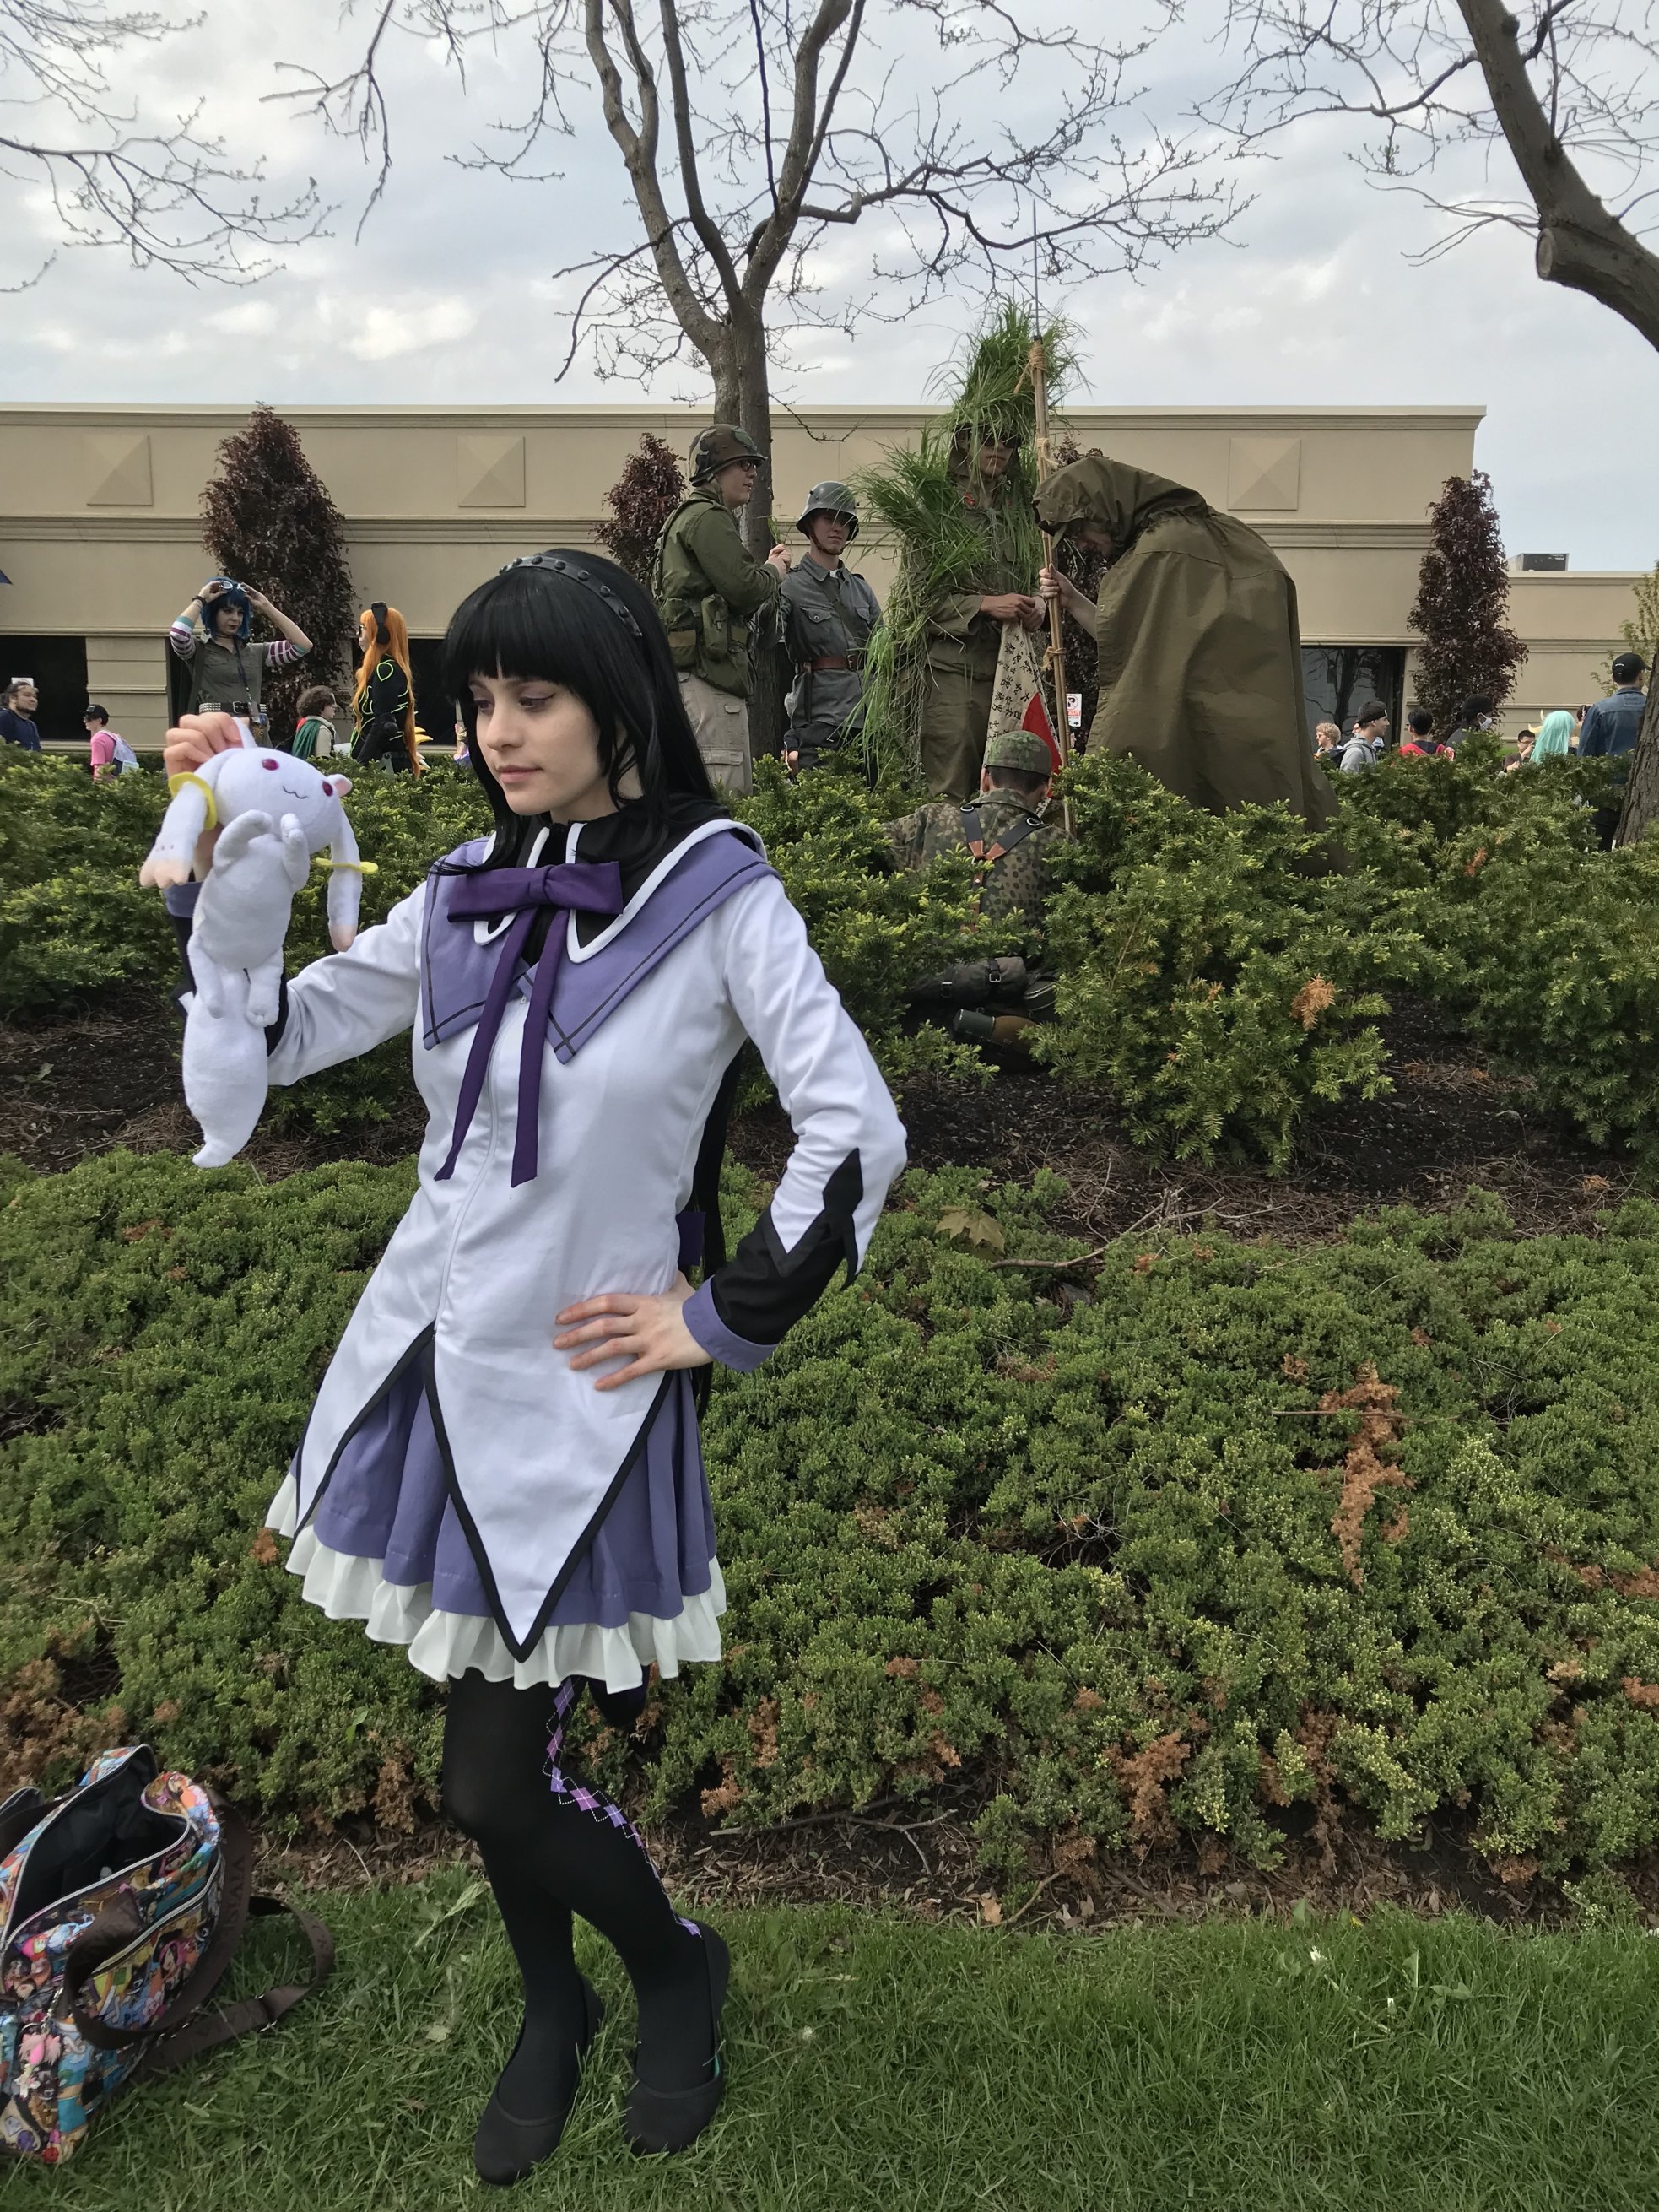
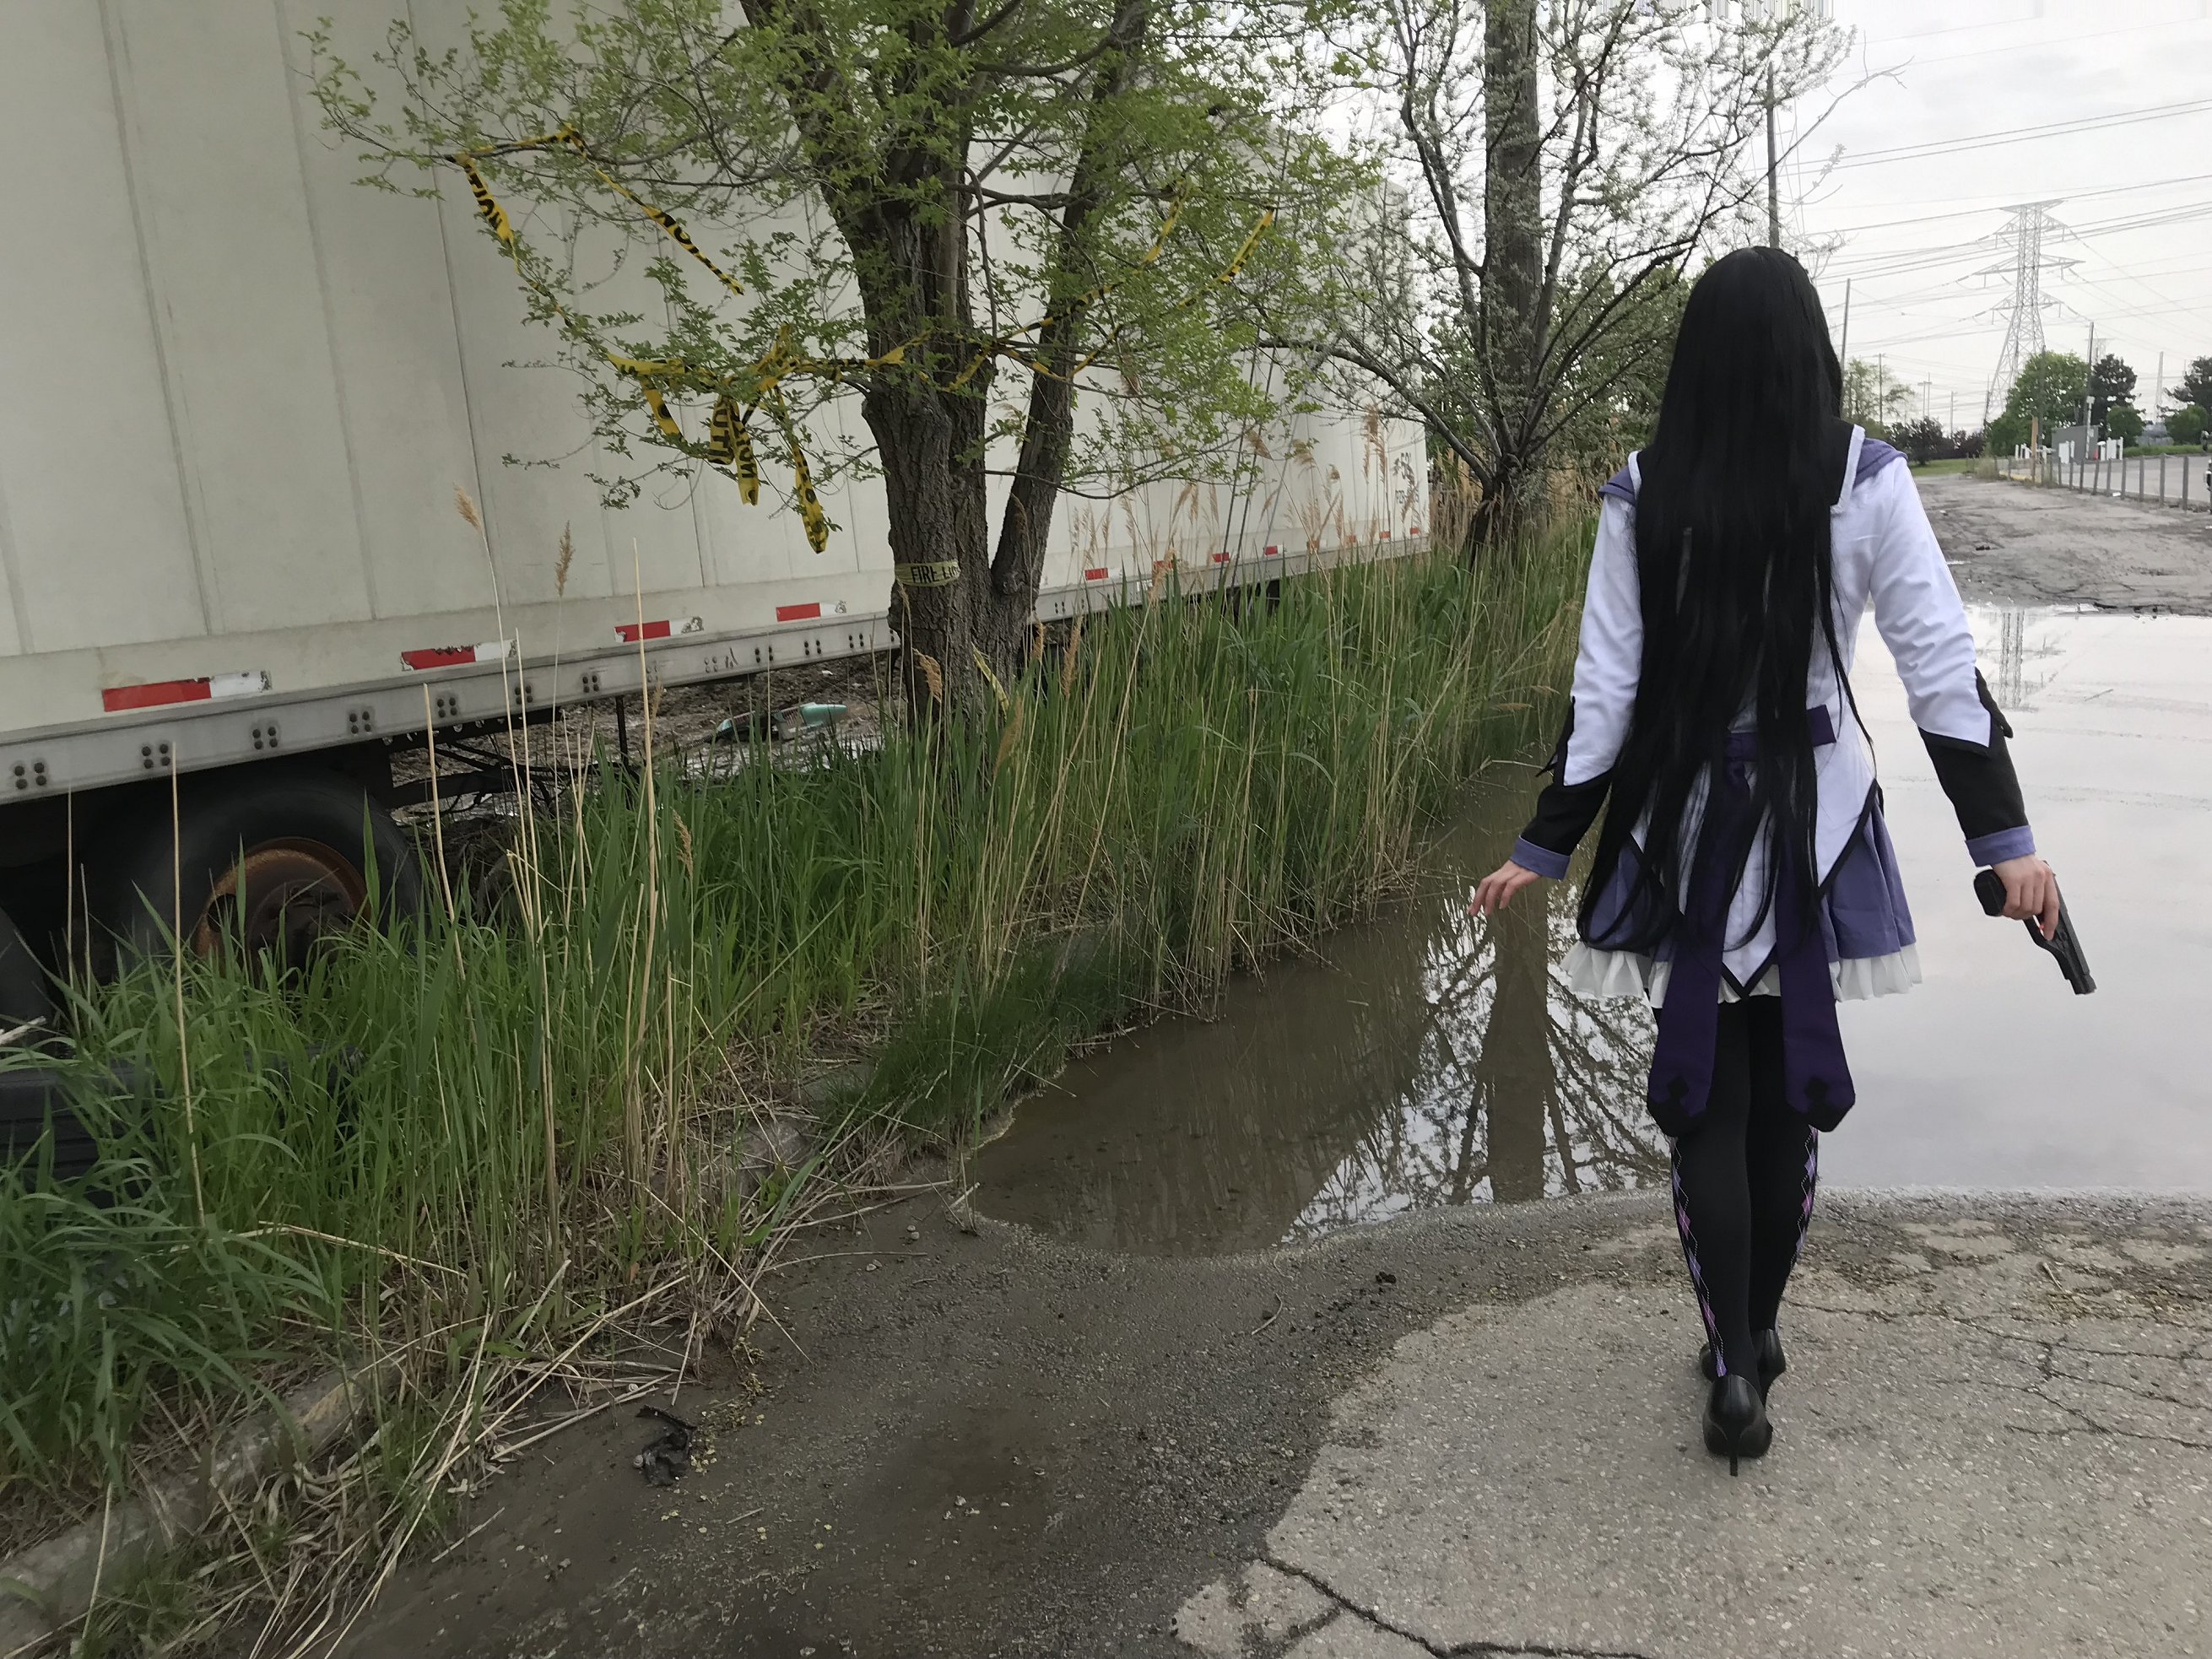
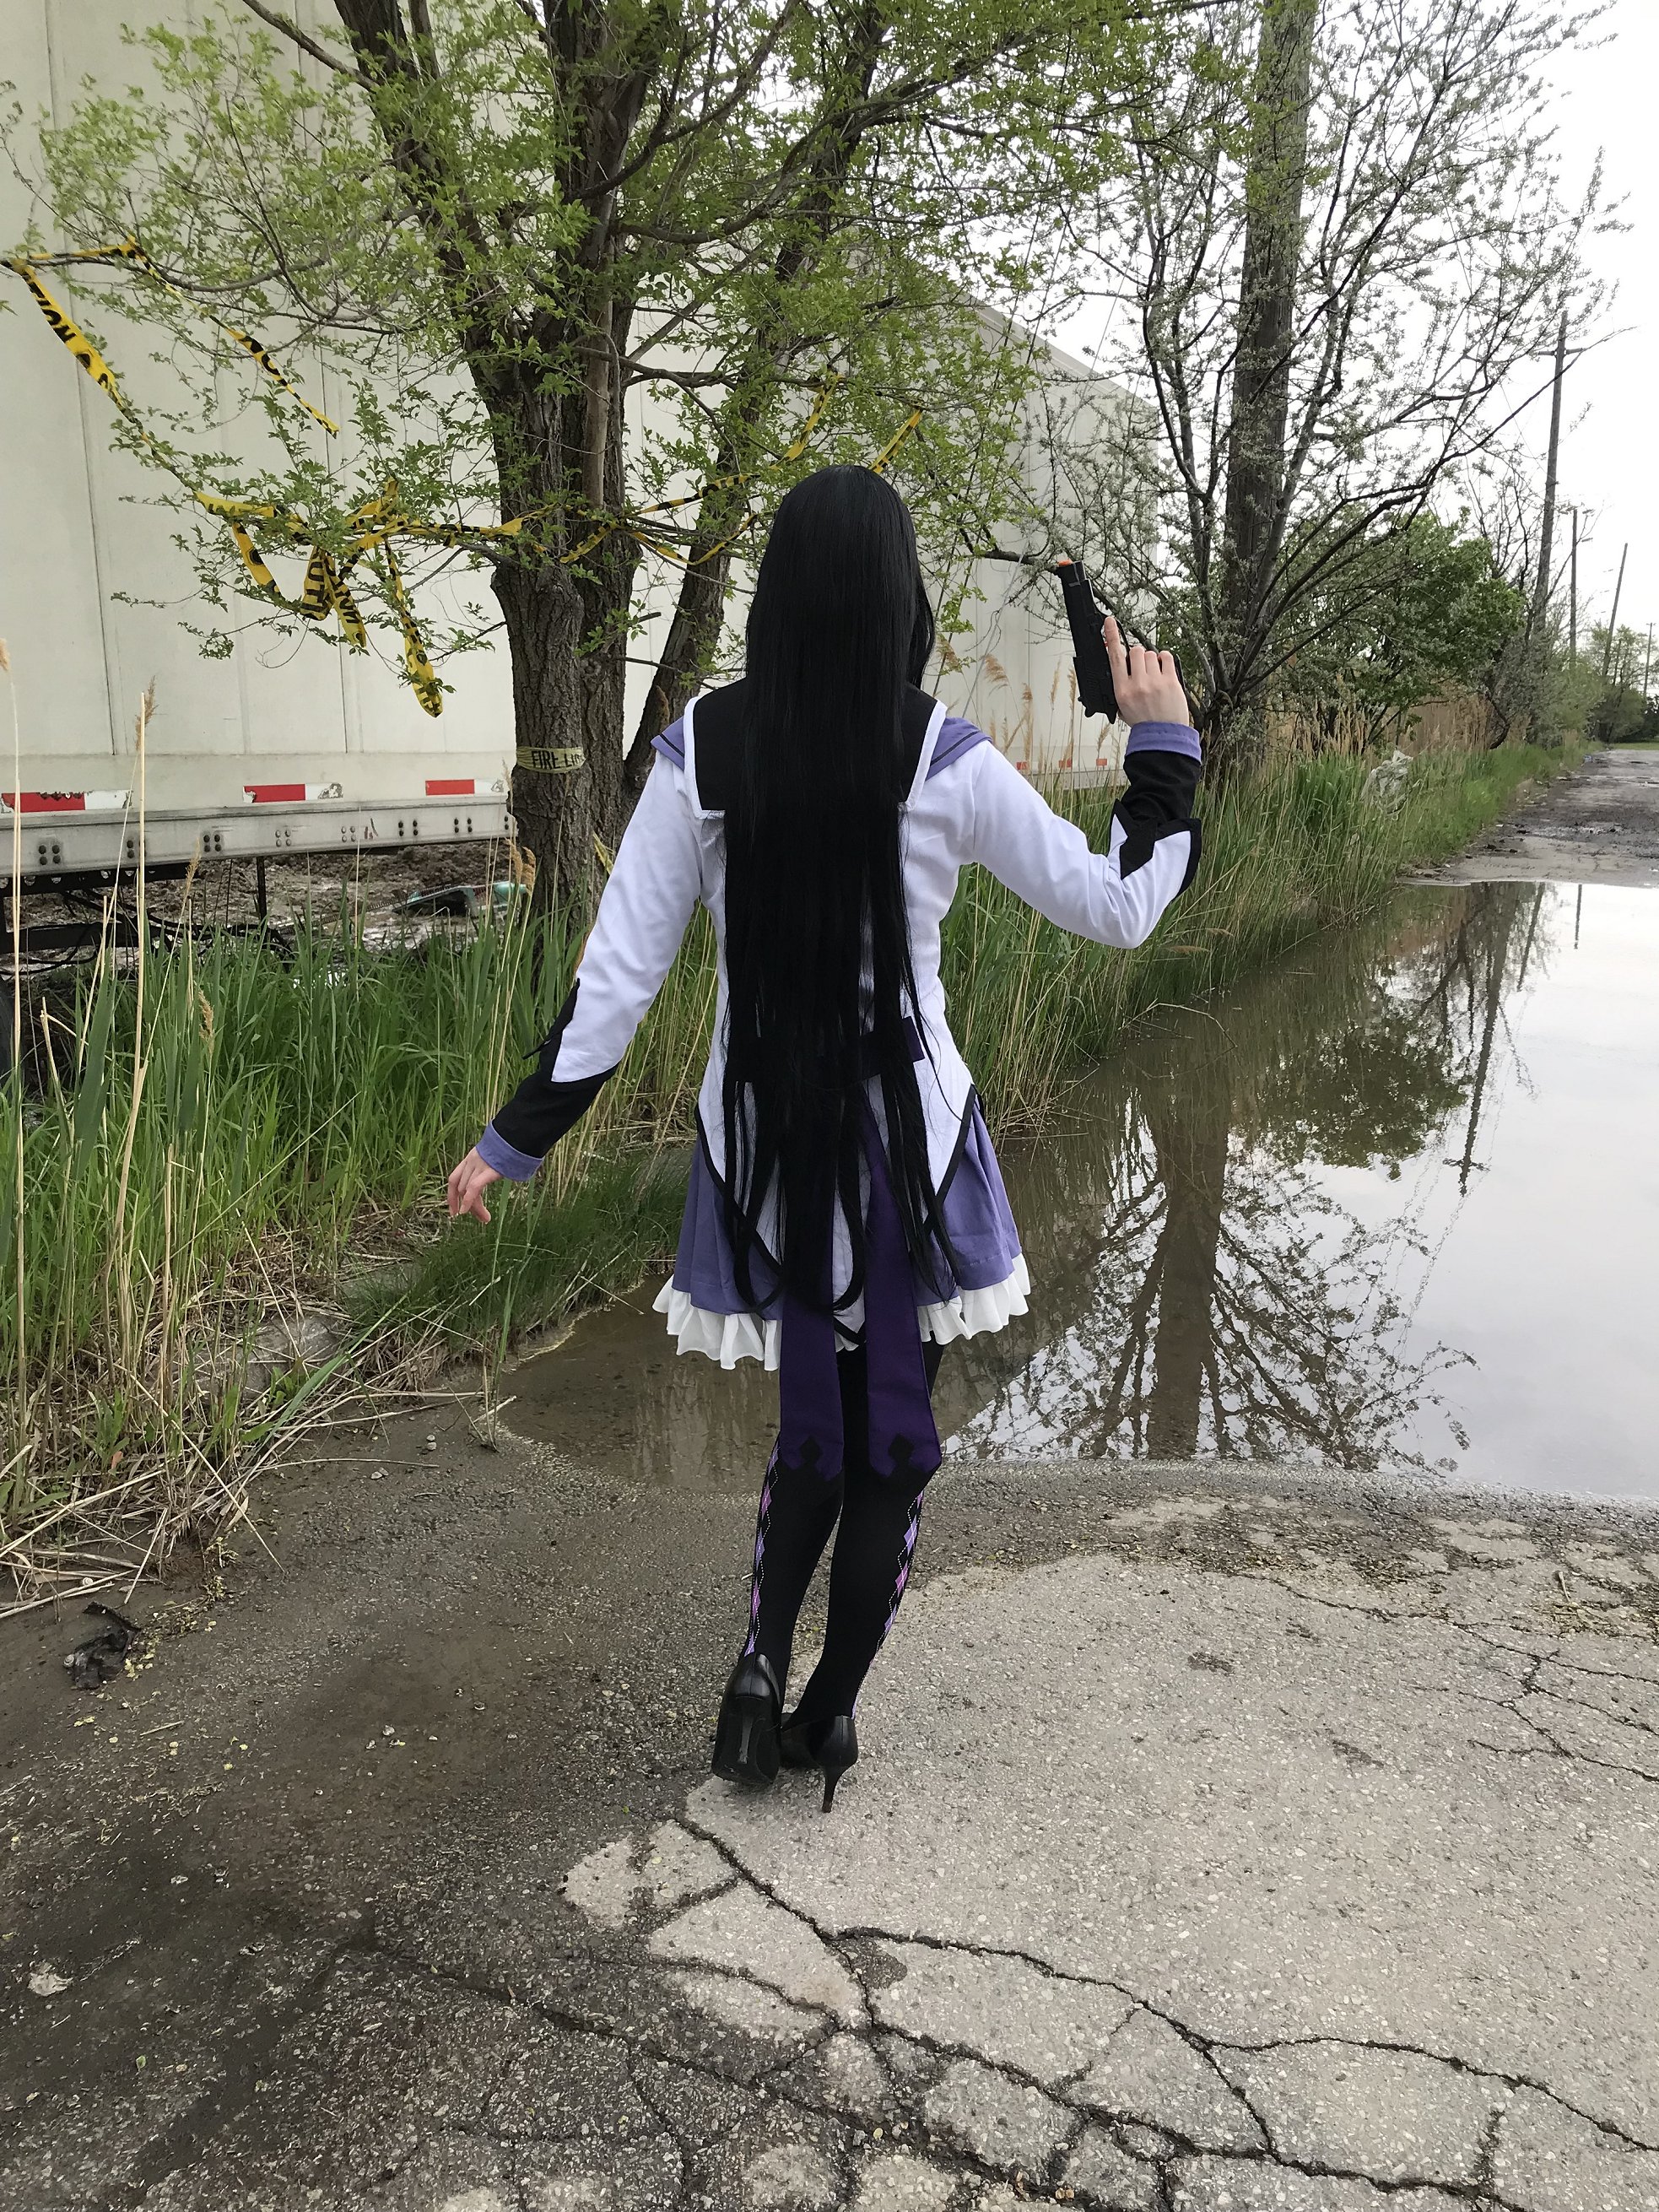
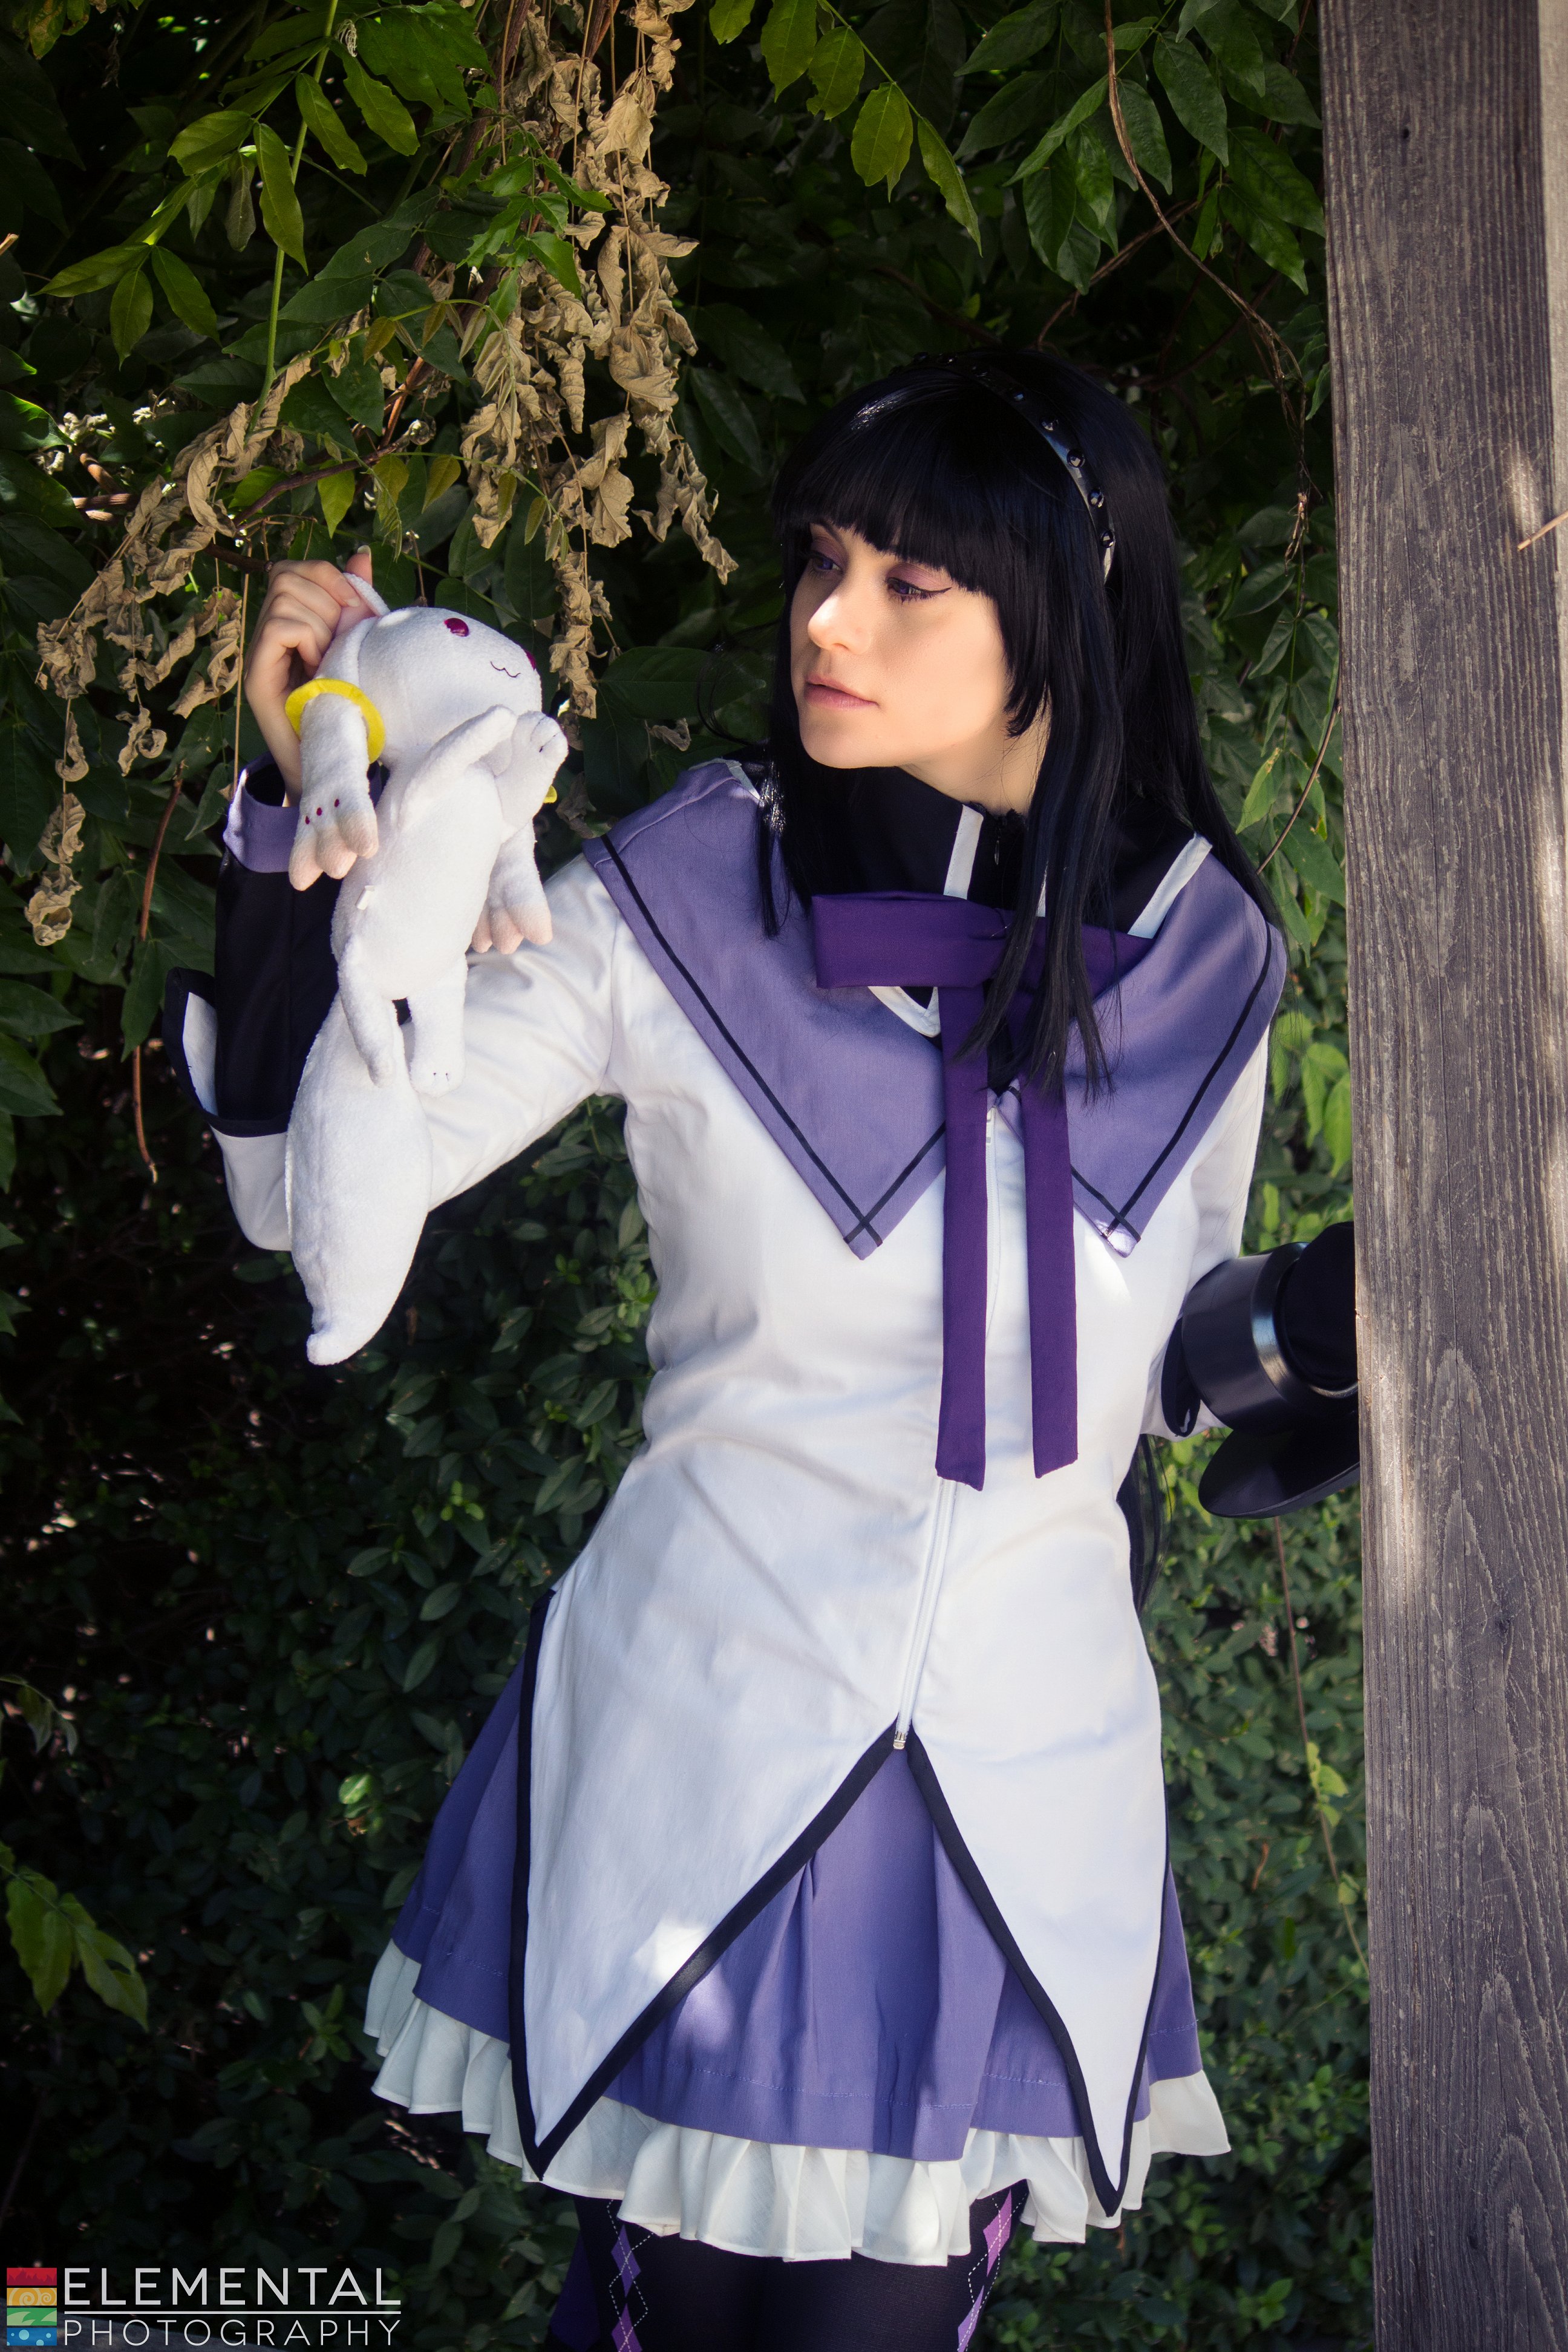
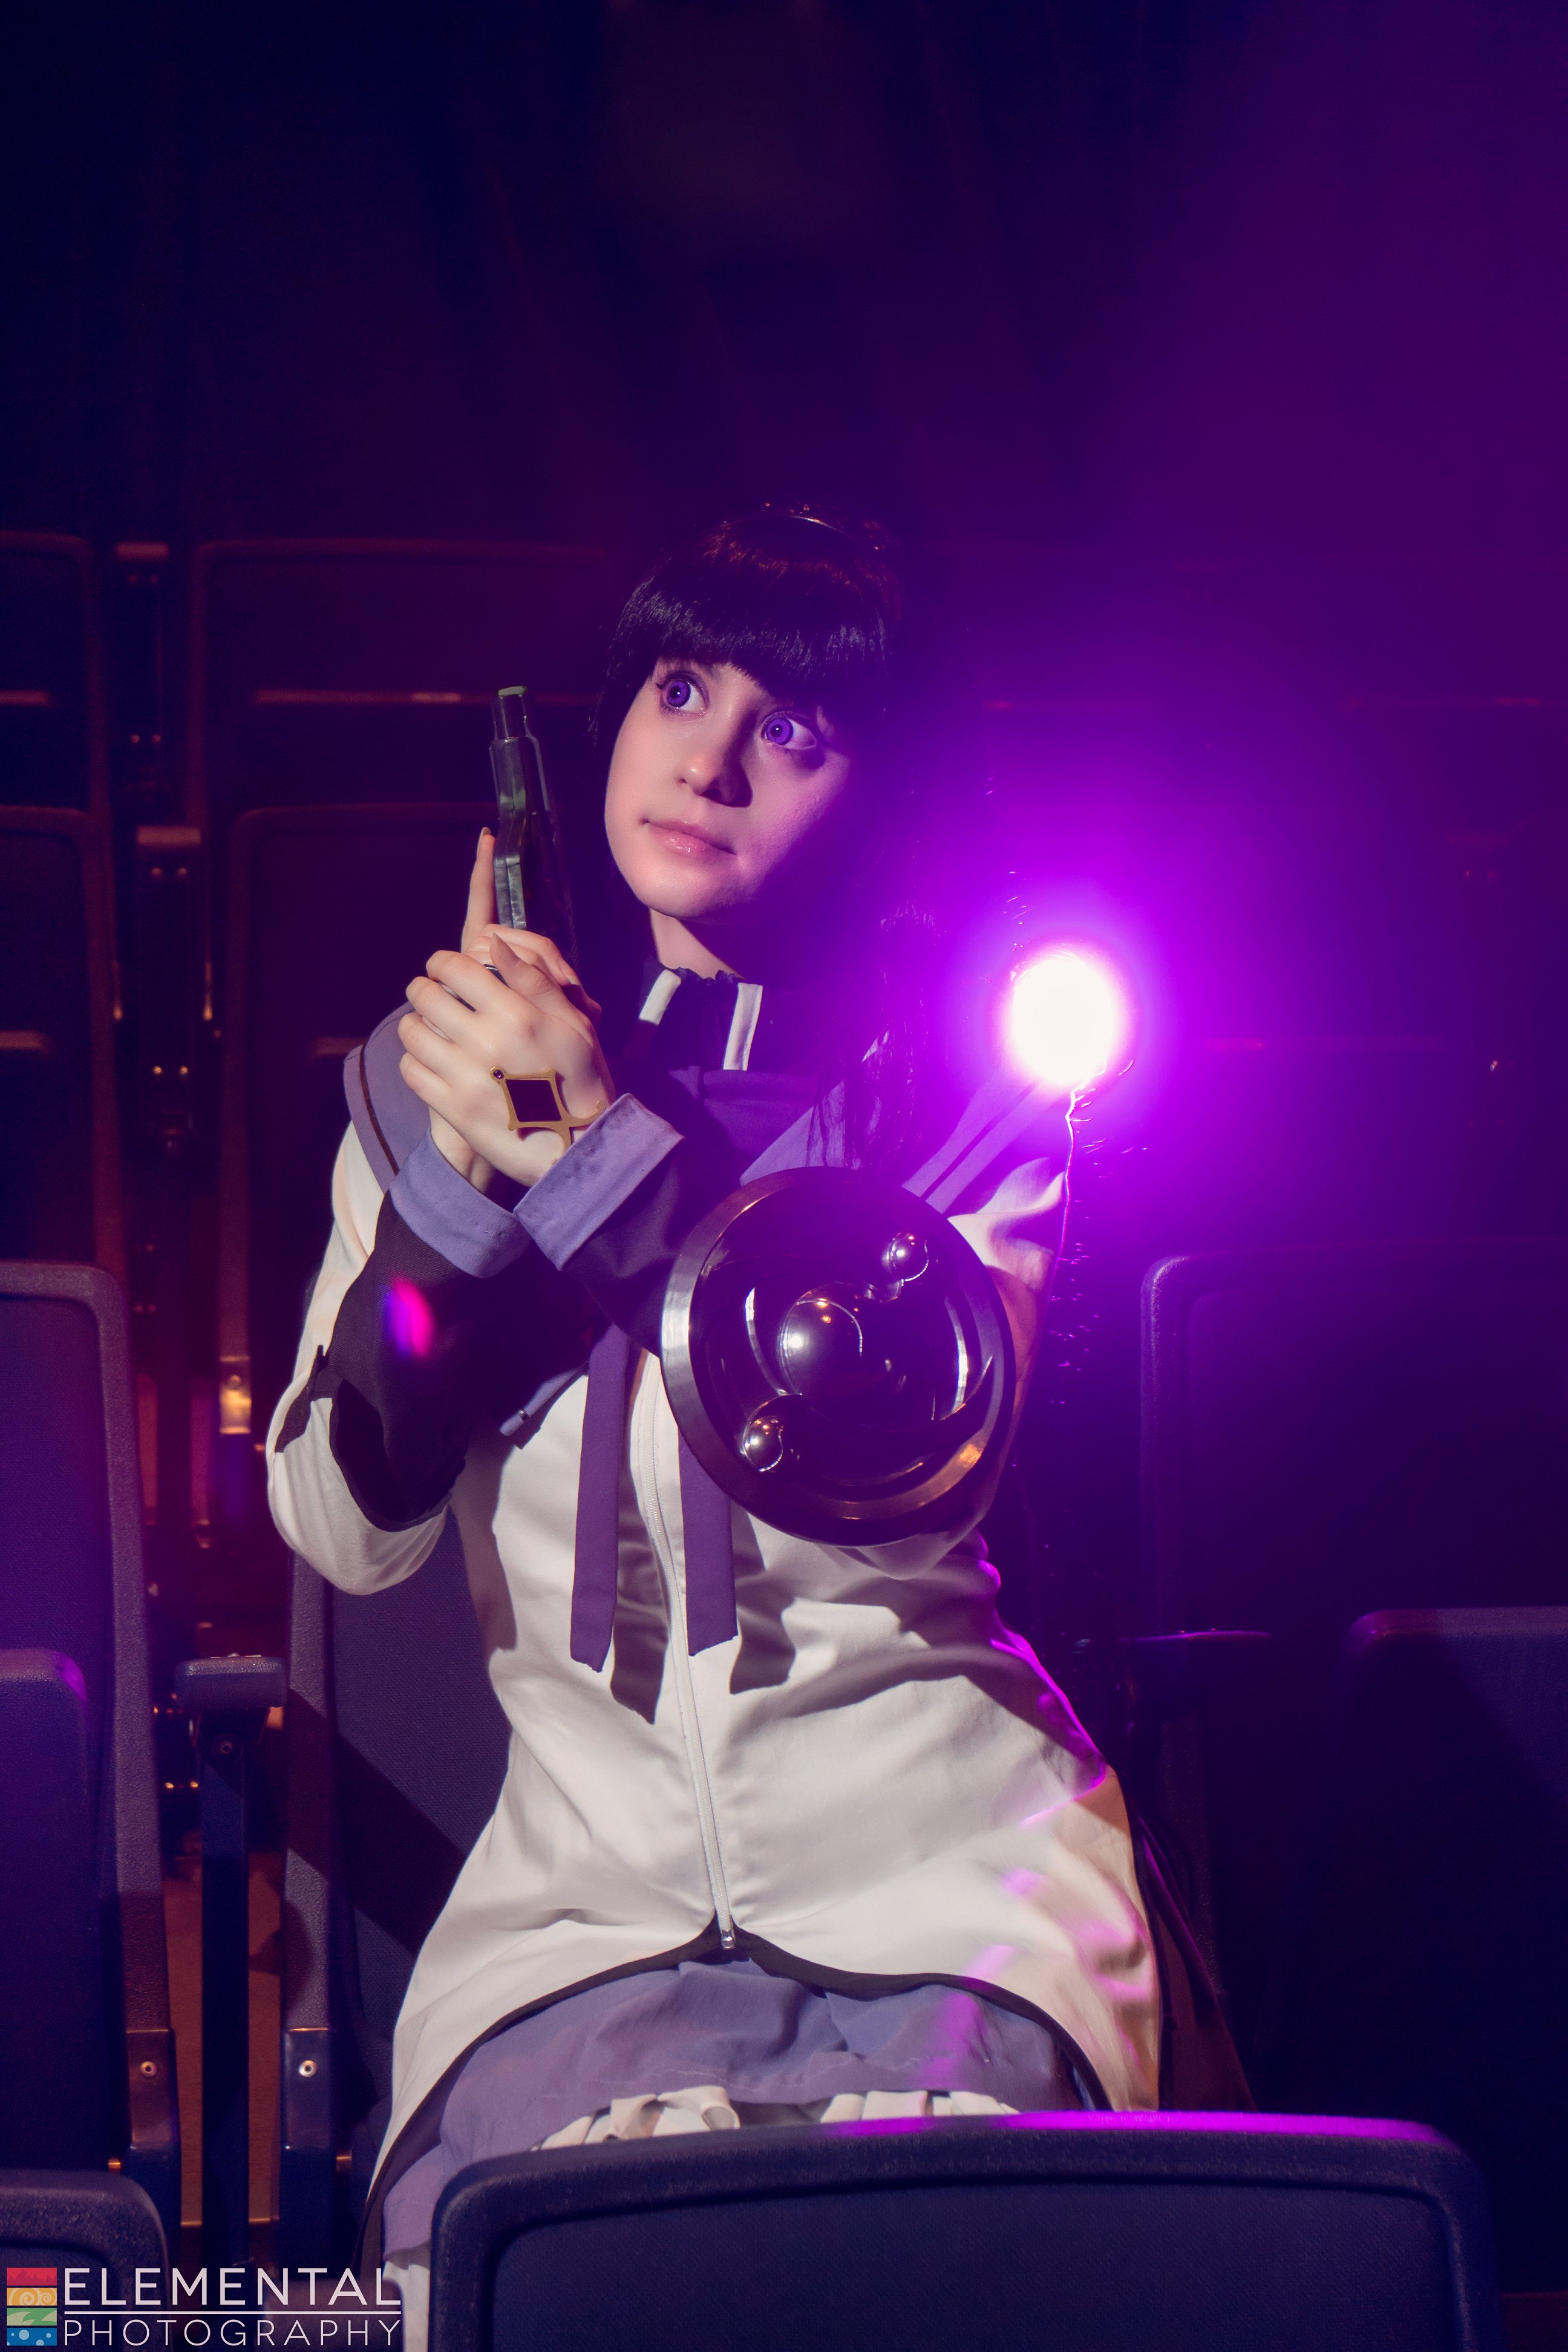
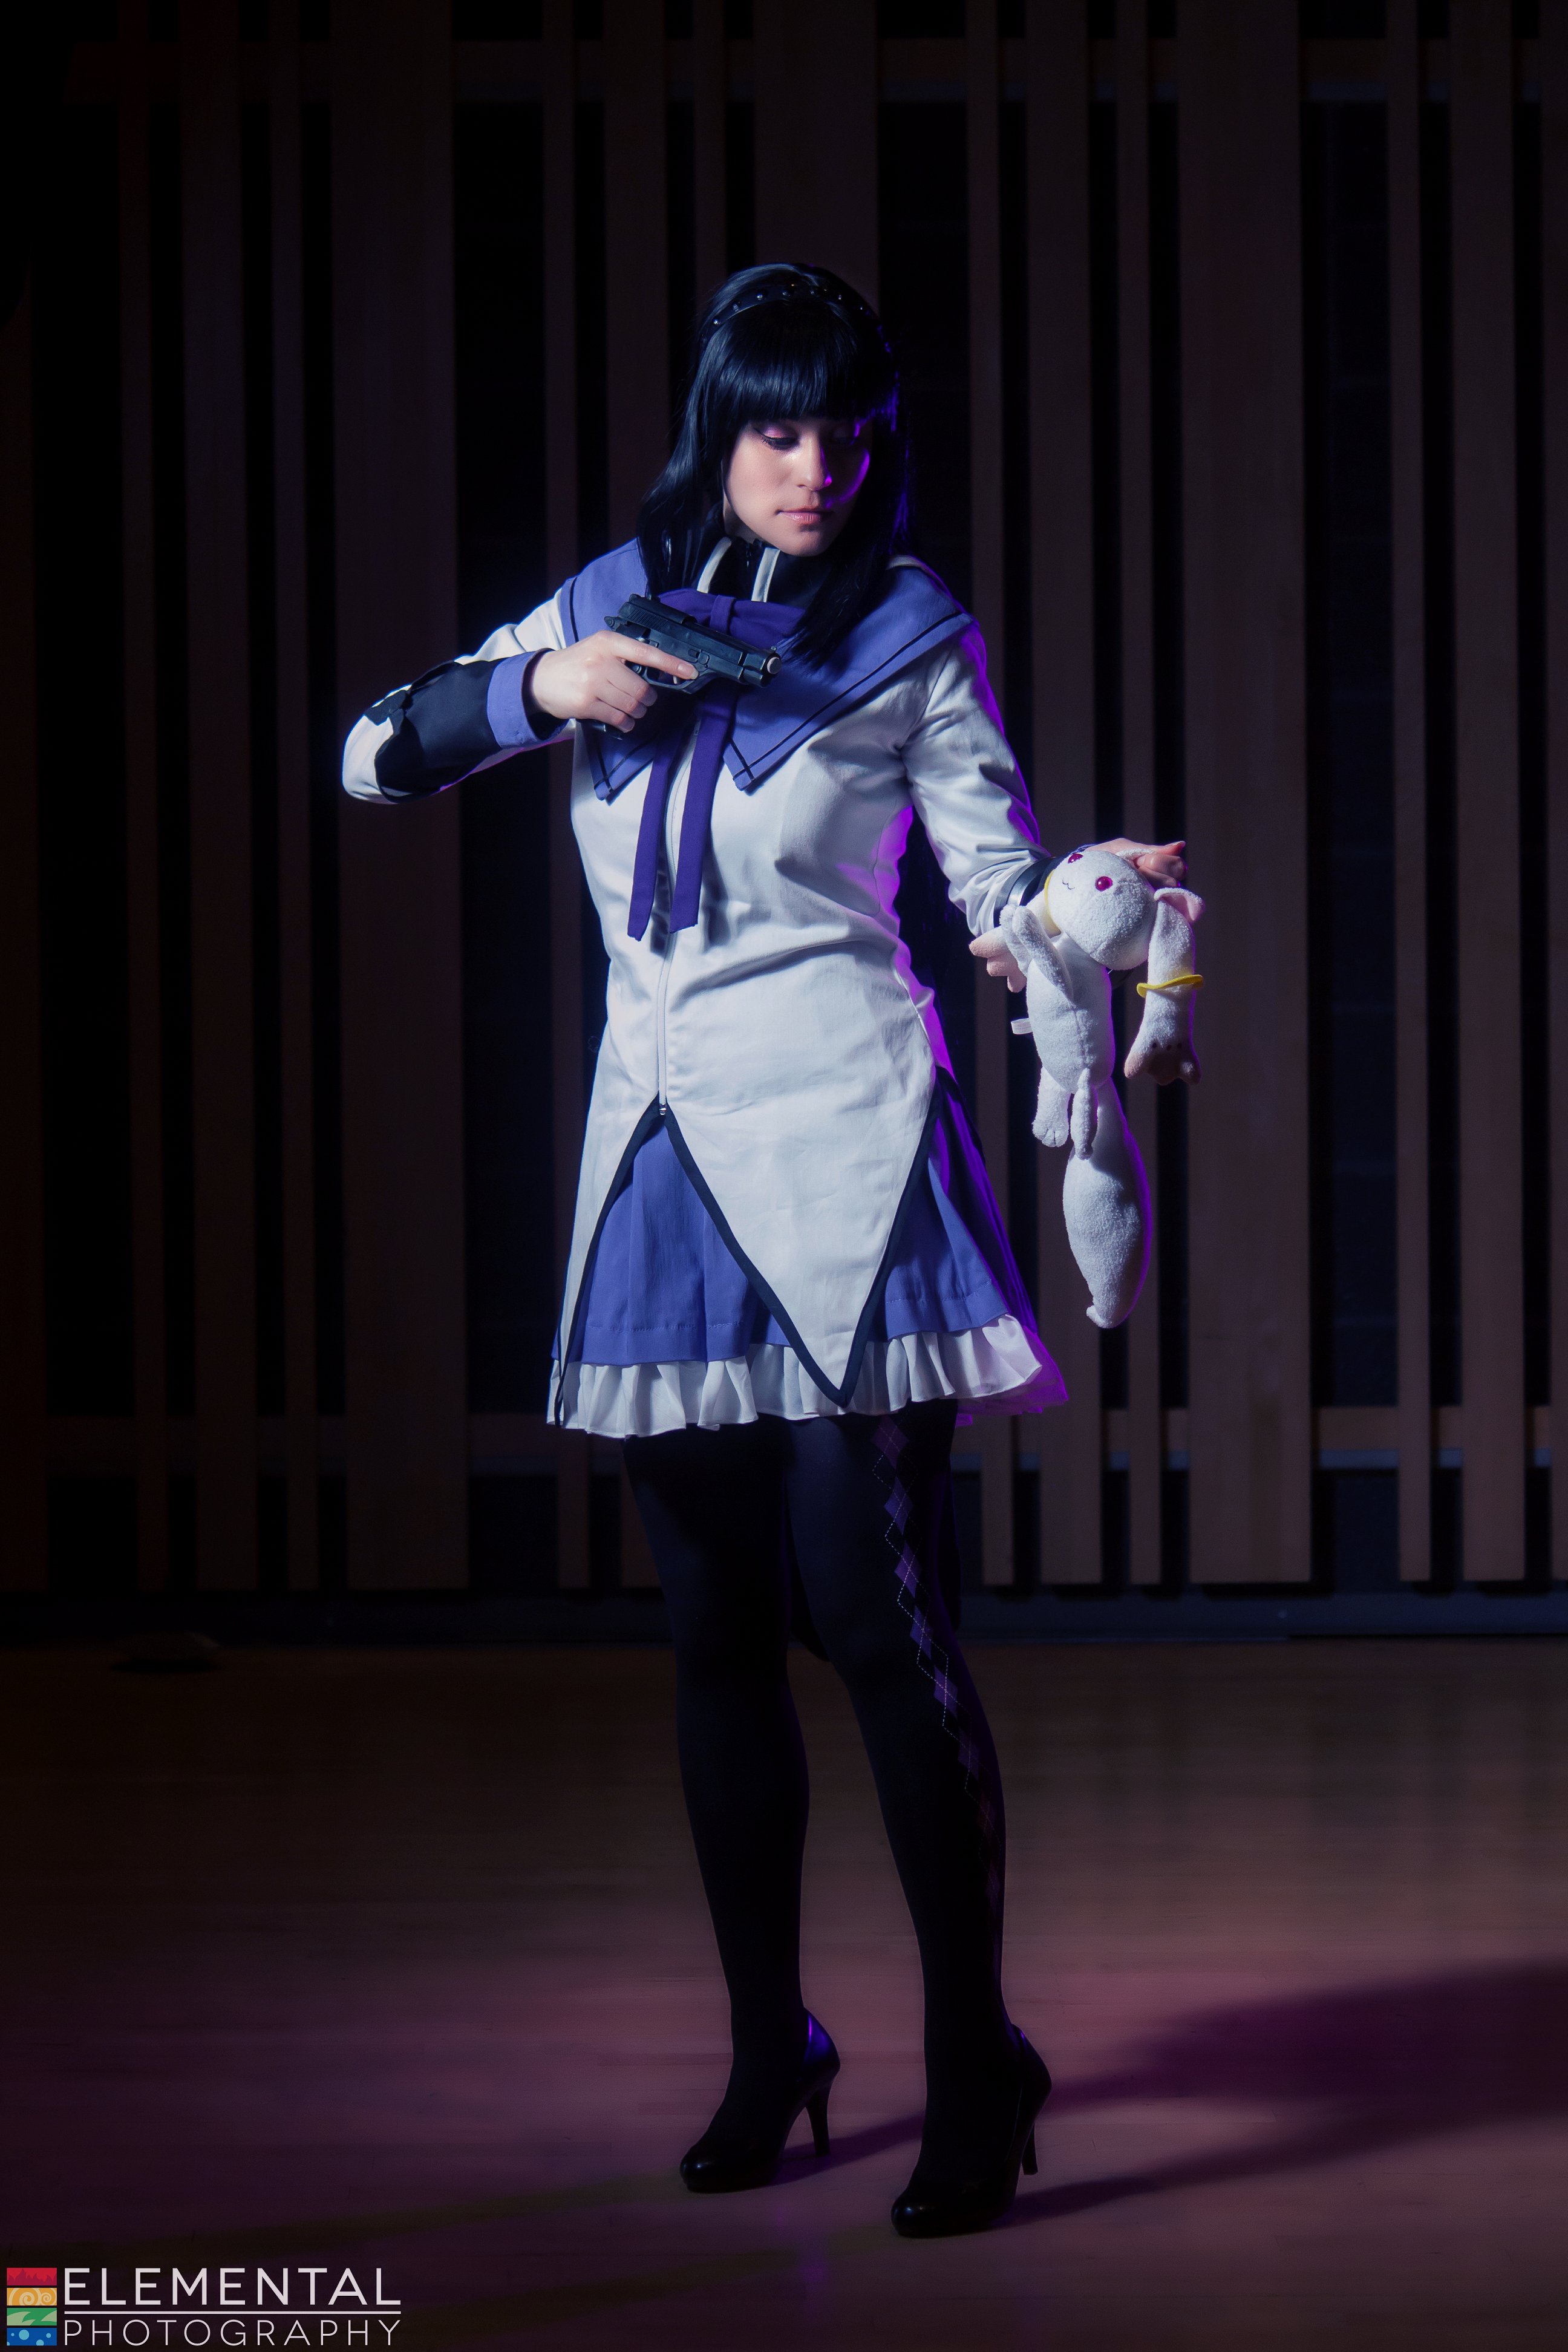
The last aspects of the costume were the props. The only prop I had my eye on was my Kyubey plush. I had previously used it with my Madoka costume so it was fun to just abuse little Kyubey as a prop. I also grabbed an old black toy handgun from my collection of prop weapons. Funnily enough, a couple of people at AN asked me to pose with their own prop weapons I guess since Homura does use a variety of guns in the Anime. It was kind of amusing. I finished up the Homura look with some contacts. I bought the same brand of contacts as what Henchmen bought for me for Orphea. They were Vassen Cloud Nine. I got them in purple this time. I liked the coverage the pink ones had and I think they were nice enough. I didn't really shoot the costume at AN so it was a bit hard to tell. One thing I skipped on was Homura's magical item - her shield. It was something I kind of wanted as a prop but I was too busy with sewing to contemplate making or buying it. I figured it was ok to skip since she doesn't always have it when in costume. I am looking to commission my friend Adrien to 3D print me one for the next time I wear Homura. I think it'll be a cool looking addition to the costume and fun to pose with.
That finished up the construction of the costume. I worked on the costume for about 3 months working on and off in the evenings and during the weekends. I spent two or three weeks on and off working on the patterning in January into February. I took a bit of a break in late February and throughout March until I could start the costume in early April. Once I got started on the costume it was pretty intense in April and especially in early May. May was such a crunch for me since I kept running into setbacks and had to change up or really reason my way through complicated parts. I never could have finished the costume or would have had a nice wig to wear to Anime North without Pan's help. She really gave me the motivation and some advice to finish up the blouse and inspiration for the undershirt. She even gave me some black twill that pretty much covered all the fabric that I needed for the black shirt. I'm so blessed to have a friend like her. It's been a bit sombering continuing to sew without my mother around to give me advice so being able to ask Pan questions when I'm stuck has been such a gift.
Wearing Homura at Anime North 2019 went pretty well. Besides losing my hand gem, the costume stayed together and turned out better than I expected. I loved how the ribbons looked and despite being mad at myself for making the wrong style of skirt, it still looked really cute. There were quite a few other Homuras at the con so it wasn't a very standout costume, but I'm super proud of how it actually all came together. Just two weeks before Anime North I really didn't think I had it in me to finish the costume and manage to organize for the Nominoichi, but I was able to get everything done and it turned out to be a really fun convention. I'm really looking forward to wearing Homura again. The costume will definitely remind me that with a little advice and some patience, I can still come through with a costume just when I'm giving up hope.
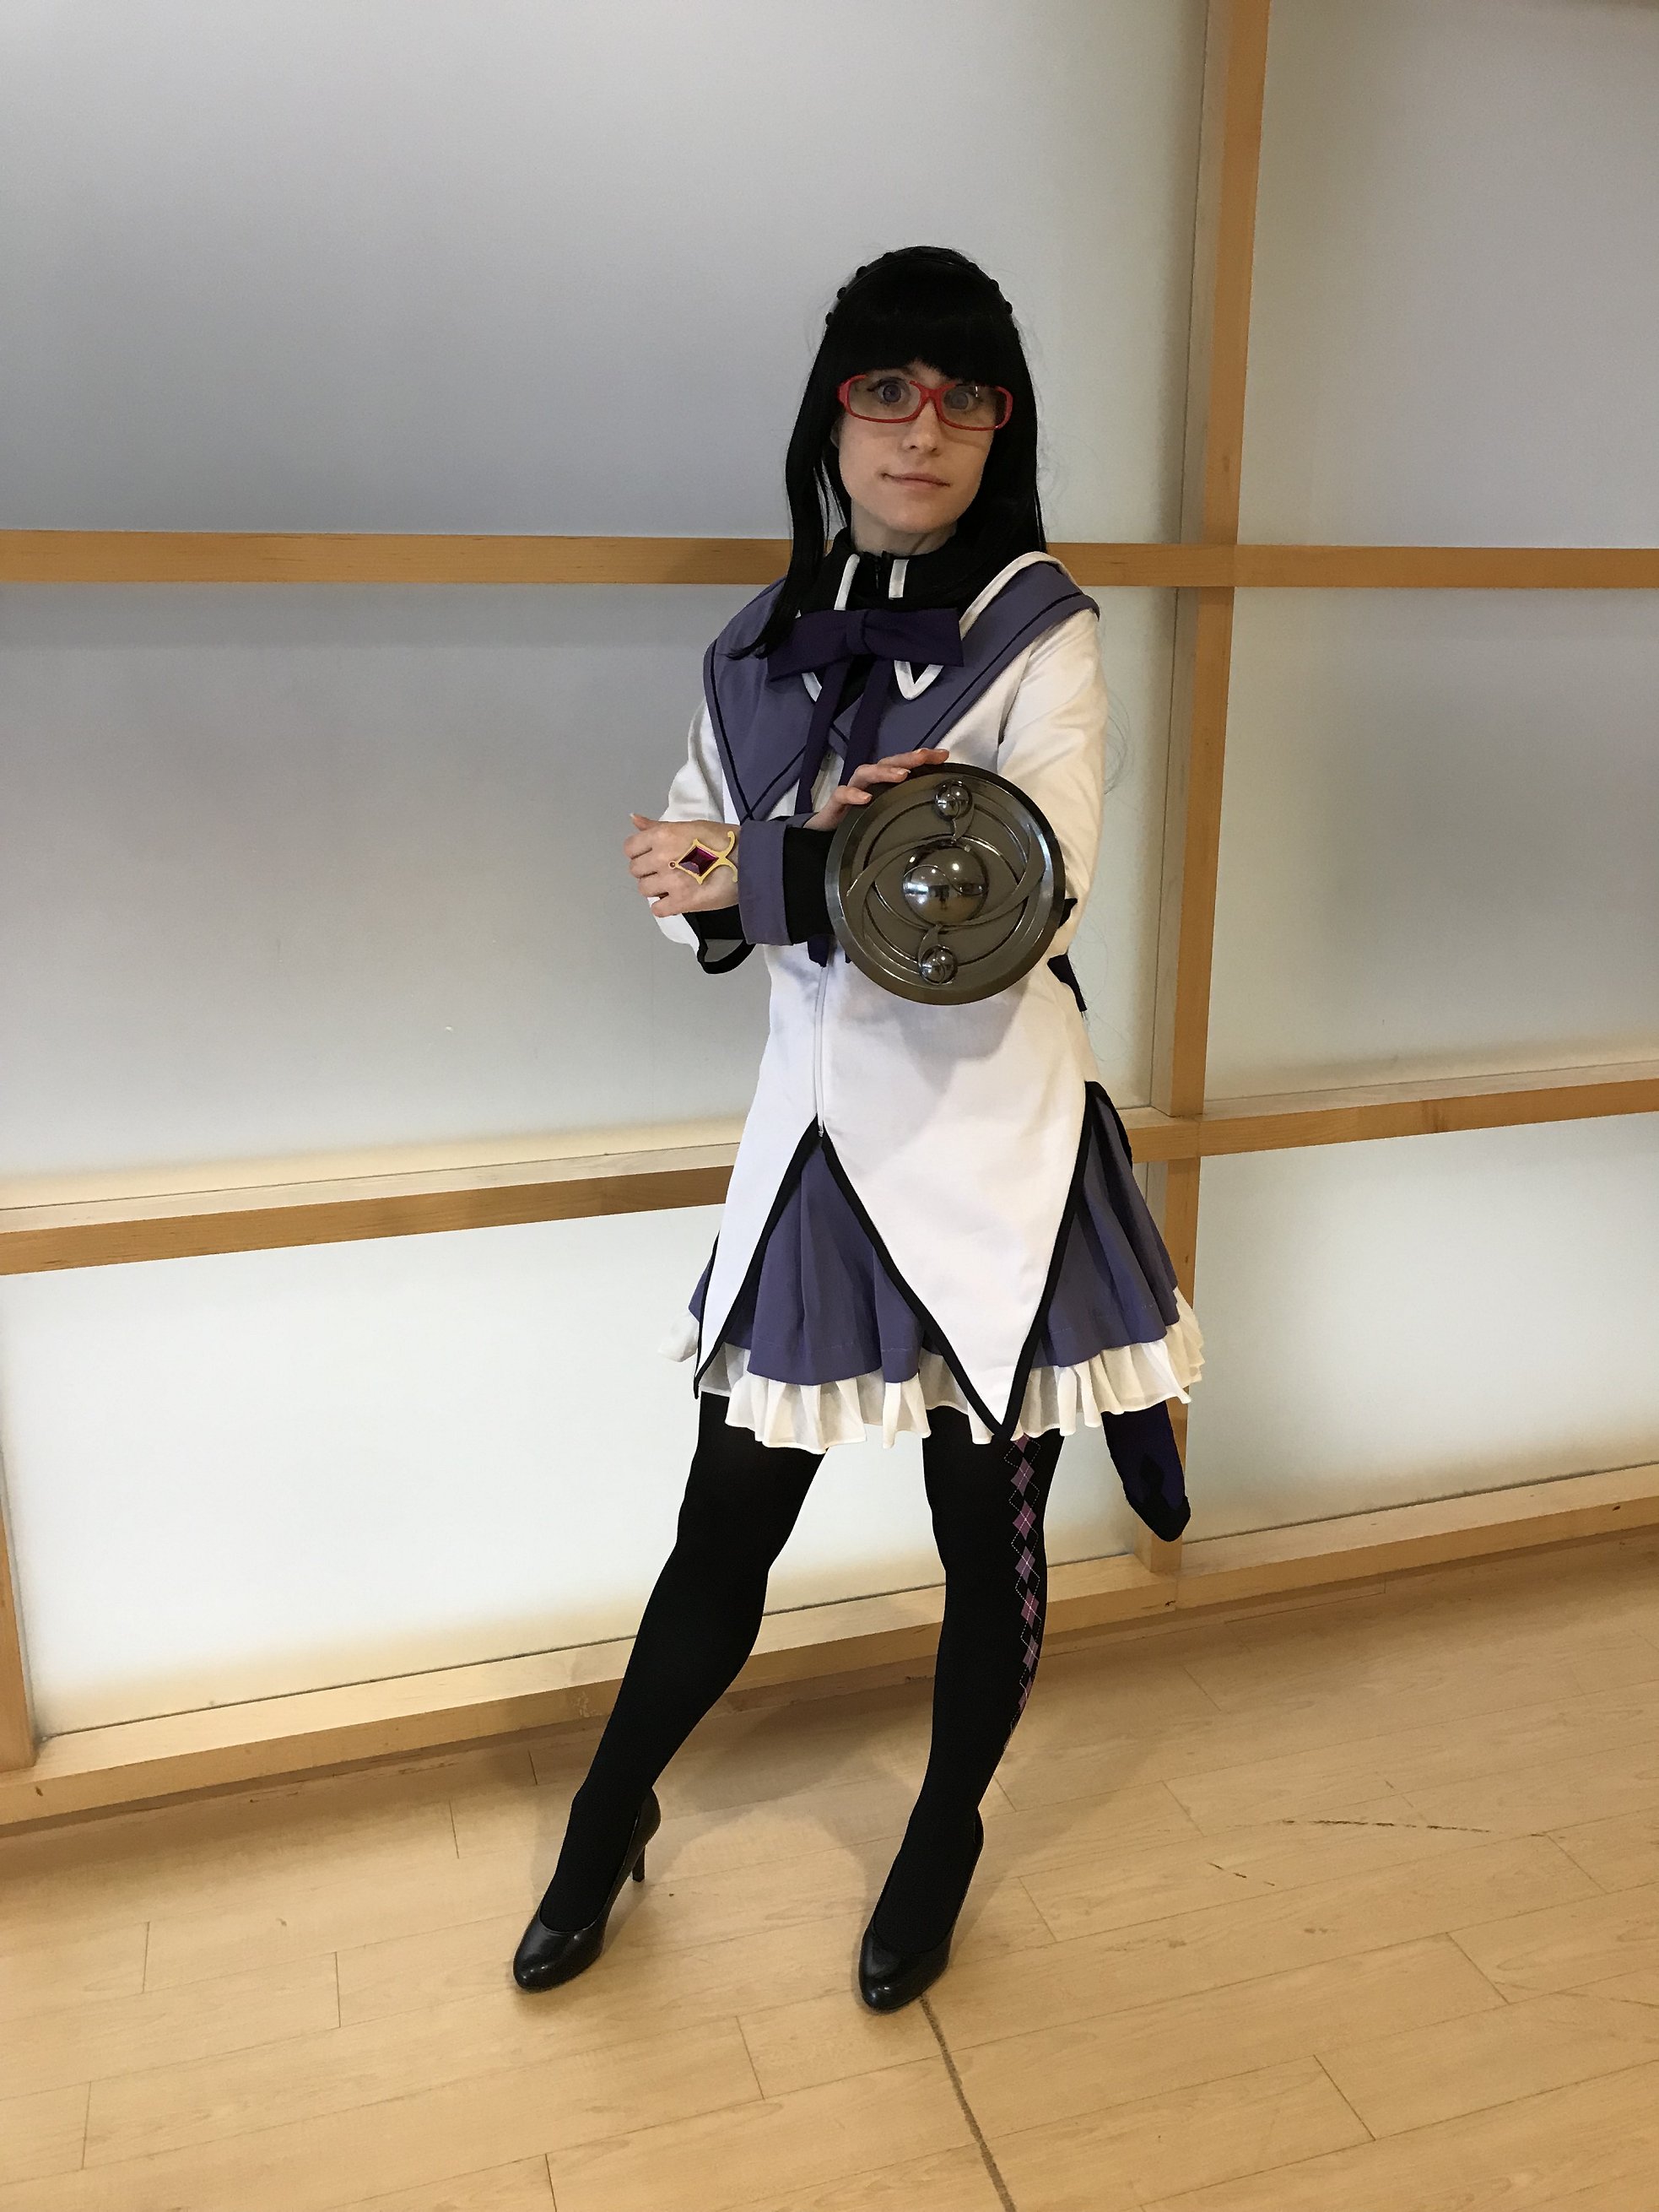
Update July 2019: In late June 2019 I asked my friend Adrien if I could commission him to make me Homura's time shield. Originally I was a bit on the fence about wanting a shield prop. It wasn't integral to the design and I wasn't really sure how it would stay on my arm so I didn't really look into getting one for Anime North. After AN I felt like the shield prop would add extra oomph to my costume. I had found some on eBay that were mass produced in China. The shields didn't look that bad but they attached with a piece of elastic and looked kind of cheap. I managed to find 3D printable plans for a shield through Thingiverse and that's when I got the idea to ask my friend Adrien if I could commission him to make me a shield. After letting him know about the printable files on Thingiverse, he agreed.
The shield was designed by Subzerofusion. The plans were for just the disc part of the shield. I liked the depth and look of the shield so that's why I approached Adrien with the commission request as he has a 3D printer and is probably the most skilled and creative prop maker that I know. He was quite skeptical about how to make the shield wearable until I noticed that a second designer on Thingiverse had made plans available for how to print a cuff for the shield. Although I have a super skinny arm, Adrien was able to print the cuff, design an inner ring to taper for my arm and he added some foam for extra padding. The designer for the cuff was pnb4ever. The original shield plans had an indentation for a cuff attachment so everything fit together.
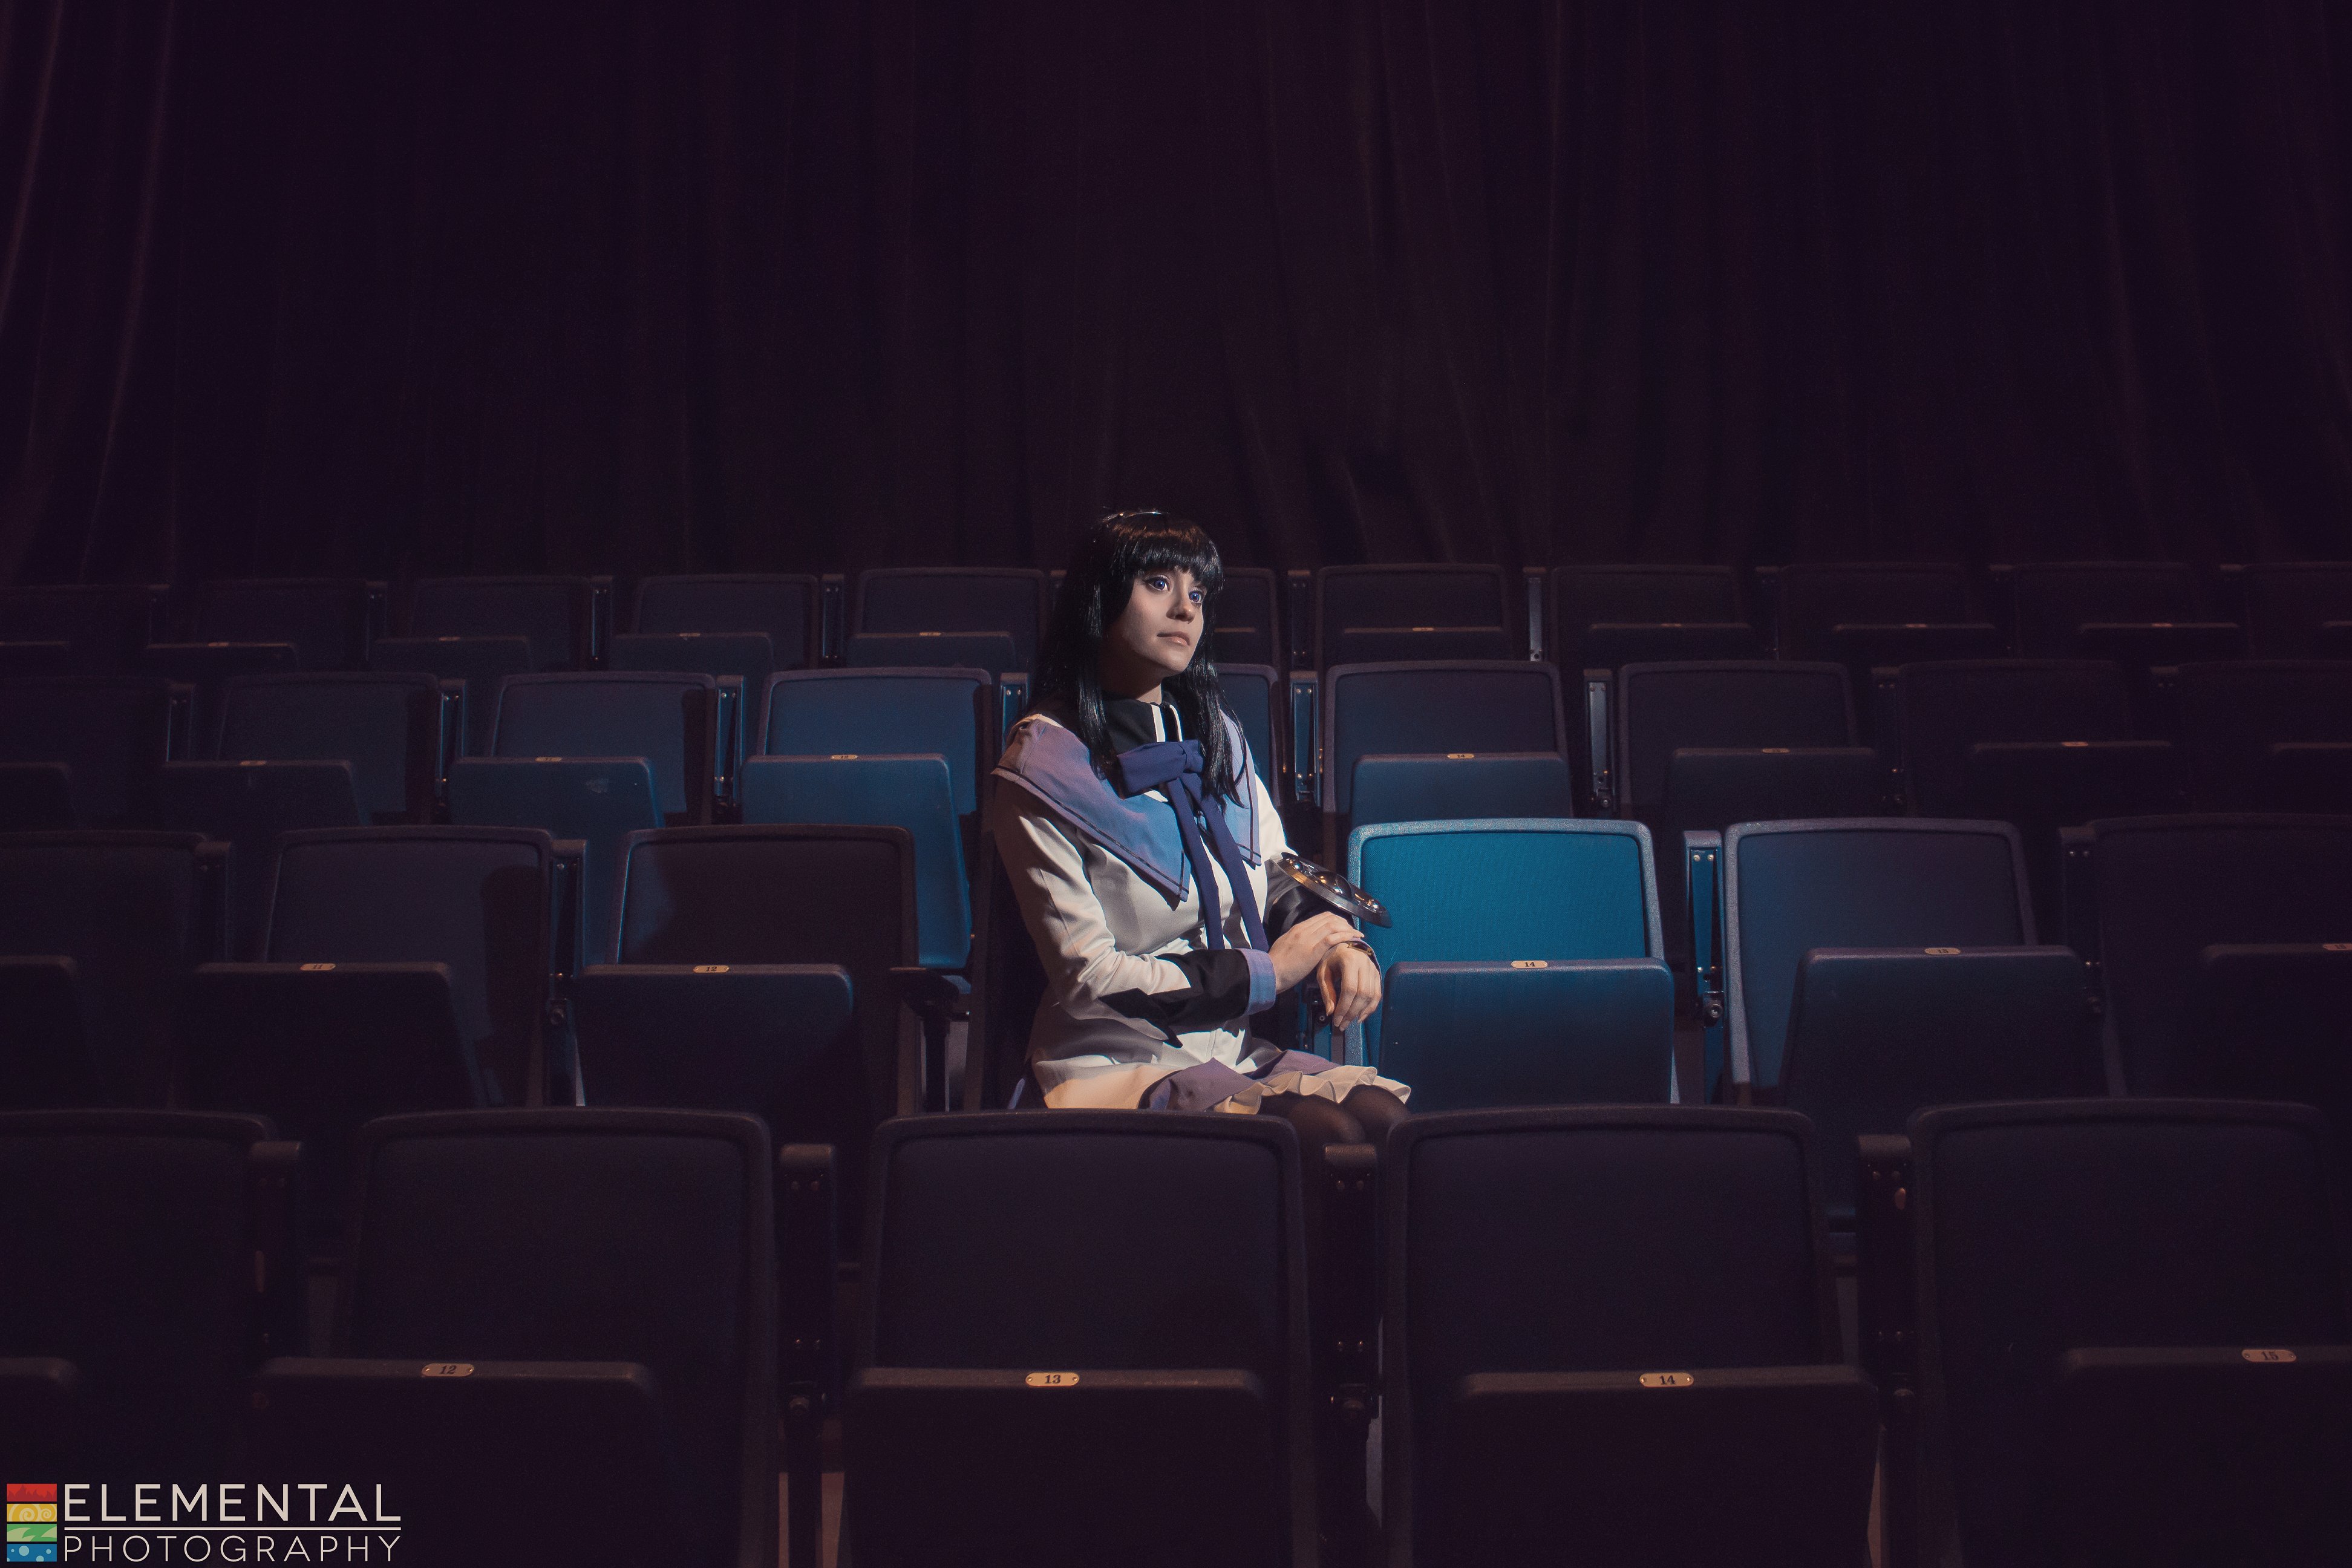
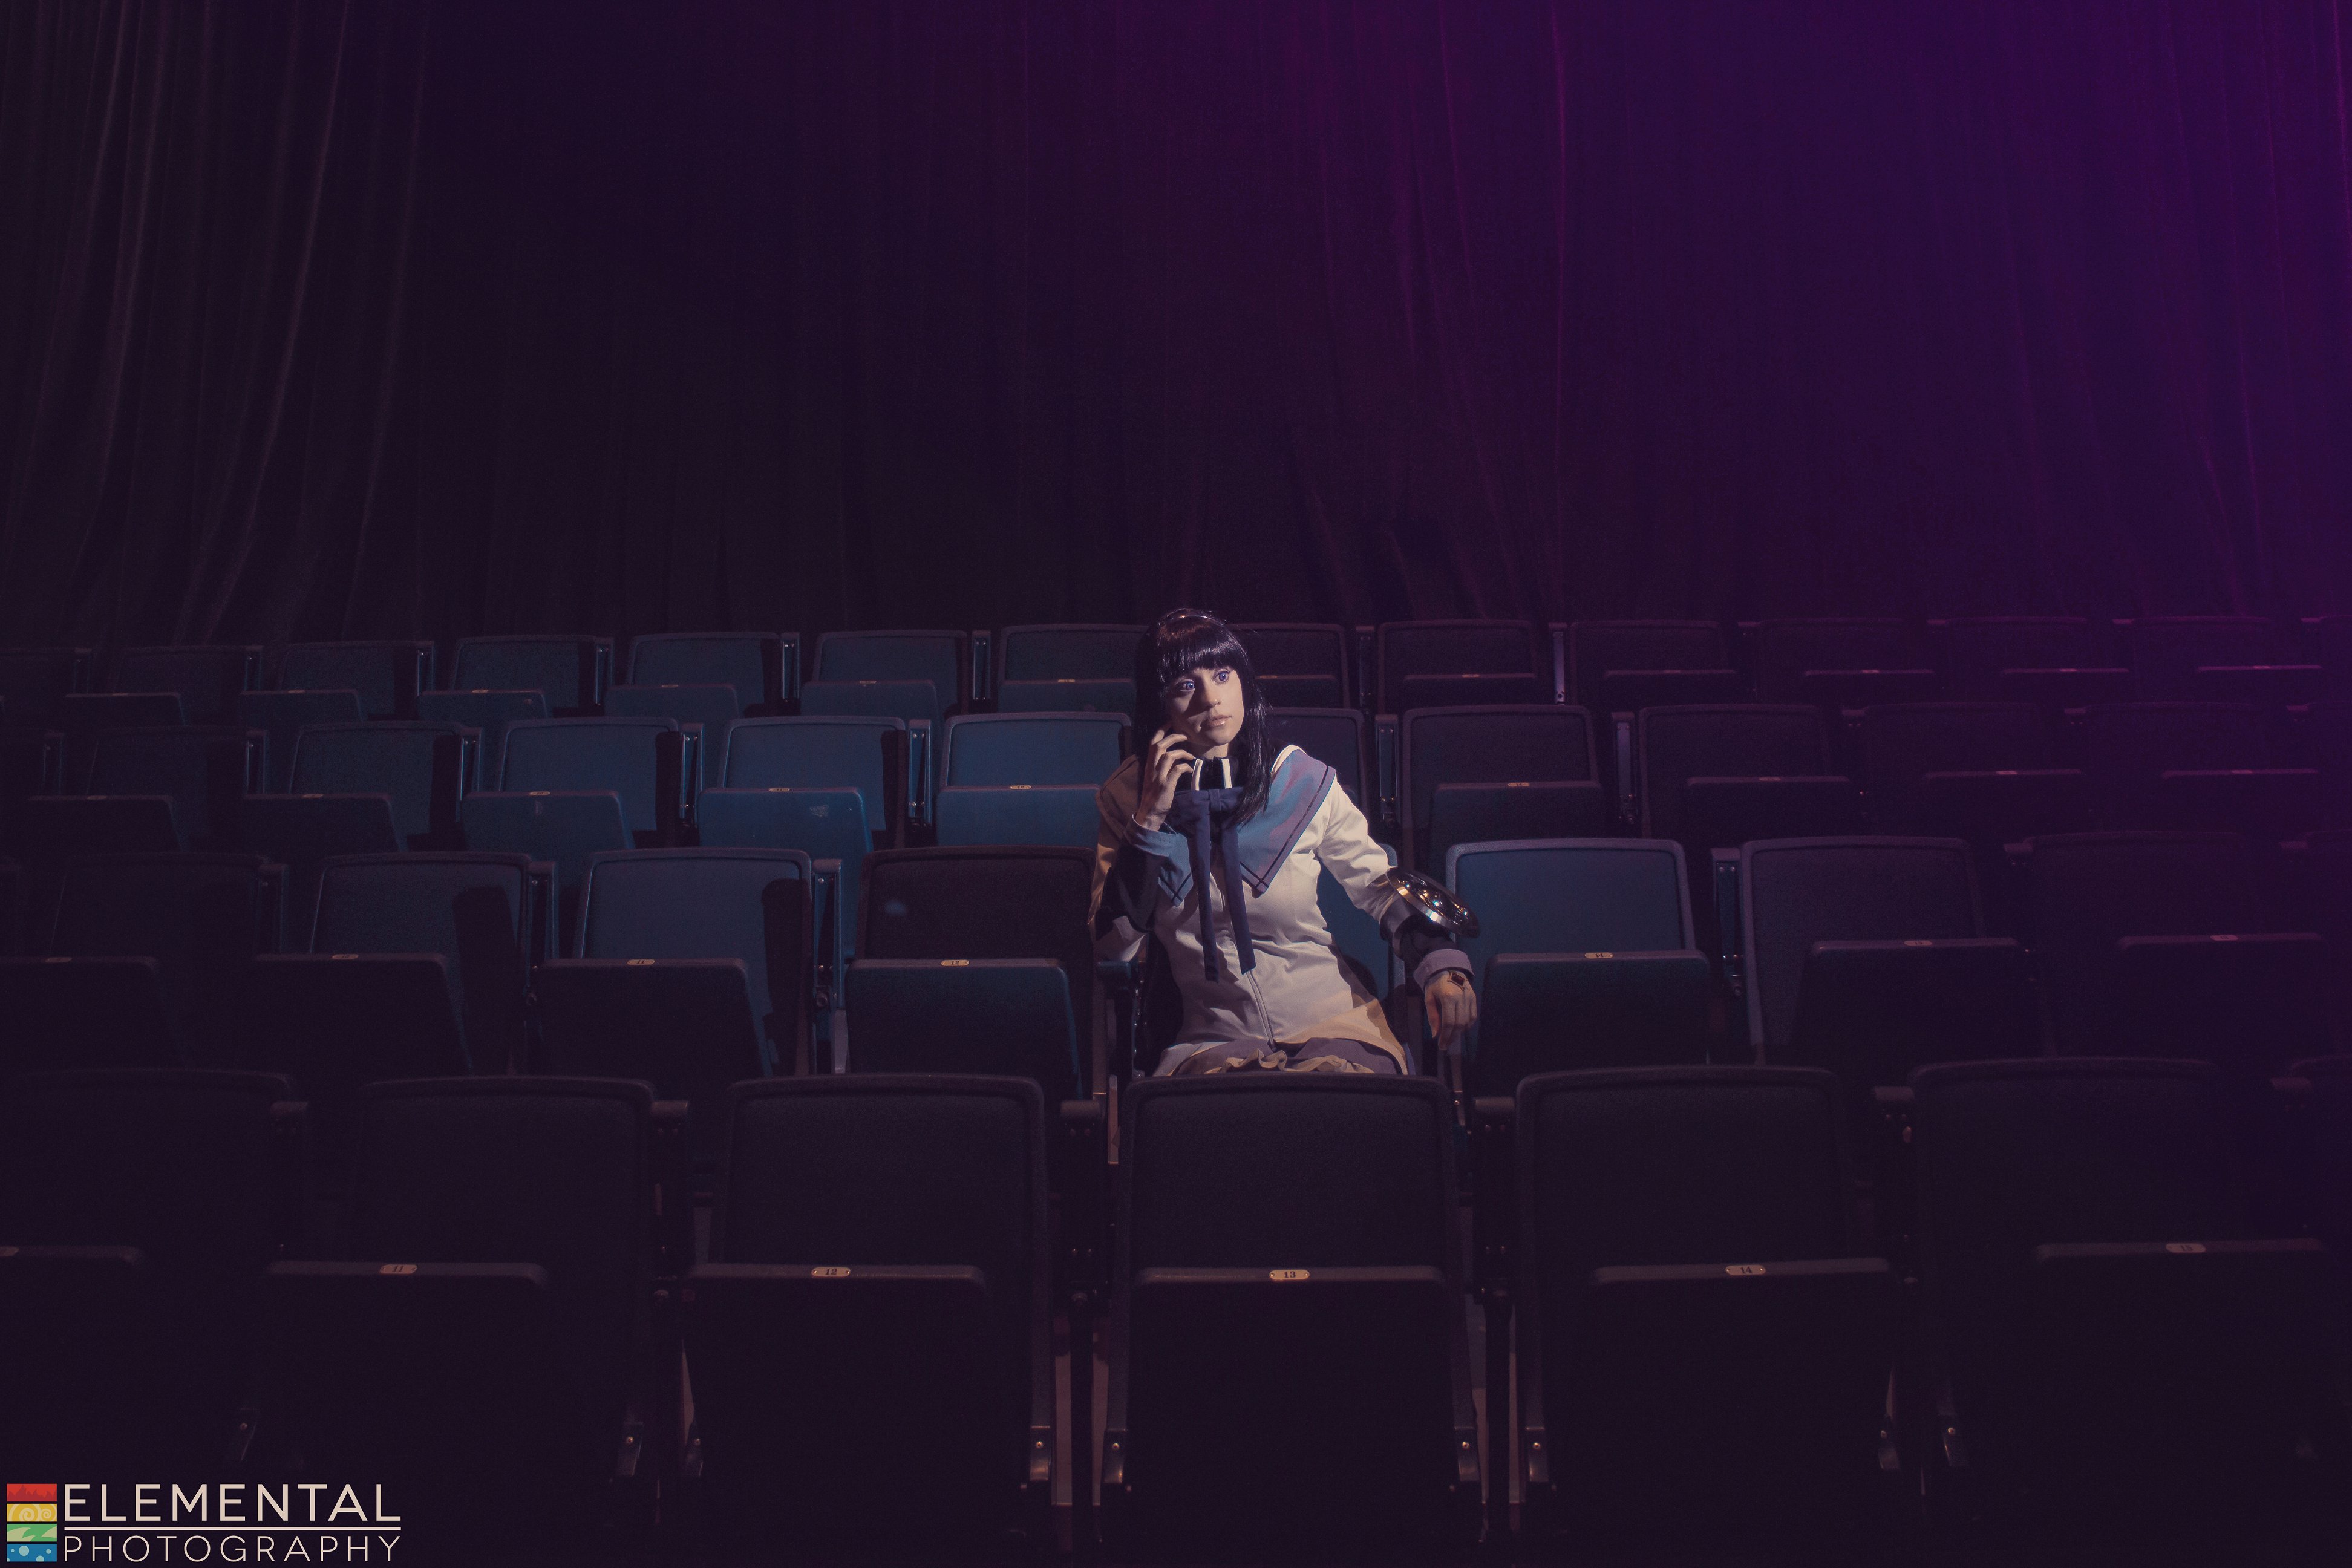
Adrien and I also discussed for a while about how I wanted the shield painted. I honestly had no idea what to suggest. I've seen the shield with gold details, red details and little steampunk elements. We were limited by the simplicity of the print so in the end I decided to request that the shield be painted a straight silver. I know the dome parts are often painted a gold colour, but I kind of liked how sleek it would look with just one defined colour. Adrien used graphite powder and made the whole design really pop. It really looked futuristic and cool. It wasn't cheap to get the shield commissioned, but I think for the slick final product, it was well worth the money that I paid for it. I picked it up in late July just the day before Pretty Heroes when I planned to wear Homura again so the timing was perfect. My shield definitely uped the wow factor of my costume and made for some cool posing options, which was great for when I did a shoot with Elemental Photography at Pretty Heroes.
Events/Conventions this costume was worn to
Anime North 2019 (Saturday), Pretty Heroes 2019 (Saturday) & Fan Expo Canada 2019 (Friday)
Photo Credits
Pan, Adrien & Elemental
Back